10 Birthday Cookies: Fall Pumpkin Spice Decorated Cookie Sets Ideas

Autumn birthdays have a distinct advantage when it comes to dessert tables. The cozy ambiance, crisp air, and rich color palettes of autumn make it the perfect season for themed celebrations. At the center of autumn baking trends is pumpkin spice—a classic flavor combination of cinnamon, nutmeg, ginger, and clove that transforms standard sugar cookies into warm, aromatic treats.

Decorated royal icing sugar cookie sets serve a dual purpose at autumn birthday parties: they act as edible artwork and memorable party favors. By blending classic birthday elements like party hats, gift boxes, and age plaques with cozy fall motifs, bakers can design show-stopping cookie displays tailored to any birthday theme.

Whether you are planning an elegant adult birthday gathering, a playful children’s pumpkin patch party, or a cozy sweater-weather celebration, these 10 fall pumpkin spice birthday cookie set ideas will inspire your seasonal baking menu.

1. The “Our Little Pumpkin is Turning One” Birthday Set

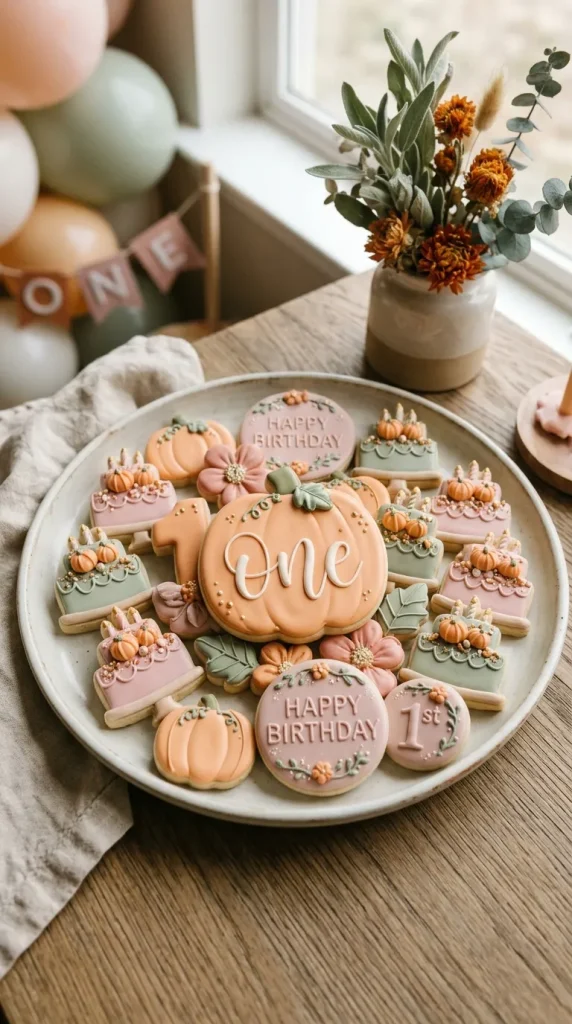
First birthday celebrations in the fall naturally lend themselves to a soft, charming pumpkin patch theme. This cookie set pairs pastel orange, dusty rose, and muted sage green royal icing to keep the aesthetic gentle and celebratory. The centerpiece cookies include a hand-piped pumpkin shaped like a “1,” a classic birthday cake cookie adorned with mini pumpkins instead of traditional berries, and personalized plaques reading “Our Little Pumpkin.” Incorporating subtle gold luster dust details gives the set a polished, milestone-worthy finish.
2. Cozy Sweater & Pumpkin Spice Latte Celebration

For teens and adults who adore sweater season, this theme blends cozy fashion with favorite autumn beverages. The set features detailed sweater-textured cookies created using thick royal icing piping tips to mimic cable-knit stitches. These are paired with decorated pumpkin spice latte cup cookies topped with fluffy white royal icing “whipped cream” and tiny cinnamon stick details. Round plaque cookies decorated with calligraphy phrases like “Spiced & Seasoned Birthday” complete this warm, relaxed aesthetic.

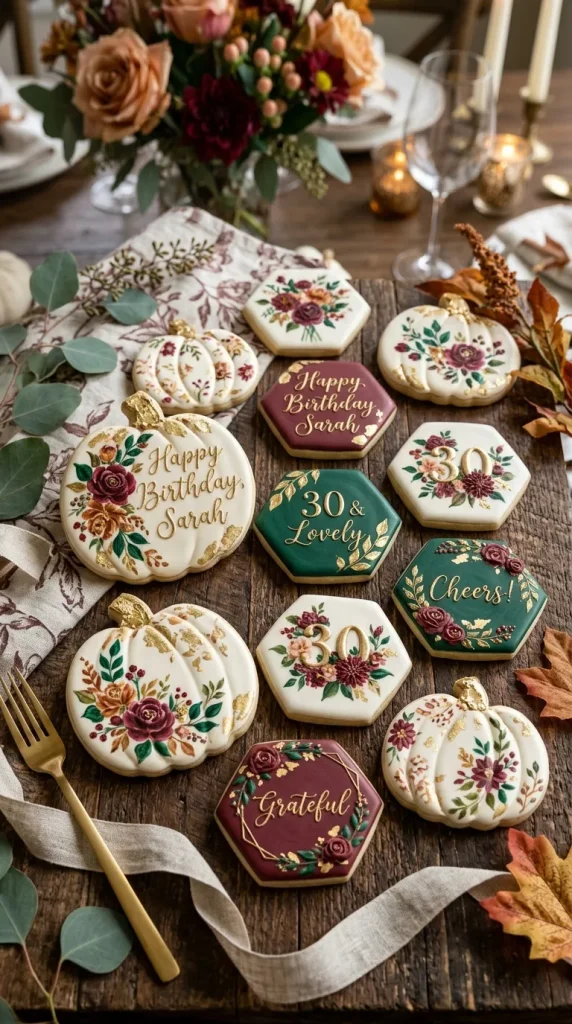
3. Elegant Floral Pumpkin & Metallic Gold Set

For a sophisticated adult birthday dinner, a botanical pumpkin theme provides an elevated touch. This set replaces traditional orange with a refined color palette of creamy ivory, deep emerald green, burgundy, and warm burnt sienna. The cookies are cut into detailed pumpkin and plaque shapes, then hand-painted with delicate autumn florals, eucalyptus sprigs, and geometric metallic gold line accents. A central hexagon cookie features clean typography highlighting the milestone age in gold leaf.
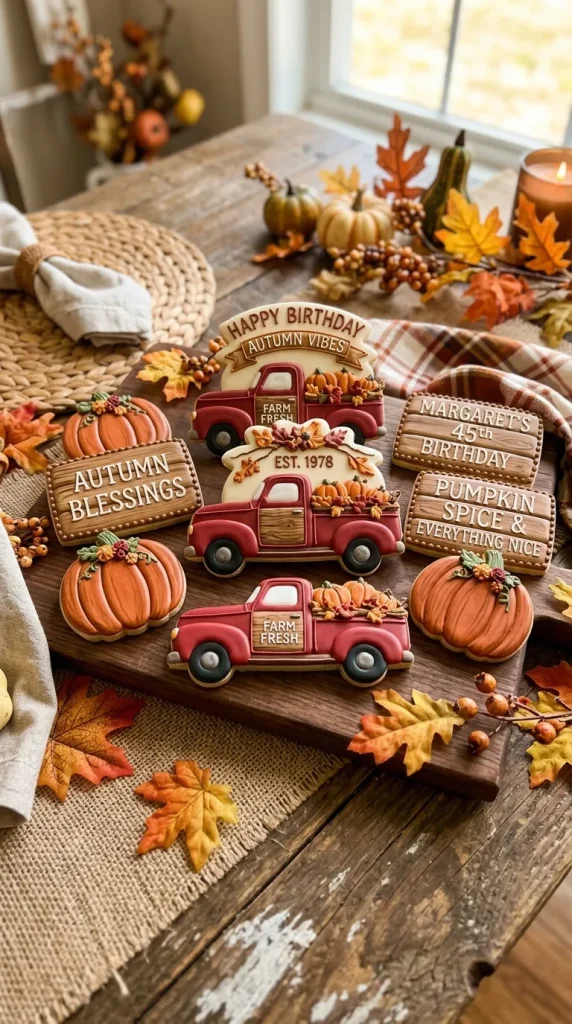
4. Vintage Farmhouse Pumpkin Truck Set

Nostalgic and rustic, the vintage pickup truck theme remains a crowd favorite for autumn birthdays across all ages. This cookie set highlights a classic vintage red or teal farm truck cookie carrying a bed full of tiny orange pumpkins. Accompanying cookies in the set include wooden-plank textured plaques with wood-grain piping, rustic burlap-patterned birthday signs, and traditional ribbed pumpkins. The sugar cookie base uses real pumpkin puree and ground pumpkin pie spice, filling the room with a heavenly seasonal aroma.
5. Golden Autumn Woodland Friends Set

Ideal for young children’s birthday parties, this set pairs cute woodland creatures with playful autumn elements. The lineup includes adorable foxes, owls, and raccoons wearing tiny warm scarves or birthday hats. Nestled alongside the animals are mini pumpkin spice cookies shaped like acorns, oak leaves, and brightly colored pumpkins in shades of mustard yellow, terracotta, and soft olive green. The charming animal expressions make these a hit for kids’ dessert displays.

6. Pumpkin Spice & Everything Nice Boho Set

Boho styling brings a breezy, relaxed vibe to autumn birthday parties. This set utilizes soft terracotta, warm beige, mustard yellow, and blush tones. Design motifs include arch-shaped cookies decorated with dry palm spears, pampas grass flourishes, and modern abstract geometric pumpkins. A central rainbow-shaped cookie in warm earth tones anchors the set, flanked by delicate birthday plaques featuring minimalist hand-lettered birthday wishes.

7. Moody Midnight Halloween-Adjacent Birthday Set

For birthdays falling near late October, a dark moody aesthetic offers an enchanting alternative to scary Halloween decor. This set pairs deep plum, charcoal grey, deep navy, and rich pumpkin orange icing tones. The cookies feature celestial motifs such as crescent moons, starbursts, and ornate starry pumpkins. Intricate white lace piping covers dark pumpkin silhouettes, creating a dramatic, Victorian-inspired look that feels celebratory and mystifying.

8. Rustic Pumpkin Patch Farmhouse Board

Designed to resemble a grazing board of sweets, this cookie set focuses on variety in texture and shape. It features a mix of standard-sized decorated cookies and bite-sized mini cookies. Shapes include pumpkin pies with dollops of white icing cream, basket-woven harvest baskets filled with mini pumpkins, wooden barn door plaques, and personalized “Happy Birthday” banners. The pumpkin spice dough provides a dark, rich backdrop that makes bright royal icing pop visually.

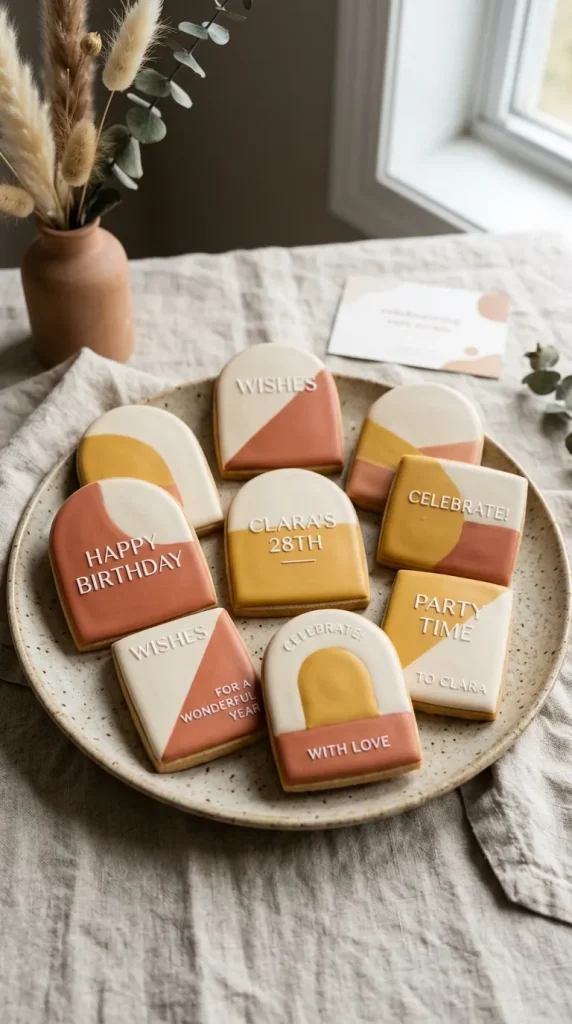
9. Modern Minimalist Color-Blocked Set

Clean lines and bold shapes define modern minimalist cookie sets. This design relies on flat, smooth floods of matte icing in a contemporary palette of warm clay, soft cream, and muted mustard. Rather than intricate line work, the cookies feature simple color-blocking techniques across abstract pumpkin silhouettes, arched milestone age numbers, and clean rectangular plaques with simple, bold typography. It is an ideal choice for design-focused birthday celebrations.
10. Sparkly Cinnamon Sugar Glaze & Royal Icing Hybrid

For those who prefer a less sweet, texture-focused cookie, this set combines traditional royal icing decoration with sparkling spice glazes. After baking the pumpkin spice sugar cookies, parts of the surfaces are brushed with a warm cinnamon-brown sugar glaze and sprinkled with sparkling sanding sugar for a crystal-like shine. Royal icing is used selectively to pipe crisp birthday messages and simple linework pumpkins over the sparkling base, creating a irresistible contrast between crunch and smooth icing.

10 Birthday Cookies Winter Wonderland Snowflake Royal Icing Ideas

Winter birthdays possess a unique magic, blending the cozy warmth of seasonal celebrations with crisp, enchanting aesthetic themes. When planning a winter wonderland birthday dessert table, few treats command attention quite like custom royal icing sugar cookies. Snowflake-themed cookies, with their intricate symmetry and icy color palettes, serve as both delicious favors and stunning edible art.

Royal icing is the ideal medium for capturing the delicate, crystalline structures of real snowflakes. By mastering a few basic techniques—such as flood consistency, wet-on-wet piping, dimensional piping, and luster dusting—you can elevate simple sugar cookies into showstopping party treats. Here are 10 creative winter wonderland snowflake royal icing ideas to make any winter birthday celebration unforgettable.

1. Classic Monochromatic White-on-White Elegance

There is timeless sophistication in simplicity. Start with a solid white royal icing flood base that has dried completely to a high-gloss, smooth finish. Using a stiff-consistency white royal icing and a fine piping tip (such as a #1 or #1.5), pipe intricate snowflake arms, delicate lattice dots, and tiny starburst details over the base. The raised, textured piping against the smooth flooded surface creates a subtle, light-reflecting relief effect that feels pristine and luxurious.

2. Pastel Winter Ombré Wet-on-Wet Snowflakes

Combine a soft birthday color story with fluid decorating techniques. Flood the cookie surface with a gradient blend of icy blue, soft lilac, and pastel pink royal icing. While the flooded base is still wet, pipe tiny white dots or lines directly into the background using flood-consistency white icing. Use a scribe tool or needle tool to gently drag through the white icing, forming smooth, seamless snowflake stars embedded directly into the ombré base.
3. Silver Leaf and Metallic Luster Dust Accents

Add a touch of birthday sparkle by introducing metallic finishes. Once a icy blue or crisp white snowflake cookie has fully cured, use a fine artist brush dipped in silver edible luster dust mixed with high-proof grain alcohol or lemon extract. Highlight the tips, center nodes, or outer ridges of the snowflake. For an even more luxurious finish, apply small fragments of edible silver leaf to the center of the snowflake using clean tweezers before the icing fully sets.

4. Iridescent Sanding Sugar Sparkle Borders

Nothing captures the illusion of fresh, glistening snow like coarse sanding sugar. Flood a hexagon or traditional six-pointed snowflake cookie in soft slate blue royal icing. Before the icing dries, sprinkle sparkling white or iridescent sanding sugar heavily over the wet icing, shaking off the excess after a few minutes. Alternatively, flood the center smooth and pipe a thick outline around the edges, coating only the outer rim in sugar for a snow-dusted frame.

5. Personalized Birthday Name and Age Monogram Snowflakes

Tailor the design specifically to the guest of honor by incorporating personalized lettering. Cut out large, sturdy snowflake sugar cookies. Flood the center with an oversized, smooth circular or hexagon pad in pale silver-grey or soft blue. Once dry, pipe the birthday child or adult’s age in bold, crisp royal icing in the center, framing it with delicate snowflake filigree extending outward toward the cookie points.

6. Stenciled Velvet Airbrushed Snowflake Patterns

Airbrushing offers a quick way to achieve professional depth and dramatic contrast. Flood a cookie base in bright white or soft cream royal icing and let it dry completely overnight. Lay a detailed snowflake stencil flat against the cookie surface. Using an airbrush system loaded with deep navy blue, pearlized icy blue, or metallic silver edible food color, lightly spray across the stencil. The result is a sharp, crisp graphic design with soft shading that resembles velvet velvet printing.

7. Deep Midnight Navy and Gold Glamour

Shift away from traditional pastels to create a dramatic, evening-inspired winter wonderland theme. Base-flood the snowflake cookies in deep midnight navy or midnight blue royal icing. Once dry, pipe bold geometric snowflake patterns using stiff royal icing painted with brilliant edible gold paint. The striking contrast between deep blue and gleaming gold offers an opulent option suited for milestone winter birthdays like a 21st, 30th, or 50th celebration.

8. Dimensional 3D Royal Icing Transfers

Take your cookie art to the next dimension by crafting separate royal icing transfers. Trace snowflake designs onto parchment paper or acetate sheets using stiff white royal icing. Allow these delicate transfers to dry completely for 24 hours until hard. Flood your base cookie in a contrasting shade, and while the base is still wet, gently lay the pre-made 3D snowflake transfer directly onto the top. The transfer sits slightly raised, creating dramatic shadows and structural depth.

9. Isomalt Crystal Centerpiece Snowflakes

Incorporate edible glass techniques for a captivating frozen aesthetic. Use a snowflake-shaped cookie cutter with a hollow center. Bake the cookie with crushed clear isomalt or hard mint candies in the center so it melts into a clear, glass-like window in the middle of the cookie. Border the clear window with royal icing scrollwork and pipe white snowflake arms extending outward over the baked cookie portion. The translucent center catches table lighting beautifully.

10. Cozy Cable Knit and Snowflake Combo

Combine winter textures by pairing cozy sweater patterns with delicate ice crystals. Divide a large snowflake cookie into sections using stiff piping consistency icing. Flood alternating sections with smooth pastel blue icing, and use a fine tip to pipe raised cable-knit crosshatch and braid patterns on the remaining sections. Top the smooth blue sections with tiny piped snowflake stars to blend the comfort of winter knitwear with the beauty of falling snow.
10 Boho Patio Winter Covered Heating Ideas

When winter arrives, outdoor living spaces often fall into disuse, but a covered patio provides the ideal canvas for extending your outdoor enjoyment into the chilly months. The bohemian aesthetic—known for its rich textures, warm earth tones, layered textiles, and inviting ambiance—is uniquely suited for cozy winter gatherings. By strategically integrating efficient, safe heating solutions into a weather-protected space, you can transform your covered patio into a year-round sanctuary.

Creating a winter-ready boho patio requires balancing practical warmth with atmospheric design. Because covered spaces shield you from rain and snow, you have greater freedom to layer plush rugs, floor cushions, and vintage accents around your heat source. Whether you prefer the rustic glow of open fire or the sleek convenience of electric heating, here are 10 inspiring ideas for heating and styling your boho covered patio this winter.

1. Concrete Propane Fire Table with Layered Textiles

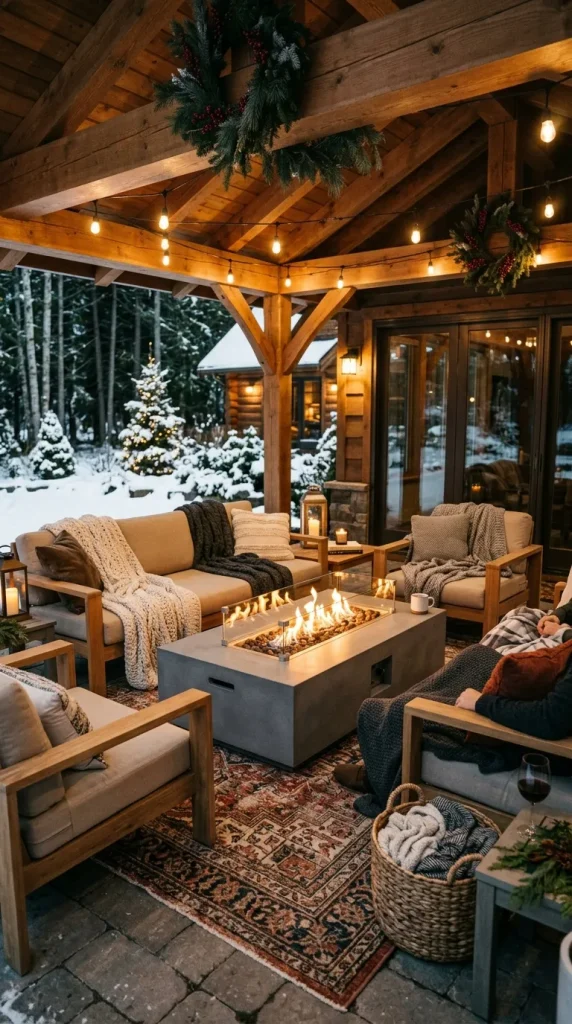
A sleek concrete propane fire table serves as both a powerful heat source and a dramatic visual anchor. Positioned at the center of a covered patio, it provides clean-burning warmth without smoke or embers, making it safe for covered overhead structures with proper ventilation. Surround the table with low teak seating layered with heavy knit throw blankets, faux-fur pillows, and overlapping patterned bohemian outdoor rugs. The modern, industrial concrete finish creates a striking contrast against soft, organic textiles.

2. Hanging Infrared Ceiling Heaters with Rattan Shades

Infrared radiant heaters provide direct, efficient heat that warms people and objects rather than the air, making them exceptionally efficient for open or semi-covered winter spaces. To seamlessly blend industrial heaters into a boho design, opt for slim overhead units disguised with custom wicker or woven rattan lamp shades. Suspending them above a dining table or lounge set allows you to maintain clean floor space while casting a soft, ambient glow that feels natural and integrated.

3. Terracotta Chiminea with Low Floor Seating

The traditional Mexican terracotta chiminea is an iconic bohemian feature that provides cozy, directed warmth. Its slender vertical chimney draws smoke up and away, making it ideal for the perimeter of a well-ventilated covered patio. Surround the chiminea with floor cushions, leather poufs, and woven jute mats to create an intimate, Moroccan-inspired lounge area. Stacking cut firewood nearby in an rustic brass log basket adds to the functional, lived-in charm.

4. Vintage Cast Iron Wood Stove

For high-heat output and nostalgic appeal, install a freestanding vintage-style cast iron wood-burning stove with an insulated flue pipe running through the patio roof. Cast iron retains and radiates heat long after the fire subsides. Style the surrounding space with vintage rattan furniture, brass lanterns, thick wool throws, and hanging macramé plant holders filled with cold-hardy winter greenery. The classic hearth atmosphere brings indoor comfort straight outside.

5. Freestanding Pyramid Glass Tube Heater

Towering pyramid-style propane heaters feature a mesmerizing flame enclosed in a glass tube that dances through the center of the unit. They deliver both substantial warmth and dramatic visual appeal. Place two matching pyramid heaters at opposite corners of your covered patio to frame the space. Complement their height with hanging bamboo lanterns, string lights woven across the ceiling beams, and tall potted palms or pampa grass arrangements in clay pots.

6. Tabletop Bioethanol Fire Bowls

If floor space is limited or you desire a portable heating solution, tabletop bioethanol fire bowls offer clean, odorless warmth. These compact units burn eco-friendly fuel and can be placed directly on coffee tables or dining setups. Arrange two or three bioethanol bowls along a long wooden table set with rustic ceramic stoneware, linen runners, and brass candle holders to create an inviting, glowing center for winter evening meals.

7. Electric Radiant Wall-Mounted Panel Heaters

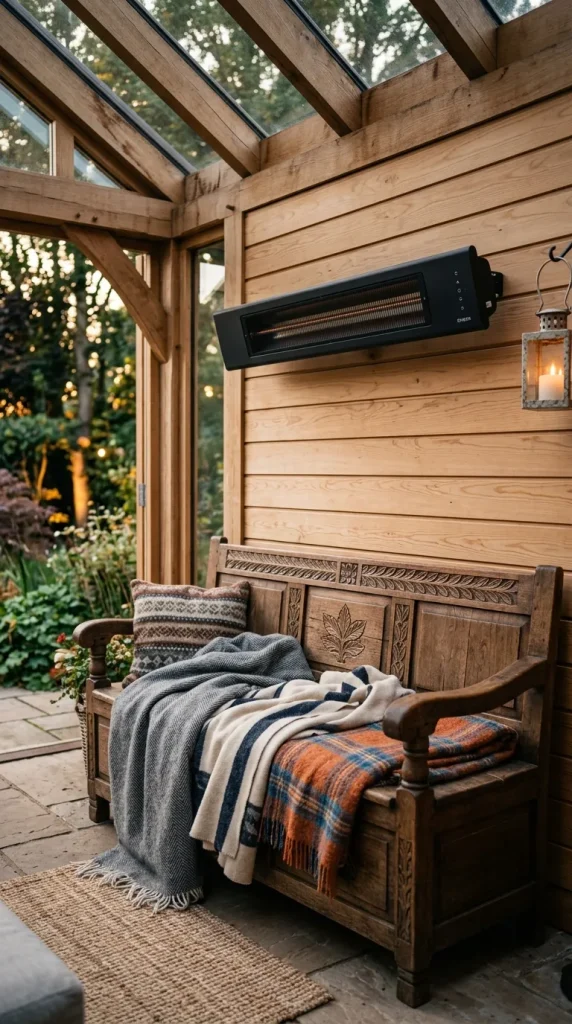
For a clean-lined look that minimizes floor clutter, mounted electric radiant panels can be installed along the exterior walls of your covered patio. Modern panels come in matte black, off-white, or custom art finishes that blend into decor. Contrast the sleek technology with rich bohemian textures—hung tapestries, macramé wall art, and a carved wooden bench lined with fleece blankets directly beneath the heat source.

8. Moroccan-Style Tile Gas Fire Pit

Integrate vibrant color and traditional pattern into your patio with a custom or prefabricated gas fire pit lined with handmade Moroccan zellige tiles. The glossy, reflective tiles catch the flickering firelight, creating a shimmering centerpiece. Frame the fire pit with low-slung floor seating, kilim cushions, and ambient copper lanterns filled with battery-operated pillar candles to amplify the warm, sun-drenched palette.

9. Covered Pergola with Enclosed Thermal Curtains and Portable Heater

Extend the heating efficiency of your covered patio or pergola by hanging heavy-duty, weather-resistant thermal curtains along the sides. During cold winter evenings, draw the curtains closed to block biting wind and retain radiant heat generated by a portable ceramic or quartz heater inside. Choose curtains in rich terracotta, mustard, or olive tones, securing them with tie-backs made of natural cotton cord and tassels.

10. Portable Stainless Steel Tabletop Heater

Compact stainless steel mushroom-style tabletop heaters bring concentrated, directed heat down to eye level. They are ideal for smaller dining corners or conversation nooks. Style the space with rich, earthy wooden furniture, sheepskin seat covers, and a warm hot-beverage bar nearby featuring stoneware mugs, spiced cider, and copper kettle accents.

10 Boho Patio Luxury Resort Style Lounging Ideas

Transforming an ordinary outdoor space into a sanctuary reminiscent of a five-star Mediterranean boutique hotel or a Tulum eco-resort is all about mastering atmosphere. The secret lies in merging the relaxed, textural freedom of bohemian design with the high-end comfort, structured layouts, and premium materials of luxury resort outdoor living.
A luxury boho patio avoids chaotic clutter, choosing instead a refined palette of warm neutrals, organic teak and rattan, plush weather-resistant upholstery, and sculptural greenery. By designing distinct zones for relaxation, dining, and late-night conversation, you can create a private outdoor haven that invites effortless lounging from morning coffee to golden hour. Here are 10 luxury resort-style lounging ideas to elevate your patio design.

1. Low-Profile Teak Daybeds with Oversized Cream Cushions

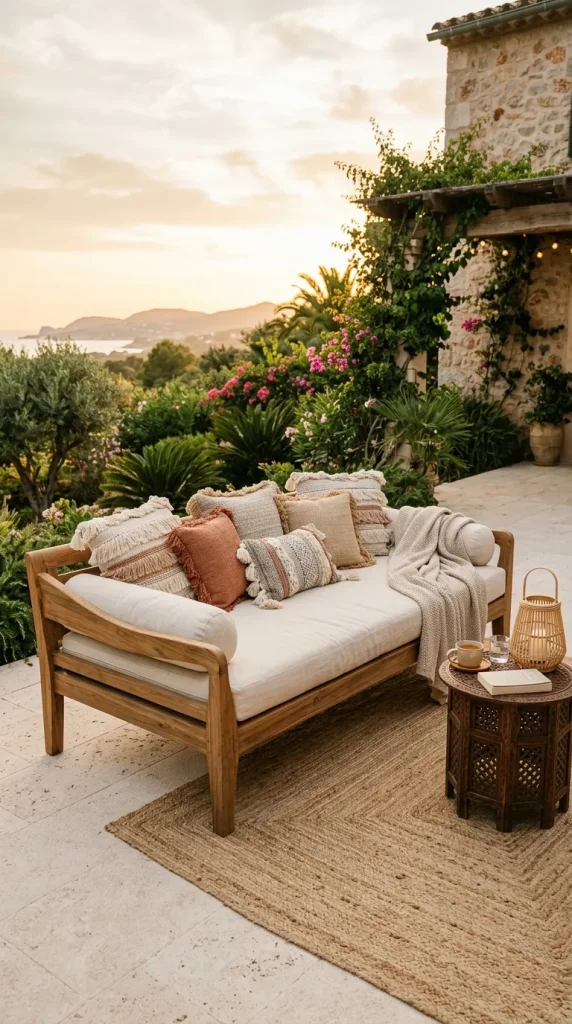
Resort lounging prioritizes deep, effortless relaxation. Replace standard outdoor seating with oversized, low-profile daybeds crafted from sustainable teak or brushed iroko wood. Top them with thick, weather-resistant mattress-style cushions in soft ivory, warm sand, or bleached linen. Layer the daybeds with a curated mix of bouclé throw pillows, fringe-edged linen blankets, and textured bolster pillows. Keeping the seating low to the ground creates an immediate sense of casual luxury while maintaining open sightlines across your garden or pool area.

2. Sunken Fire Pit Lounge with Built-In Masonry Seating

Nothing captures five-star luxury quite like a dedicated sunken seating lounge centered around an architectural fire feature. Construct curved or L-shaped plaster bench seating in a warm cream, micro-cement, or smooth terracotta finish. Line the benches with custom outdoor bench pads and an abundance of weather-proof pillows in neutral tones. At the center, place a concrete or natural stone gas fire bowl filled with lava rocks or smooth river pebbles. This design anchors the patio, creating a cozy evening gathering space that feels seamlessly integrated into the landscape.

3. Oversized Macramé Hammock Under a Timber Pergola

Bring a touch of artisanal craftsmanship to your outdoor layout by hanging an extra-wide woven macramé hammock featuring heavy fringe details. Suspend it beneath a dark wood or whitewashed timber pergola draped with lightweight, semi-sheer outdoor linen drapes. The curtains provide filtered sunlight during the day and gentle wind protection in the evening, while the natural cotton cord of the hammock adds a tactile, bohemian quality to the structured pergola frame.

4. Teak and Rattan Cabana Lounge with Floating Curtains

Create an exclusive retreat within your patio by installing a freestanding teak outdoor cabana frame with an adjustable louvred roof or canvas canopy. Outfitting the interior with a double-wide lounge bed and flanking it with teak side tables transforms an open deck into a private getaway. Sheer, cream-colored outdoor drapes suspended on all four sides can be pulled closed for shade and privacy or tied back with jute ropes to frame views of surrounding pool water or lush landscaping.

5. Layered Outdoor Rugs and Floor Cushion Sanctuary

Define a dedicated conversation zone by layering multiple outdoor rugs with distinct textures. Start with a large, durable jute or sisal base rug, then slant a smaller geometric flat-weave or subtle Moroccan-style outdoor rug over it. Arrange a collection of water-resistant leather poufs, oversized floor floor pillows, and low rattan coffee tables across the surface. This layered setup breaks away from rigid furniture arrangements, encouraging an informal, lounge-focused atmosphere perfect for entertaining.
6. Mediterranean Plaster Built-In Bench with Terracotta Accents

Draw inspiration from the sun-drenched coastal villas of Greece and Ibiza by building smooth, rendered plaster bench seating directly against a patio boundary wall. The clean, seamless curves of white or warm beige plaster provide a striking architectural background for earthy accents. Contrast the pale structure with rich terracotta planter pots, woven bamboo wall sconces, and deep rust or olive green accent pillows, striking a balance between old-world Mediterranean charm and modern luxury.

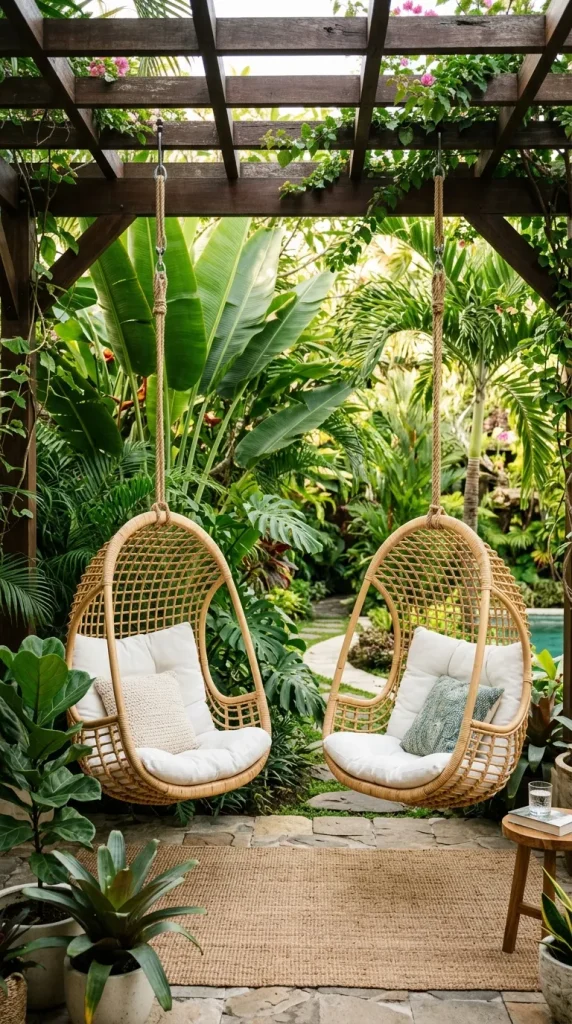
7. Hanging Wicker Egg Chairs Surrounded by Tropical Foliage

Vertical interest elevates outdoor design. Hang a pair of heavy-duty woven wicker or rattan swing chairs from sturdy metal stands or a solid pergola beam. Position them side-by-side facing a lawn or pool, lining the interior of each basket chair with plush shearling-style or linen cushion inserts. Frame the seating area with large terra-cotta or stone planters filled with tall birds of paradise, monsteras, and cascading creepers to create an immersive, jungle-resort feel.

8. Resort-Style Poolside Chaise Lounges with Fringe Umbrellas

Replicate the aesthetic of an exclusive beach club by arranging a pair of streamlined teak chaise lounges alongside your pool or patio edge. Outfit the lounges with custom quick-dry foam cushions wrapped in high-performance neutral fabric. Pair them with a vintage-inspired outdoor umbrella featuring a natural canvas canopy edged with heavy bullion fringe or tassels. A small, carved wood side table placed between the loungers holds iced drinks and sun care essentials within easy reach.

9. Ambient Lantern and String Light Canopy

Lighting transforms a luxury patio when the sun goes down. Skip harsh overhead lights in favor of layered, warm ambient illumination. String warm-white Edison bulbs in a dense grid beneath a pergola or ceiling structure. On the ground, scatter oversized teak, brass, and woven bamboo hurricane lanterns fitted with flameless LED candles of varying heights along pathways and next to lounge seating. The soft, golden glow highlights natural wood grain and woven textures while setting a tranquil mood.

10. Outdoor Bar and Kitchen with Bamboo and Zellige Tile Details

Luxury lounging often revolves around food and drink. Design an outdoor beverage bar or kitchenette featuring a front panel clad in natural bamboo slats or fluted teak wood. Top the bar with a light quartz or honed granite countertop, and finish the backsplash with handcrafted square Zellige tiles in an off-white or soft warm grey glaze. Add low-backed rattan bar stools with woven leather seats to encourage guests to linger while cocktails are prepared.

10 Birthday Candles DIY Dried Flower Embedded Wax Ideas

Birthday celebrations are anchored in small traditions, and few carry as much quiet magic as blowing out the candles atop a cake. While commercial striped taper candles have long been the standard, handcrafted botanical candles offer a sophisticated, organic alternative that elevates dessert presentation into a thoughtful art form. Embedding dried flowers into candle wax captures a slice of nature, preserving delicate petals, miniature leaves, and colorful blooms inside translucent soy, beeswax, or paraffin wax.

Creating your own flower-embedded birthday candles allows for custom color palettes, meaningful floral symbolism, and tailored shapes. Whether crafting slender cake tapers or small decorative votives to surround a dessert platter, working with pressed botanicals yields delicate, heirloom-quality pieces. Here are 10 creative DIY dried flower embedded wax ideas to inspire your next celebration.

1. Pressed Wildflower Tall Cake Tapers

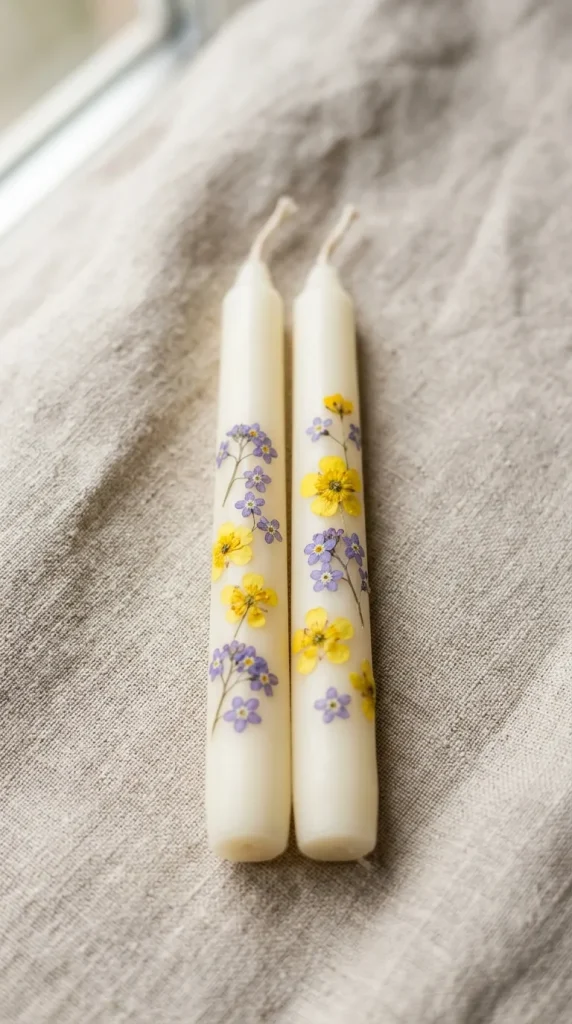
Classic slender birthday tapers look ethereal when adorned with tiny pressed wildflowers like forget-me-nots, buttercups, and miniature daisies. To craft these, start with pre-made or hand-dipped white beeswax tapers. Warm the outer layer of wax slightly using a craft heat tool or warm spoon. Gently press flat, dried botanical specimens onto the softened wax surface. Finish by quickly dipping the taper into a pot of clear, low-temperature soy wax. This final dipping layer seals the flowers beneath a smooth, protective jacket, ensuring the botanicals remain flat and flush against the stem.

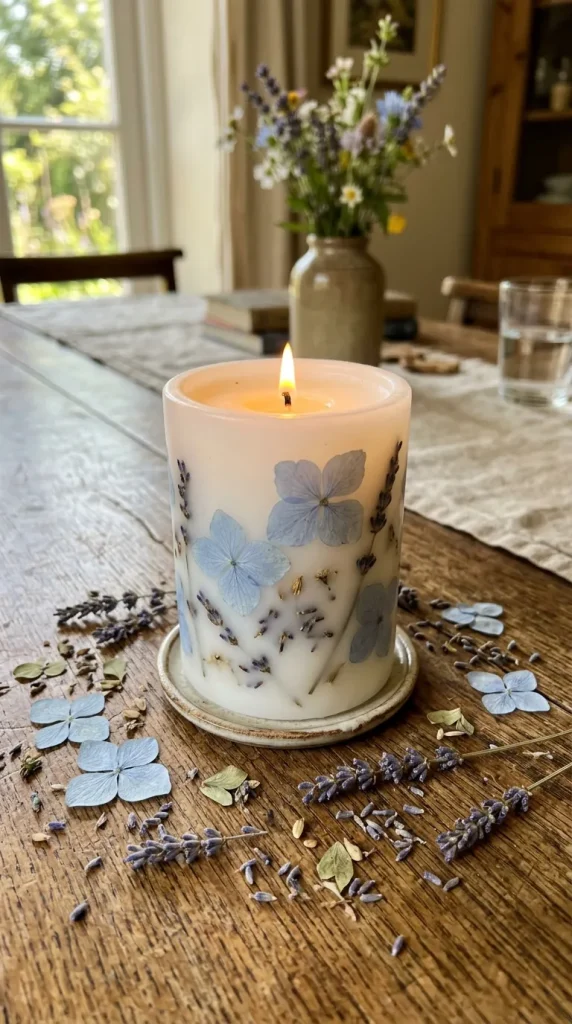
2. Pastel Lavender and Hydrangea Pillar Candle

For a soft, dreamy birthday table setting, a wider pillar candle provides an expansive canvas for larger petals. Dried lavender sprigs paired with pressed pale blue and soft pink hydrangea petals create a balanced, garden-inspired composition. Using a double-pour technique with a aluminum pillar mold, place pressed flowers against the cold mold walls before pouring warm soy wax into the core. As the wax sets, the translucent outer edges reveal the delicate vein structures of the hydrangea petals and the raised texture of the lavender buds.

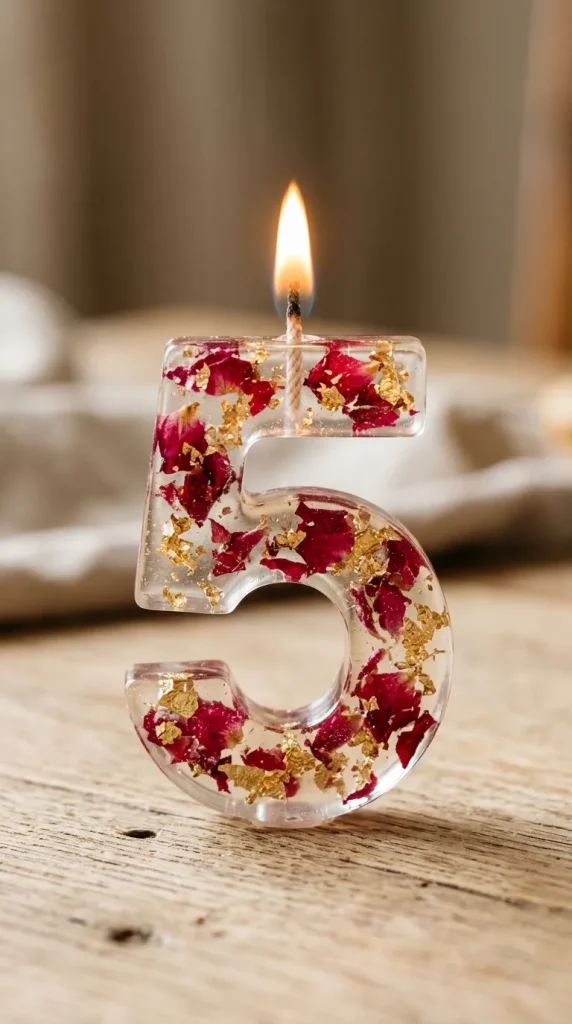
3. Gold Leaf and Dried Rose Petal Birthday Numbers

Number-shaped birthday candles become instant focal points when infused with rich crimson rose petals and subtle metallic accents. Using silicone number molds, fill the bottom layer with small fragments of crushed, dried red rose petals and tiny flakes of imitation gold leaf. Pour clear or off-white wax over the arrangement in light stages so the botanical elements stay evenly distributed throughout the depth of the number rather than settling to the bottom. Once unmolded, the candle shines with rich red tones and warm metallic glimmers.

4. Botanical Herb and Citrus Wax Birthday Votives

Infuse natural aromatics and earthy warmth into birthday decor by combining dried botanicals with citrus elements. Thinly sliced, dehydrated kumquat rounds or small lemon peels pair beautifully with dried rosemary sprigs and thyme leaves. Line the walls of small glass votive cups with these botanical slices before pouring beeswax mixed with a touch of essential oil. Positioned around the base of a birthday cake, these votives cast a warm glow while releasing a subtle, refreshing herb-and-citrus scent as the wax warms.

5. Pressed Pansy and Viola Mini Cake Toppers

Violas and pansies are natural candidates for botanical wax crafts due to their flat faces and vibrant hues. Collect purple, yellow, and velvet-maroon pansy blooms, pressing them flat between heavy books for a few days. Dip the flat backs of the pressed flowers into melted clear wax and adhere them around slender birthday sticks or short mini pillar candles. The bold, face-like patterns of the flowers stand out vividly against a pale cream wax background, making them delightful accents for sweet treats.

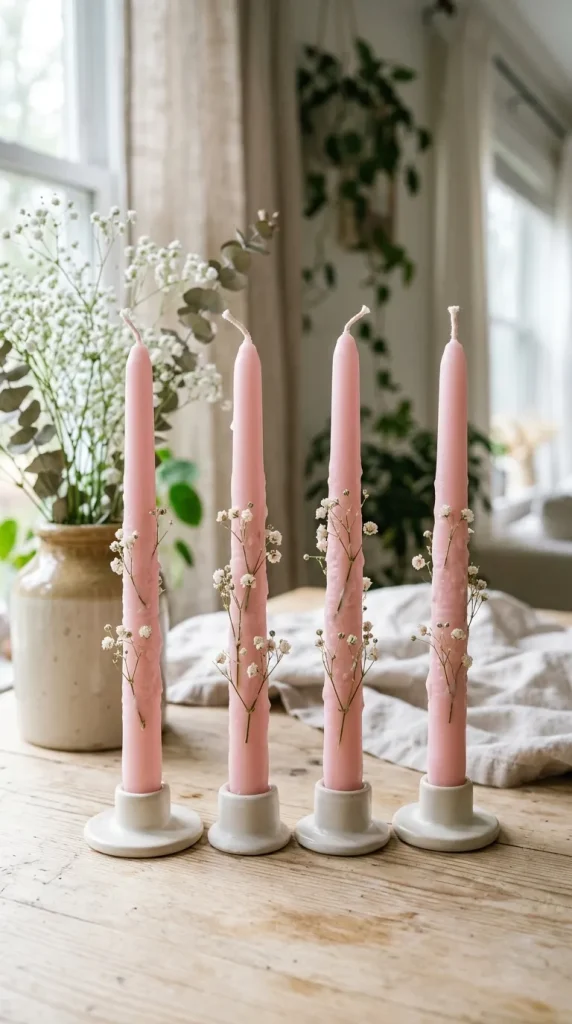
6. Embedded Baby’s Breath Pastel Birthday Dip Tapers

For a minimalist, cloud-like aesthetic, incorporate dried baby’s breath (gypsophila) into pastel-tinted wax. Tint soy wax with a hint of soft blush or sage green candle dye. As you hand-dip cotton wicks into the warm wax to build up the taper shape, embed tiny clusters of dried white baby’s breath along the outer layers. The final result is a delicate, textured candle where small white blossoms appear suspended inside a soft, translucent pastel haze.

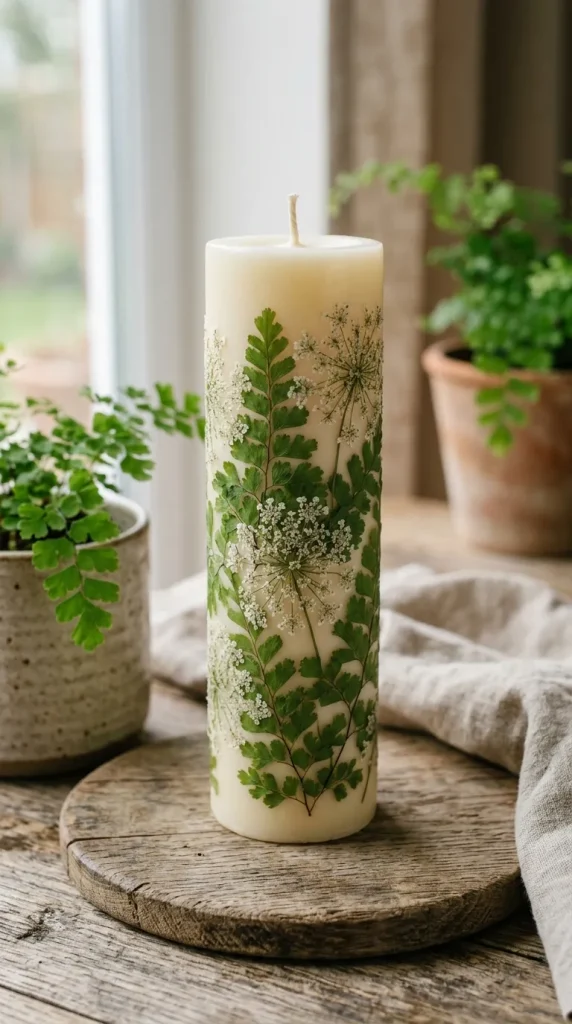
7. Pressed Fern and Queen Anne’s Lace Woodland Candle

A botanical woodland theme relies on delicate greenery and intricate lace-like textures. Press small fronds of maidenhair fern alongside delicate, umbrella-shaped clusters of Queen Anne’s lace. Adhere these greens in an upward, growing orientation along the sides of a tall beeswax candle using a warm paintbrush coated in liquid wax. The stark geometric contrast between the deep green fern fronds and the airy white flower heads creates a sophisticated, nature-inspired design suited for outdoor summer birthdays.

8. Dried Cornflower and Calendula Confetti Candle

Mirror the playful spirit of birthday confetti using brightly colored dried flower petals. Mix vibrant blue cornflower petals, bright orange calendula strips, and pink gomphrena fragments in a bowl. Melt a batch of clear paraffin or low-melt soy wax in a container mold. As the wax begins to cool and reach a slushy consistency, stir in the flower confetti mix. The cooling wax holds the petals in suspension throughout the entire body of the candle, ensuring colorful flower specks show from every angle.

9. Monochromatic White Jasmine and Chamomile Floating Candles

Floating candles bring dynamic light to birthday tables when arranged in wide water bowls. Using small disk or flower-shaped molds, embed whole dried jasmine buds and tiny chamomile flowers face up in white beeswax. The light natural hue of the wax highlights the pale cream petals and soft yellow centers of the chamomile. Floating on water surrounding a main dessert display, these delicate candles catch ambient room light and bob gently as guests move around the table.

10. Terracotta-Toned Marigold and Globe Amaranth Pillar

Warm, sun-baked tones create an inviting atmosphere for evening birthday gatherings. Select dried orange marigold petals and deep magenta globe amaranth heads. Arrange the whole amaranth heads at the base of a pillar mold and layer the shredded marigold petals along the sides. Pour a warm, un-dyed beeswax or warm amber-tinted soy wax into the center. The deep golden-orange hue of the beeswax enhances the rustic marigold tones, producing a rich, glowing botanical art piece.

10 Birthday Candles Aesthetic Spiral Cake Decor Ideas

Birthday cakes have evolved far beyond basic frosted sponge layers topped with a single wax digit. Today’s celebration aesthetics favor intentional design, playful geometry, and sculpted details that turn sweet treats into centerpiece artwork. Among the most popular current cake trends, spiral aesthetic birthday candles take center stage. With their soft curves, playful twist silhouettes, and architectural elegance, these candles bring dynamic energy and modern charm to any party spread.

Whether you are baking from scratch, elevating a store-bought cake, or styling a celebration for a minimal aesthetic, incorporating spiral candles offers endless design possibilities. Here are 10 creative spiral cake decor ideas to inspire your next celebration.

1. The Pastel Twisted Candle Crown

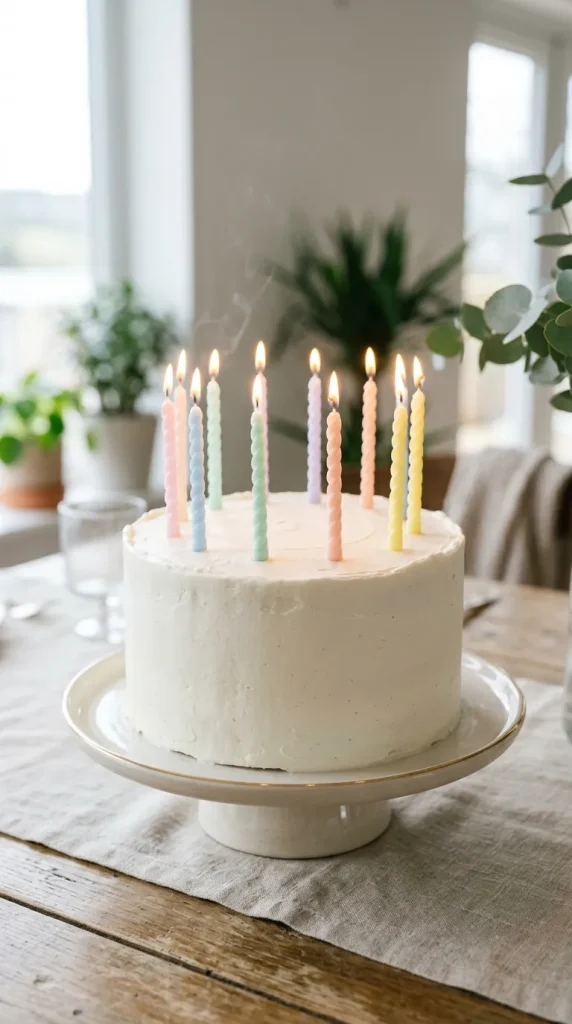
For a delicate, fairytale-inspired celebration, nothing matches the charm of pastel hues paired with soft spiral shapes. Choose a clean, smooth-frosted cake iced in plain white or soft cream buttercream. Select ten spiral candles in gentle pastel tones—mint green, blush pink, lavender, butter yellow, and baby blue. Arrange them in a tight, full circle around the top crown of the cake, spacing them evenly to create a vibrant ring of soft color. The tall, twisting lines of the candles add height and playful movement while keeping the overall palette light, refined, and airy.

2. Monochromatic Ombré Height Gradient

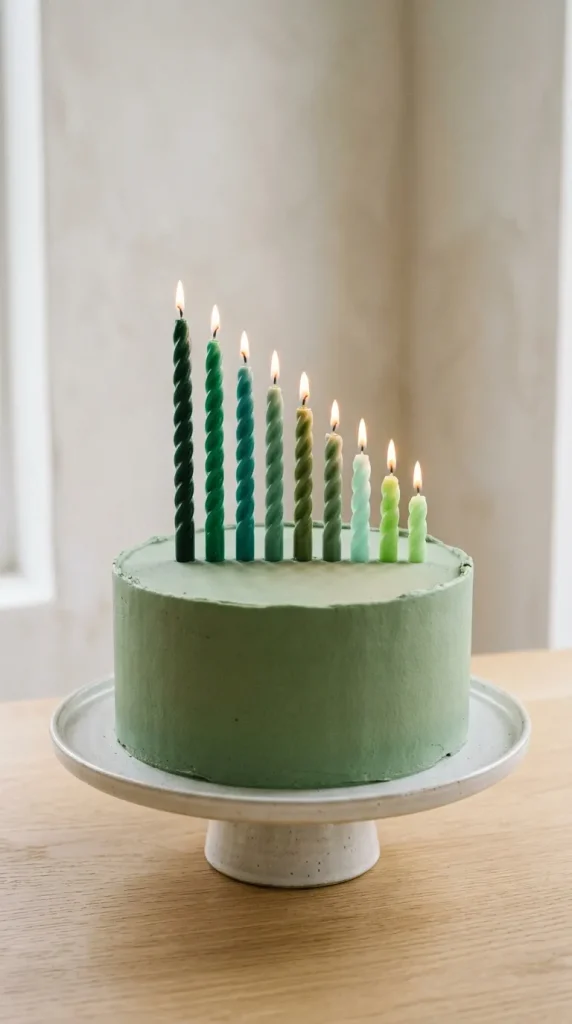
Gradient designs introduce sophisticated visual hierarchy to modern cake styling. Start with a plain, single-tone cake—such as a deep sage green, dusty rose, or sky blue. Gather ten spiral candles in varying shades of that same color family, ranging from deep saturated tones down to pale tints. Instead of cutting the candles to uniform lengths, push them into the cake top at varying depths, or trim their bases so that they form an ascending stair-step arc. The blend of shifting color density and spiraled texture elevates a simple frosted cake into a sculpted work of art.

3. Minimalist Off-Center Cluster

Contemporary dessert styling often leans into asymmetry and negative space. Rather than placing candles in traditional concentric circles or straight lines, cluster all ten spiral candles together in a dense group on one side of the cake. Choose long, slender spiral candles in a single muted tone, such as warm beige, taupe, or soft terra cotta. Insert them at slight, varying angles so their twisting stems overlap visually. Leaving three-quarters of the cake top completely smooth and plain creates a chic contrast that highlights the candles as a bold design focal point.

4. Metallic Foil Twisted Burst

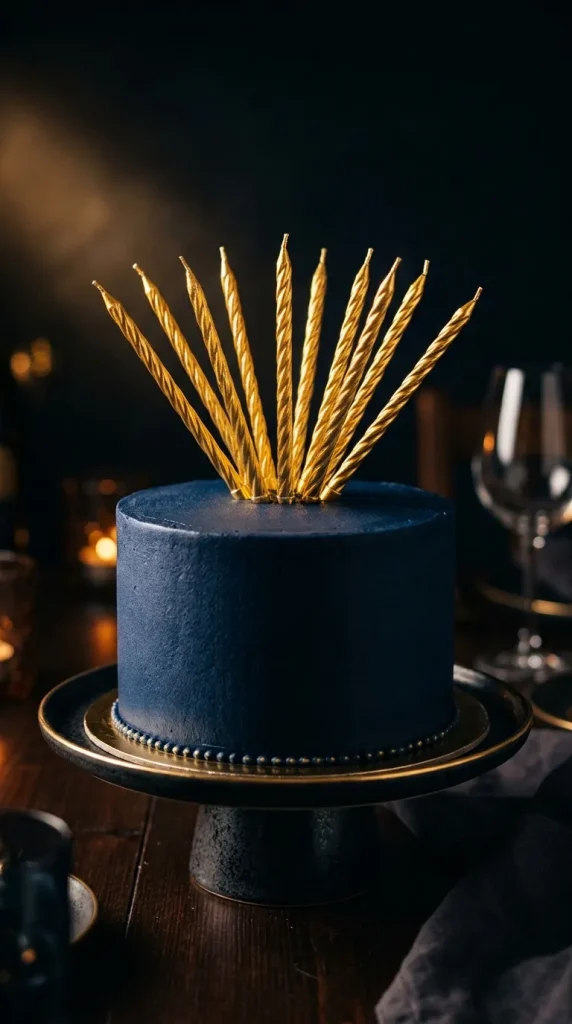
When celebrating major milestones, a touch of metallic shimmer brings instantaneous glamour. Pair a rich, dark-toned cake—such as deep navy, forest green, or charcoal black buttercream—with metallic foil spiral candles. Select ten candles coated in high-shine gold, rose gold, or polished silver finishes. Insert the candles near the center of the cake, fan them outwards slightly at subtle angles like a bursting sparkler. The light reflecting off the shiny metallic twists against a moody, matte frosting backdrop adds high-contrast elegance.

5. Retro Wave Bow and Twists Combination

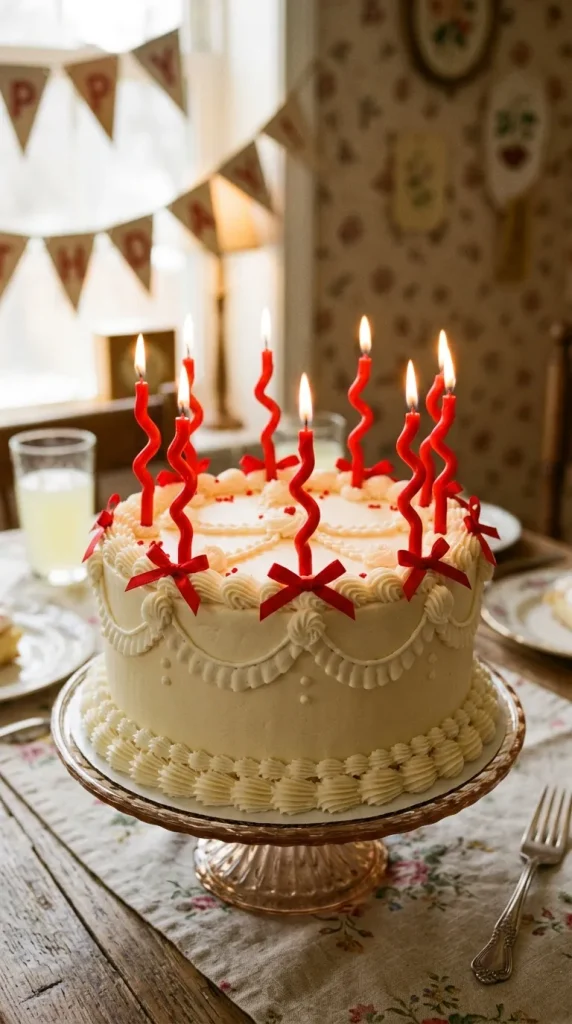
Nostalgic baking aesthetics continue to dominate modern dessert trends, blending vintage piping styles with modern playful accessories. Coat a multi-layered cake in classic piped buttercream shell borders, delicate rosettes, and subtle swags. Place ten vibrant, retro-colored spiral candles—such as cherry red, lilac, or bright orange—in a playful wave pattern across the cake top. To finish the look, tie tiny satin ribbons in tiny delicate bows around the base of each candle. The combination of classic piped texture, satin accents, and modern spiral shapes creates a sweet, whimsical centerpiece.

6. Geometric Gradient Wave

Transform the top of a simple rectangular or round sheet cake into an architectural landscape. Take ten extra-tall spiral candles in a bright, modern palette like electric blue, bright magenta, or lemon yellow. Arrange them in a smooth S-curve wave across the top surface of the cake. By pushing the outer candles deeper into the frosting and keeping the center candles taller, the tops of the candles will form an undulating wave that echoes their spiraled shapes. It is an ideal layout for modern, graphic celebrations.

7. Dual-Tone Checkerboard Twist Accent

Checkerboard patterns and high-contrast color blocking offer a cool, contemporary edge. Style a round cake iced in ultra-smooth white fondant or chilled buttercream. Choose ten spiral candles split evenly between two contrasting colors—five stark black and five pure white, or five cobalt blue and five warm mustard yellow. Arrange the candles in two neat, alternating parallel rows across the center. The graphic color scheme combined with the organic spiral twist of the wax creates a striking optical aesthetic.

8. Wildflower Meadow and Twisted Wax Forest

For an organic, outdoor-inspired birthday gathering, pair natural floral elements with tall, twisted candles. Cover a cake in textured, rustic knife-stroked frosting. Press edible pressed flowers, dried chamomile, and delicate green herbs around the bottom base and sides of the cake. On top, plant ten slender spiral candles of varying soft earth tones—olive, ochre, cream, and dusty mauve—spaced randomly like a mini wax forest. The organic placement mirrors a natural meadow, blending botanical beauty with sculpted candle design.

9. Arching Double Spiral Arc

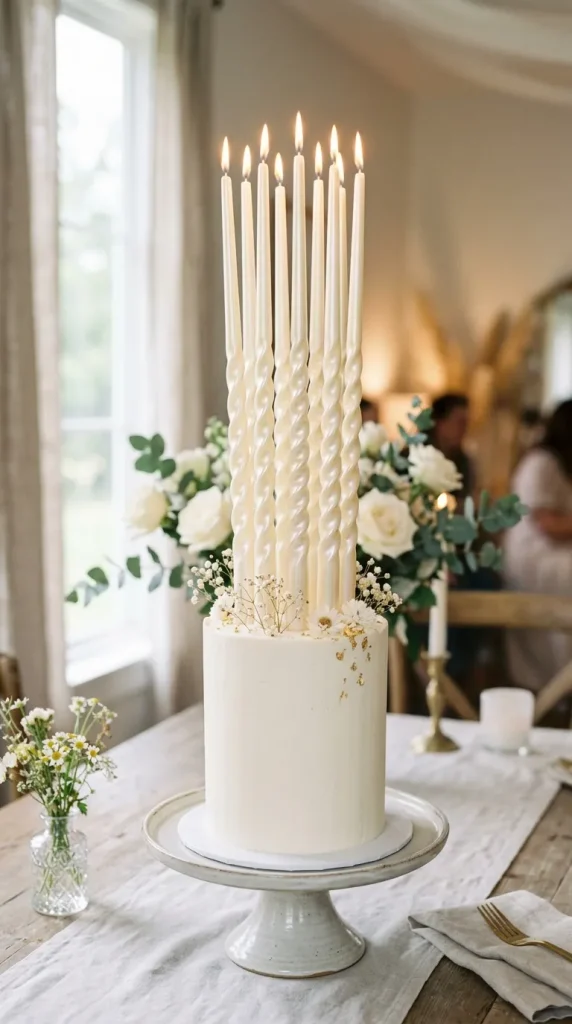
Create a sense of movement with an arching candle formation. On a wide round cake, arrange ten thin, flexible spiral candles in two sweeping parallel arcs that curve opposite each other, forming a gentle wave or stylized crescent moon shape. Using monochrome tone-on-tone candles that match the exact shade of the cake icing—such as warm ivory on ivory—creates a subtle, sculptural relief effect that relies entirely on shadow and twist texture rather than color contrast.

10. Sculptural Floating Spiral Cluster

Give your cake an illusion of weightlessness with ultra-thin, elongated spiral candles that tower above the frosting. Select ten extra-long, delicate spiral candles in translucent or pearlescent wax finishes. Push only the very tips of the candle bases into the top center of a small, minimalist tall cake, allowing the long, spiraled stems to extend dramatically upward into the air. The delicate, sky-high silhouette feels whimsical and dramatic, turning a simple dessert into an unforgettable birthday moment.

10 Summer Crafts Coastal Driftwood Key Holder Decor Ideas

Summer is the ideal season to refresh home entryways with functional, ocean-inspired decor. Entryways and mudrooms often get cluttered with daily essentials like keys, sunglasses, and dog leashes. Combining utility with coastal charm, a DIY driftwood key holder serves as both an organized storage solution and a serene, summer-themed art piece.

Driftwood brings a distinct tactile quality into the home. Sculpted by ocean currents, salt water, and sun, each piece features unique curves, distressed grain patterns, and sun-bleached tones. By fitting these natural branches with simple metal hooks, nautical rope, or subtle painted accents, you can transform simple shoreline finds into purposeful decor.

Whether you lean toward modern minimalism, rustic cottage style, or colorful coastal accents, these 10 DIY coastal driftwood key holder ideas will help you craft a organized, welcoming entryway.

1. The Single Plank Brass Hook Key Holder

Simplicity is key when highlighting the natural beauty of weathered wood. Select a relatively flat, wide driftwood plank with smooth, sun-bleached edges. Sand the surface lightly to remove loose debris while retaining the aged patina. Secure four to five vintage brass or antique bronze cup hooks along the bottom edge, spaced evenly apart. Mount the plank flush to the wall using hidden flush-mount brackets. The combination of warm brass hardware and grey-toned weathered wood creates an effortless, elevated look right by the front door.

2. Nautical Jute Knot & Branch Key Organizer

For an authentic nautical aesthetic, combine driftwood with heavy natural fibers. Choose a sturdy, medium-thickness driftwood branch with interesting knots or slight bends. Wrap natural jute or Manila rope tightly around both ends of the branch, securing the wraps with wood glue on the backside. Extend the rope upward to form a hanging loop that suspends the branch from a single decorative wall peg. Screw sturdy black iron hooks into the underside of the branch to hold heavy key rings and lanyards.

3. Striped Coastal Paint Accent Board

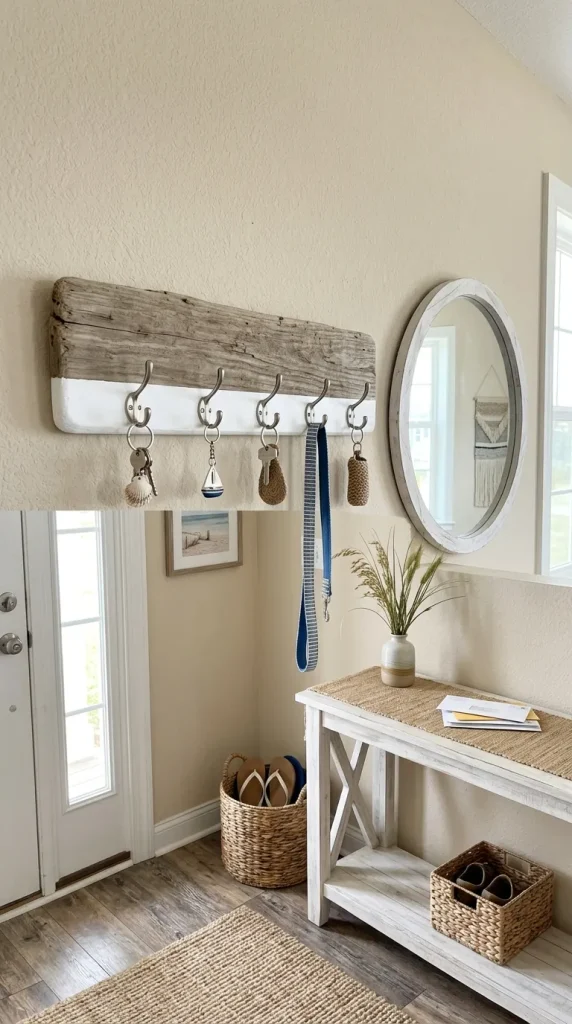
If you want to introduce a pop of summer color into your entryway, a partial dip-paint effect works brilliantly. Take a flat driftwood board and mask off the bottom third using painter’s tape. Apply two coats of crisp white, soft aqua, or ocean blue matte acrylic paint to the lower section, leaving the top two-thirds in its raw, weathered state. Once dry, install simple white or brushed nickel hooks along the painted band. The clean, painted line creates a modern contrast against the textured wood grain.

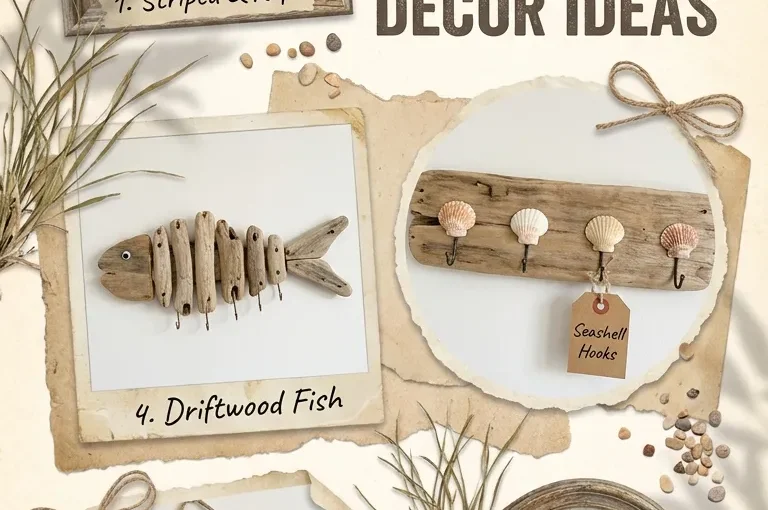
4. Driftwood House Silhouette Key Rack

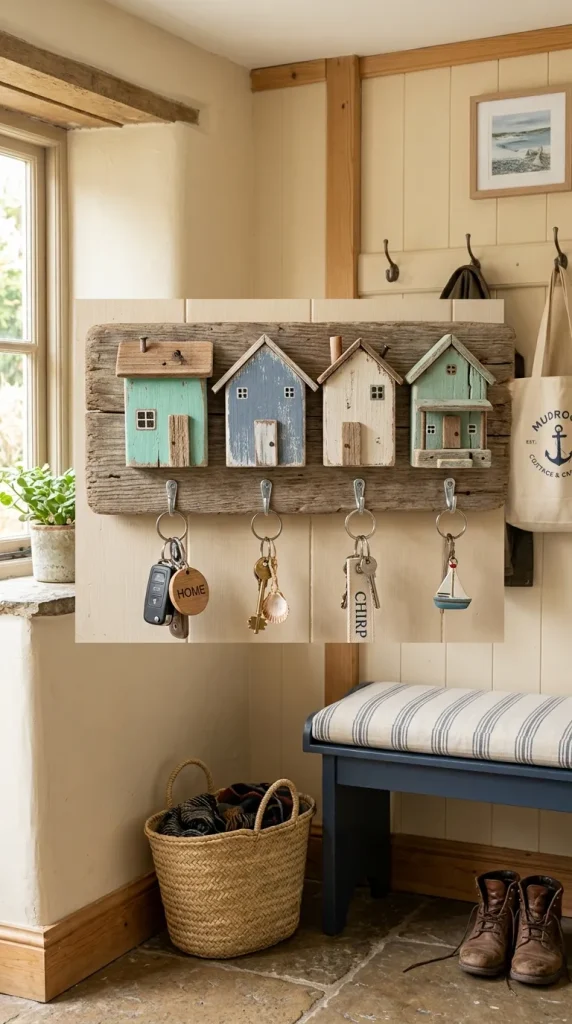
Capture the cozy charm of seaside cottages by constructing small wooden cottage silhouettes. Gather three to four small, blocky pieces of driftwood or cut thicker pieces into simple house shapes with pitched roofs. Paint the fronts in muted coastal shades—such as mist grey, sage green, sandy beige, and washed white. Mount these mini houses in a row on a sturdy driftwood base plank, adding a tiny metal hook beneath each cottage silhouette to designate keys for different family members.

5. Cast Iron Anchor & Driftwood Key Bar

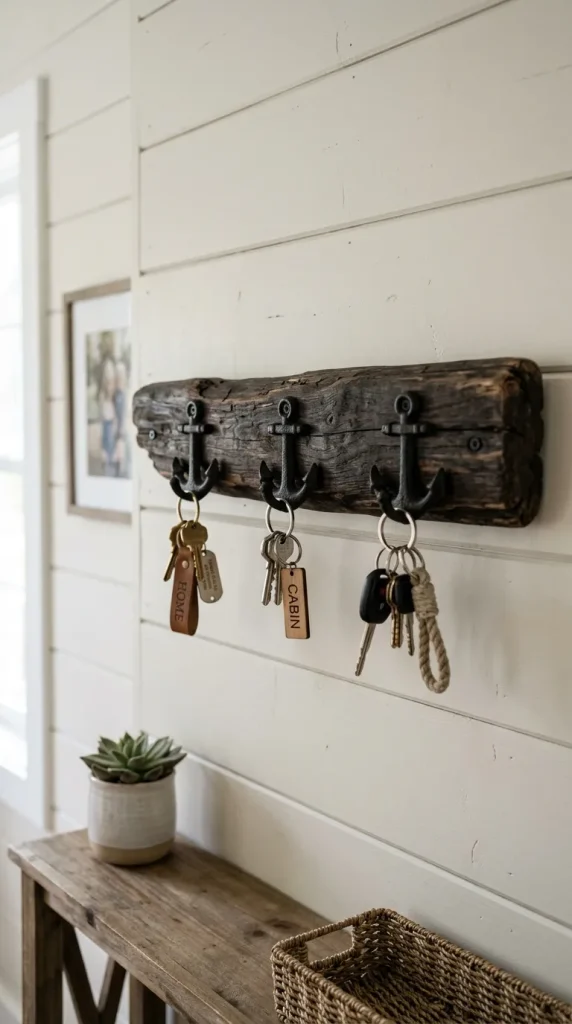
Anchor motifs are a quintessential coastal design choice that adds weight and structure to light driftwood. Select a solid, dark driftwood branch that can support heavier hardware. Mount two or three small cast iron anchor-shaped hooks directly onto the front face of the wood. The heavy black iron provides a rustic contrast against the soft grey and tan tones of the salt-cured wood, making this piece durable enough to hold heavy key sets, dog leashes, and small totes.

6. Stacked Multi-Layer Driftwood Key Shelf

For entryways needing extra organization, a multi-layered design offers both key storage and a small display ledge. Join two or three flat driftwood planks vertically using wood glue and small metal mending plates on the back. Position a slightly wider plank horizontally across the middle to serve as a narrow floating shelf for mail or sunglasses. Attach small cup hooks along the lower plank to keep your keys organized and off the counter.

7. Sea Glass & Driftwood Mosaic Key Holder

Incorporate soft, tumbled beach treasures by blending sea glass with driftwood. Select a wide, flat piece of wood as your base. Lightly trace a wave line or simple nautical motif across the front surface. Using clear waterproof adhesive, lay smooth pieces of pale green, aqua, and frosted white sea glass along the line to create a subtle mosaic inlay. Finish the piece by adding minimalist silver hooks underneath the sea glass design.

8. Asymmetrical Branch with Hanging Tags

Work with nature’s irregular forms by choosing an asymmetrical, multi-forked driftwood branch. Rather than forcing the branch into a straight line, mount it horizontally following its natural curve. Install small brass hooks along the main branch as well as the sturdier sub-branches. To add a personalized touch, hang small stamped wooden or brass tags above each hook labeled “Home,” “Car,” or “Mail” to keep the entire household organized.

9. Bleached Driftwood and White Clay Bead Rack

To fit Scandinavian-coastal or boho-inspired homes, pair pale driftwood with handmade clay details. Deeply bleach your chosen driftwood branch using a mild water-and-bleach soak, then let it dry thoroughly in direct summer sunlight to achieve a bright, ivory-toned finish. String handmade white terracotta or polymer clay beads onto thin cord loops attached to the mounting points. Add minimalist matte white metal hooks along the bottom edge for a serene, monochromatic look.

10. Recessed Shelving Unit with Driftwood Trim

Upgrade a standard wooden key box or shallow shadow box by framing it in raw driftwood twigs. Paint the interior of the shadow box a clean off-white or soft sky blue. Line the outer frame edges with thin, straight driftwood twigs glued tightly together. Mount a row of key hooks inside the recessed box to keep key sets neatly tucked away while displaying a decorative coastal frame on your entryway wall.

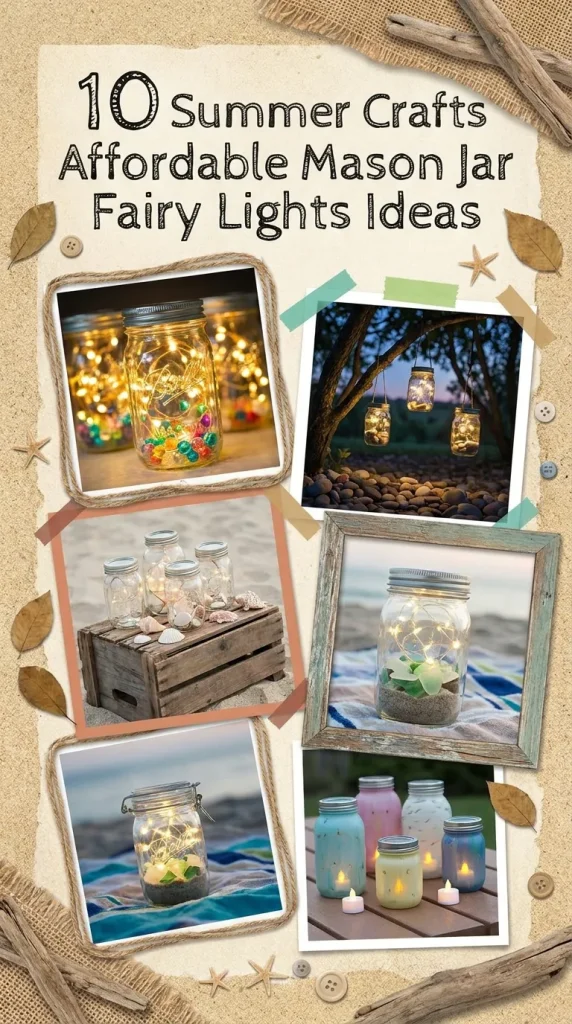
10 Summer Crafts Affordable Mason Jar Fairy Lights Ideas

Summer evenings invite us outside to linger on patios, porches, and backyards long after the sun goes down. Creating warm, inviting lighting doesn’t require expensive outdoor fixtures or complex wiring. Mason jars, paired with inexpensive warm-white LED fairy lights, offer one of the most versatile and budget-friendly foundations for DIY summer decor.

Whether you want to create magical table centerpieces, illuminate garden pathways, or hang glowing lanterns from porch beams, mason jars provide timeless rustic charm. Because battery-operated and solar-powered LED fairy light strands are widely available and extremely affordable, you can craft a whole set of custom lighting fixtures in an afternoon. Here are 10 creative, budget-friendly mason jar fairy light ideas to brighten your summer nights.

1. Frosted Glass Firefly Lanterns

Capture the nostalgic magic of catching fireflies on warm summer nights with a frosted glass finish. Lightly coat the outside of clean mason jars with a semi-translucent frosted glass spray paint or apply a layer of Mod Podge using a sponge brush for a soft, diffused look. Place a strand of micro fairy lights inside, securing the battery pack beneath the lid with adhesive tape. The frosted finish scatters the light, softening individual LED bulbs into a gentle, ethereal glow that mimics fireflies hovering inside a jar.

2. Twine-Wrapped Hanging Porch Lanterns

Turn standard glass jars into charming hanging lanterns using basic jute twine or macramé cord. Wrap twine tightly around the neck of the jar, creating a sturdy handle loop over the top for hanging from shepherd’s hooks, tree branches, or porch rafters. For added texture, wrap additional cord around the bottom or middle section of the jar in simple crisscross patterns. Drop in a fairy light strand, screw the lid ring on, and hang them around your outdoor living space for an instant ambient upgrade.

3. Pressed Summer Flower and Leaf Jars

Celebrate peak summer blooms by pressing flowers and leaves from your garden, then applying them directly to the inside or outside of your mason jars. Brush a thin layer of decoupage medium onto the jar, arrange your pressed petals—such as delicate ferns, cosmos, or pansies—and seal with another light coat. When the fairy lights are switched on inside, the translucent petals illuminate like stained glass, highlighting every vein and color variation in the floral arrangement.

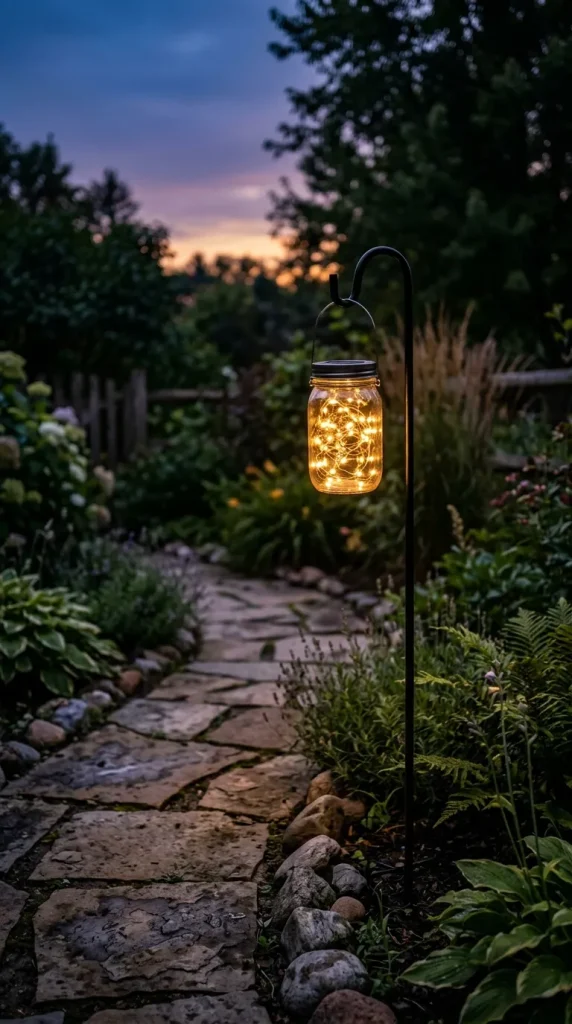
4. Solar-Powered Garden Pathway Stakes

For an automatic evening display that requires zero manual switches, swap standard mason jar lids for affordable solar top inserts designed specifically for canning jars. Insert a fairy light strand attached to the solar lid, then mount the jars onto metal garden stakes using sturdy wire jar handles. Stake them along garden walkways, porch steps, or patio edges. During the day, the solar panels charge in the summer sun, automatically turning on at dusk to guide your steps with a warm, magical trail of light.

5. Tinted Coastal Glass Lanterns

Infuse your outdoor lighting with coastal color by tinting plain clear jars in soft shades of seafoam green, ocean blue, or warm amber. Mix a few drops of food coloring with Mod Podge and a splash of water, pour the mixture inside the jar, and swirl until the interior walls are completely coated. Drain any excess and let it dry completely (or bake on low heat in the oven to set). When lit from within by micro fairy lights, the colored glass projects vibrant, warm hues across outdoor dining tables.

6. Beachcomber Sand and Shell Lanterns

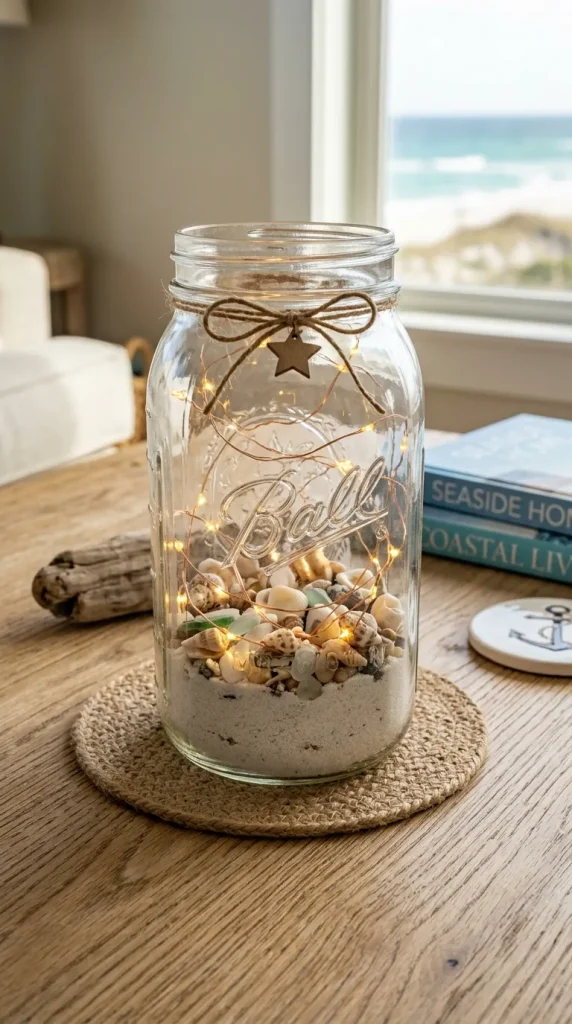
If you have a collection of small seashells, pebbles, or sea glass from seaside trips, turn them into rustic beach-themed lanterns. Fill the bottom two inches of a wide-mouth mason jar with clean white sand or fine gravel. Nestly lay small shells, tiny starfish, or polished beach stones on top of the sand bed. Intermingle a warm fairy light strand throughout the shells, coiling the excess wire neatly inside. This design looks just as charming as a sunny daytime accent as it does glowing softly after dusk.

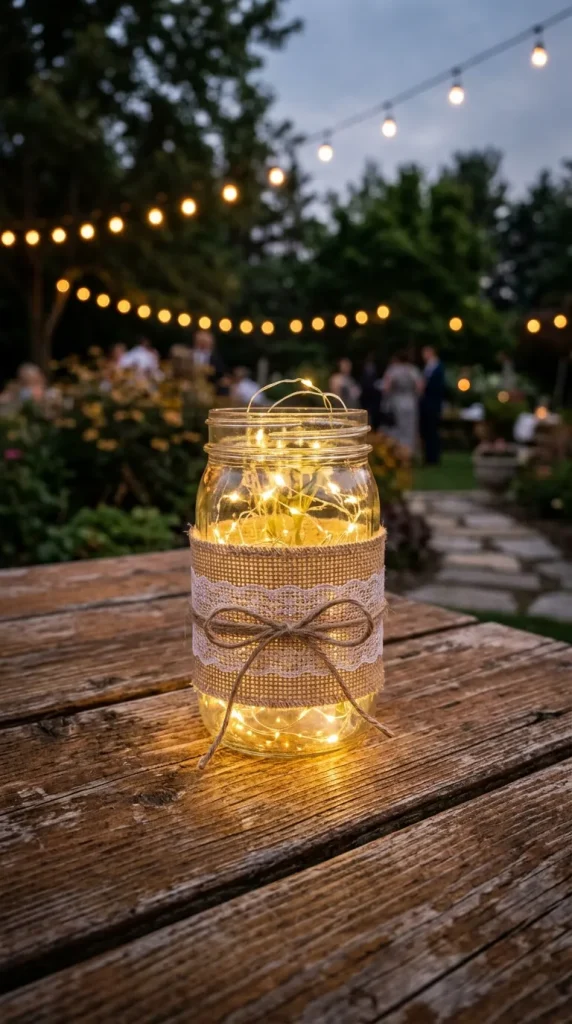
7. Rustic Burlap and Lace Table Centerpieces

Perfect for summer backyard barbecues, outdoor dinner parties, or rustic weddings, this idea pairs raw texture with delicate detail. Cut a wide strip of natural burlap to wrap around the middle of the mason jar, gluing it in place. Layer a narrower strip of vintage-style white lace down the center of the burlap. Tie a simple jute twine bow around the neck of the jar. The contrast between the rough burlap fiber, soft lace pattern, and glowing interior creates an instant centerpiece for wooden picnic tables.

8. Faux Stained Glass Mosaic Jars

Create rich, jewel-toned patterns on your outdoor tables using tissue paper or stained glass paint. Tear colorful tissue paper into small geometric pieces, then decoupage them onto the exterior of the jar in an overlapping mosaic pattern. Once dry, use black dimensional fabric paint to outline the shapes, mimicking traditional leaded glass seams. When you tuck fairy lights inside, the jar radiates vibrant, colorful light patterns onto surrounding surfaces.

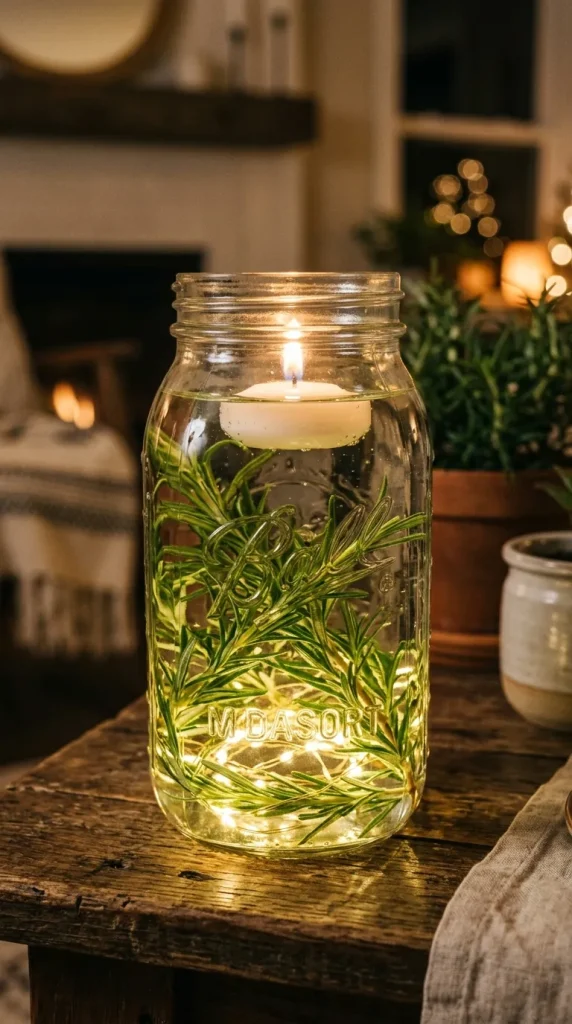
9. Floating Candle and Fairy Light Hybrid Jars

Combine the soft motion of water with the reliable sparkle of wire lights for a refreshing summer aesthetic. Place a submersible or waterproof fairy light strand at the bottom of a large gallon or quart mason jar. Fill three-quarters of the jar with clean water, adding a few sprigs of fresh rosemary, eucalyptus, or lemon slices for a subtle botanical touch. Float a small white tea light candle on the surface of the water for a layered lighting effect that blends flickering flame with twinkling LEDs.

10. Etched Geometric Constellation Jars

Bring the clear summer night sky down to your tabletop with custom constellation patterns. Coat the exterior of a mason jar with black or dark navy blue matte spray paint. Once fully dry, use a small nail, stylus, or wooden skewer to scrape or poke tiny holes into the painted surface, forming real or imagined star patterns and constellations. When you place fairy lights inside, light beams shine sharply through the tiny pinpricks, casting star-like dots onto nearby walls and tabletops.

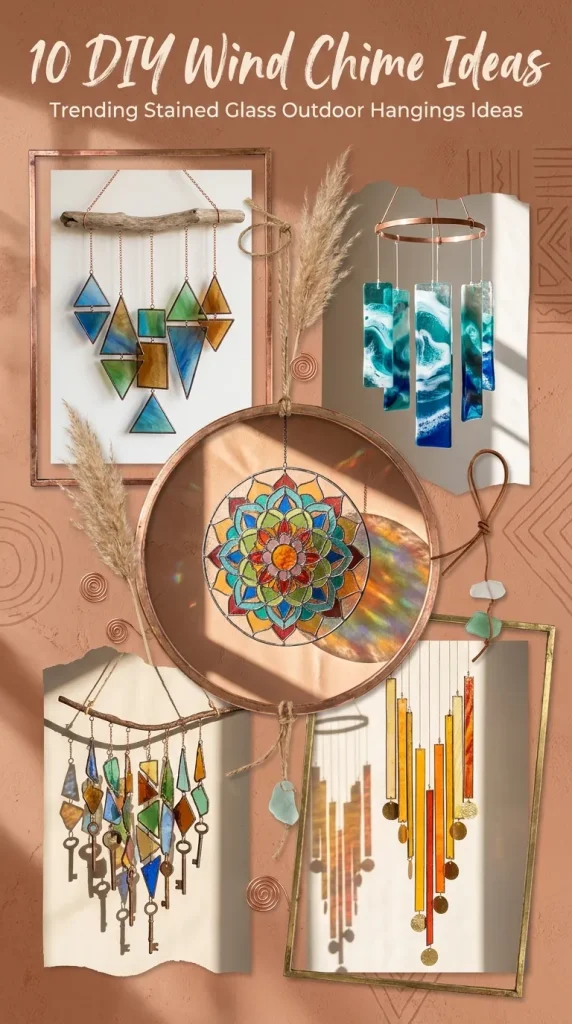
10 DIY Wind Chime Ideas Trending Stained Glass Outdoor Hangings Ideas

There is a unique magic in capturing both sight and sound in outdoor garden design. While traditional metal or wooden chimes offer pleasing auditory tones, glass outdoor hangings elevate backyard aesthetic appeal by acting as suncatchers and musical instruments all at once.

Stained glass wind chimes are sweeping outdoor decor trends. The brilliant interplay of sunlight streaming through translucent colored glass creates dancing reflections across porches and patios, while gentle breezes produce soothing, delicate clinks. Whether using traditional leaded glass techniques or accessible upcycled crafts, creating a custom stained glass chime is an achievable weekend DIY project.

Here are 10 trending DIY stained glass outdoor wind chime ideas to elevate outdoor living spaces, ranging from rustic bohemian looks to modern geometric designs.

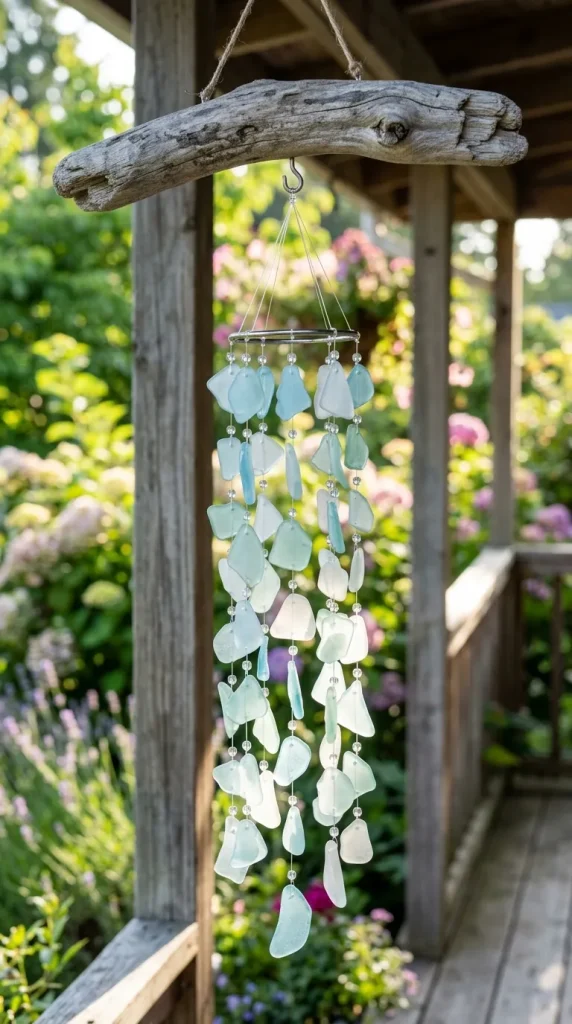
1. Upcycled Sea Glass Cascade

Drawing inspiration from coastal aesthetics, this project uses tumbled ocean glass or faux sea glass pieces hung vertically from a piece of weathered driftwood.

  • The Look: Soft, frosted pastel tones (pale blues, seafoam greens, clear white) strung on durable monofilament fishing line.
  • The Sound: Soft, rhythmic, gentle clinking reminiscent of waves lapping against pebbles.
  • DIY Tip: Drill small holes into beach-tumbled glass using a diamond drill bit submerged in water to prevent fracturing, then string them at varying lengths to create a stepped waterfall effect.

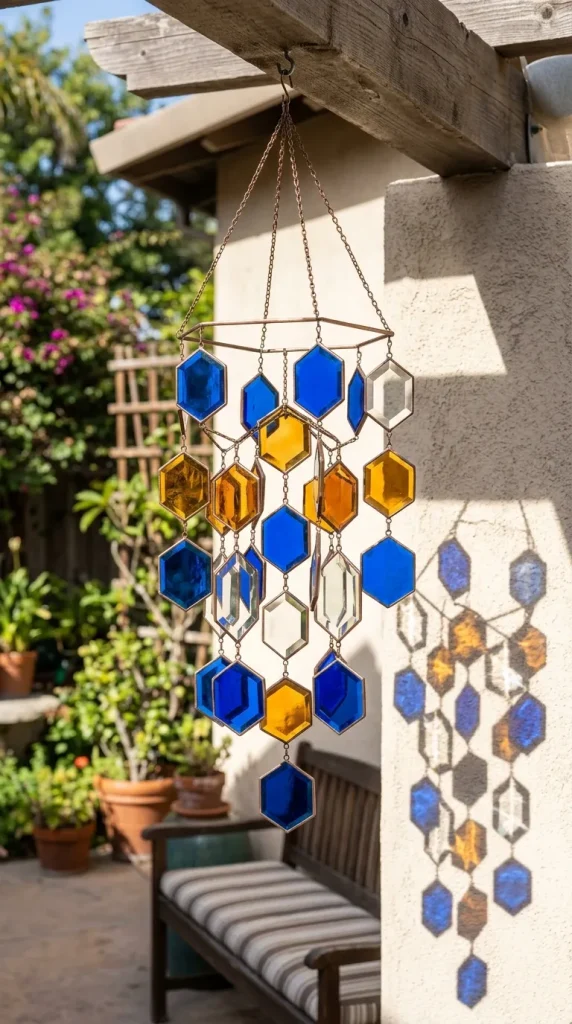
2. Geometric Hexagon Prism Mobile

Modern backyard design leans heavily into crisp geometric shapes. A geometric glass mobile utilizes pre-cut hexagonal glass tiles wrapped in copper foil and soldered into a staggered 3D tiered arrangement.

  • The Look: Clean lines, sharp angles, and vibrant amber, cobalt, and clear bevel panel combinations.
  • The Sound: Crisp, high-pitched metallic-glass tinkling as the edges lightly contact each other.
  • DIY Tip: Use a circular brass ring as your top anchor frame. Suspend the glass panels using fine bronze chain links rather than string for a sleek, industrial-chic finish.

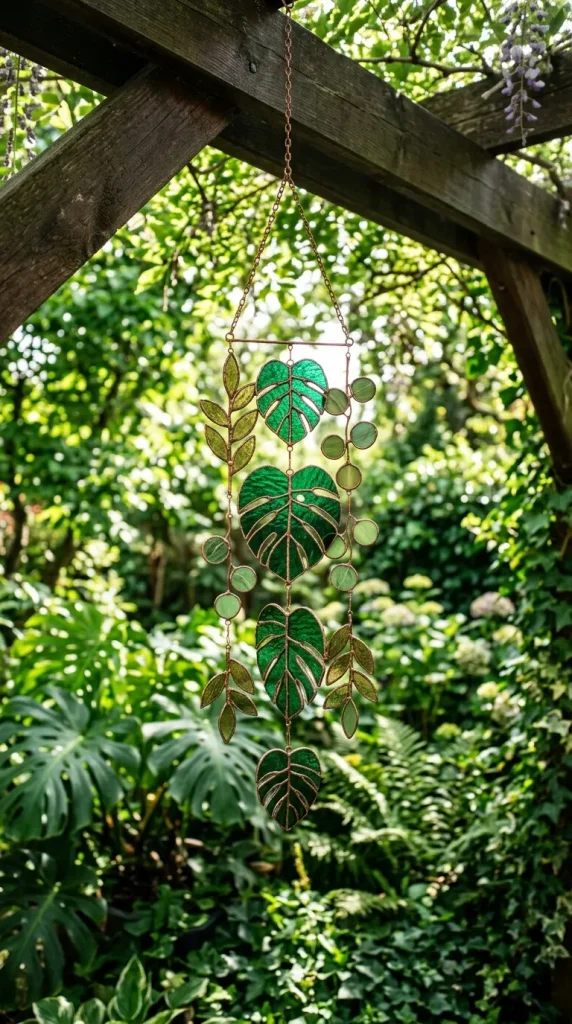
3. Vibrant Botanical Leaf & Floral Strings

Bring natural organic shapes into outdoor decor by creating stained glass panels shaped like monstera leaves, eucalyptus sprigs, or cheerful sun blossoms.

  • The Look: Deep emeralds, olive tones, and warm ruby hues flowing downward in a loose, vine-like structure.
  • The Sound: Subtle, light notes ideal for quiet garden nooks.
  • DIY Tip: Copper foil (Tiffany technique) works best here. Foil the curved edges of your cut leaf shapes, solder tiny brass rings onto the top and bottom of each piece, and connect them in vertical chains.

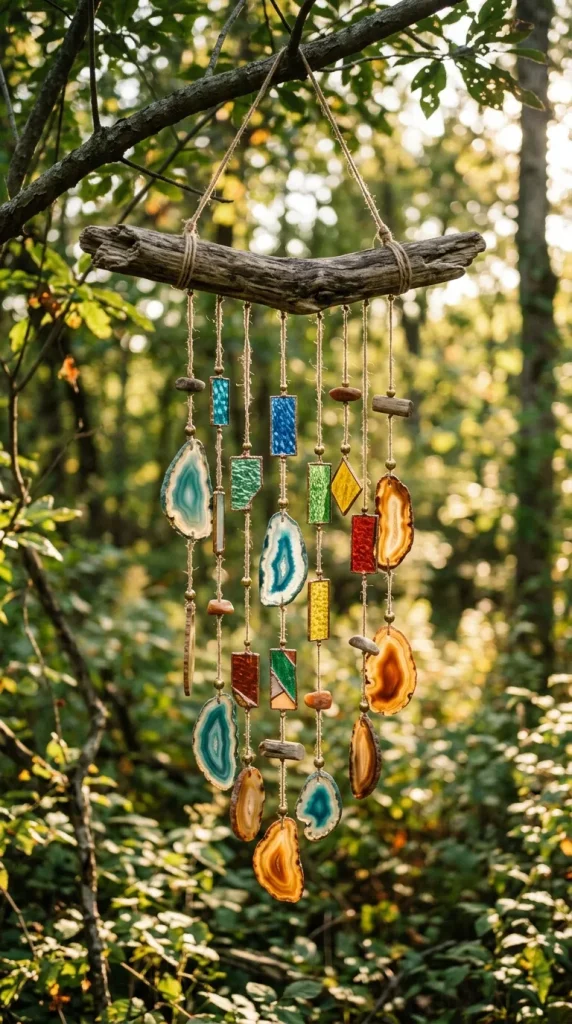
4. Vintage Agate Slice & Glass Chime

Combining raw polished mineral slices with colorful stained glass creates an enchanting, bohemian garden piece.

  • The Look: Earthy tones paired with vivid stained glass offcuts. Translucent agate centers radiate light alongside jewel-toned glass geometric panels.
  • The Sound: Deep, resonant, satisfying tones due to the density of the agate slices hitting the glass.
  • DIY Tip: Wrap the outer perimeters of thin agate slices with copper foil, solder hanging loops directly to the foil, and alternate them with stained glass rectangles on a rustic wooden log base.

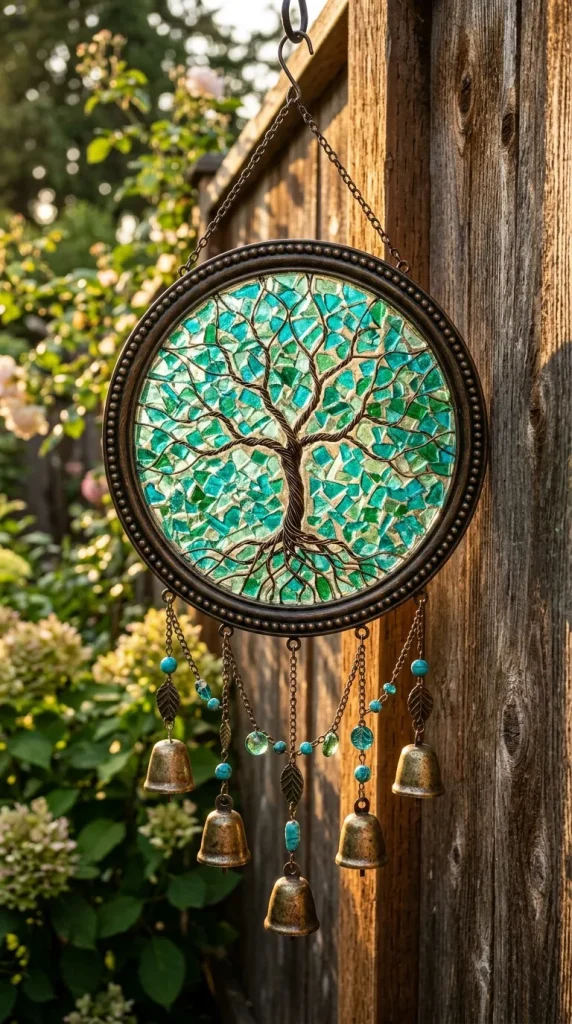
5. Mosaic Resin Suncatcher Chime

For DIY enthusiasts without glass-cutting or soldering equipment, non-traditional faux stained glass offers an easy alternative using UV resin or epoxy alongside crushed glass mosaic tiles.

  • The Look: Rich, stained-glass panel effects housed inside hollow metal silhouetted frames (like moon crescents or tree-of-life outlines).
  • The Sound: Pure, bell-like chimes if suspended alongside small accent brass bells.
  • DIY Tip: Fill laser-cut metal or wooden frame outlines with clear resin mixed with transparent glass paints or crushed colored glass bits. Drill tiny hanging holes once cured.

6. Rainbow Waterfall Bar Chime

Minimalist yet high-impact, a bar-style wind chime arranges long, narrow rectangles of stained glass in chromatic order across a horizontal bar.

  • The Look: A striking horizontal gradient spanning red, orange, yellow, green, blue, and violet.
  • The Sound: A continuous, sweeping cascade of sound as wind passes along the horizontal line.
  • DIY Tip: Mount a sturdy copper tube or hardwood rod horizontally. Hang equal-length glass strips close together (about a quarter-inch apart) so even light breezes trigger a gentle domino-effect sound.

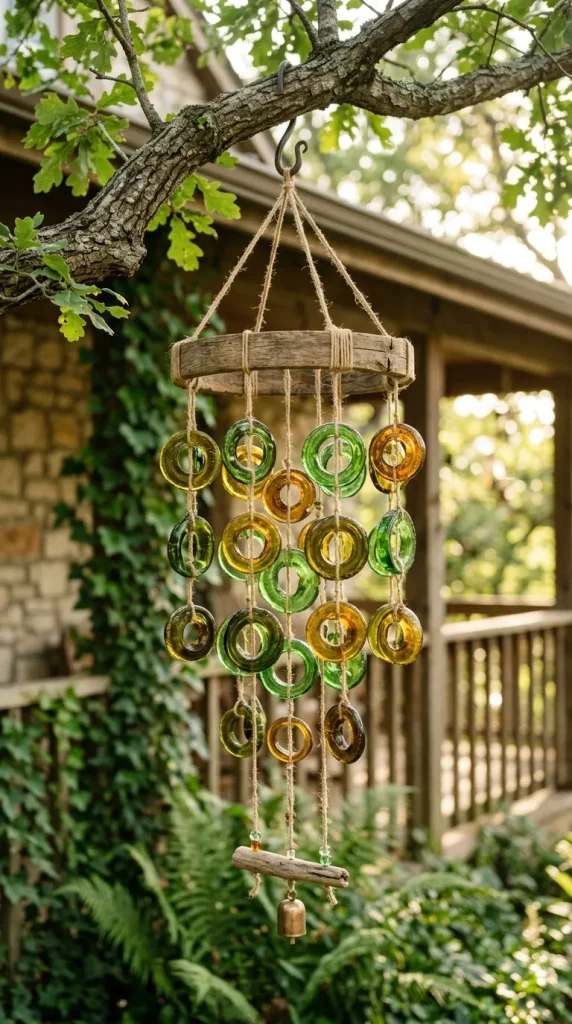
7. Vintage Wine Bottle Cut Ring Chime

Upcycling old wine or liquor bottles made of green, amber, and cobalt glass is an eco-friendly trend dominating home gardens.

  • The Look: Rustic, farmhouse-chic design featuring stacked glass rings cut from colored glass bottles.
  • The Sound: Rich, hollow, soothing tones.
  • DIY Tip: Use a glass bottle cutter tool to slice bottles into 1-inch rings. Smooth the raw edges with silicone carbide sandpaper, drill side holes, and cascade them around an upcycled wooden barrel hoop.

8. Celestial Sunburst & Moon Mobile

Celestial motifs remain a timeless favorite for patio accents. This style features a center stained glass sun face flanked by dangling crescent moons and star panels.

  • The Look: Golden yellows, deep blues, iridescent whites, and shimmering glass bevels that catch sunlight at all hours.
  • The Sound: Bright, ethereal chimes.
  • DIY Tip: Incorporate small glass prisms at the very bottom of each vertical chain to cast rainbow light spots across your patio walls when the sun hits directly.

9. Driftwood & Glass Fragment Garland

If you have leftover glass scraps from prior stained glass crafts, this random-fragment style turns leftover pieces into outdoor art.

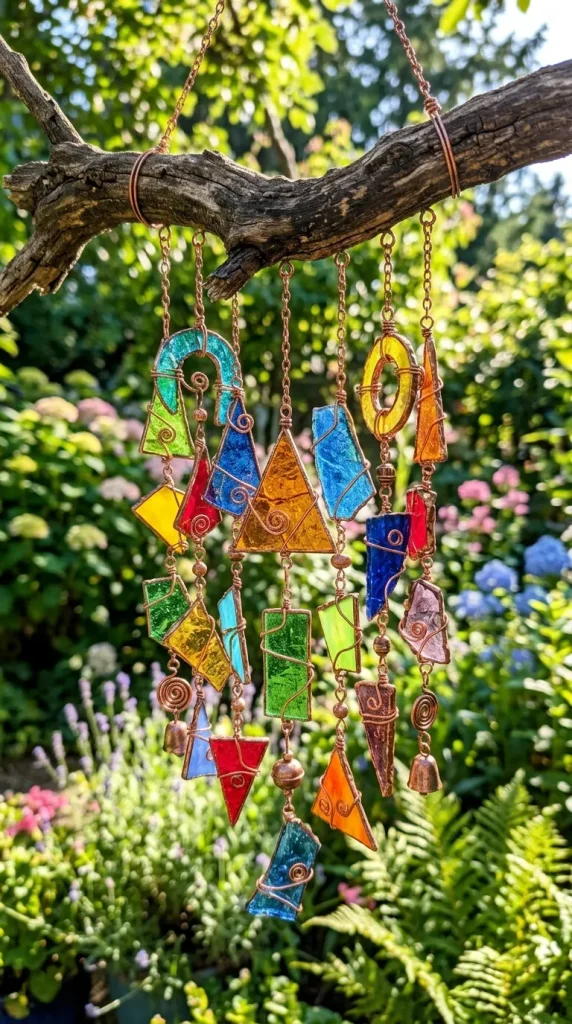
  • The Look: A whimsical, eclectic art piece with mismatched shapes, textures, and colors cascading from a thick branch.
  • The Sound: Playful, light tinkling.
  • DIY Tip: Wire-wrap glass scraps using silver-plated craft wire if you want to avoid soldering. Twist the wire securely around the edges to form artistic cages, then tie them to the branch using outdoor-rated nylon cord.

10. Chime with Brass Temple Bells

Combine the visual radiance of stained glass suncatchers with classic auditory garden elements by integrating small vintage brass bells or chimes alongside stained glass panels.

  • The Look: Antique, worldly charm featuring stained glass main panels suspended above tiny brass hanging bells.
  • The Sound: A delightful blend of deep metallic chiming and crisp glass notes.
  • DIY Tip: Place the stained glass panel centrally as a main suncatcher, and suspend tiny brass bells at the end of each glass strand so they act as weight clappers when the wind moves.

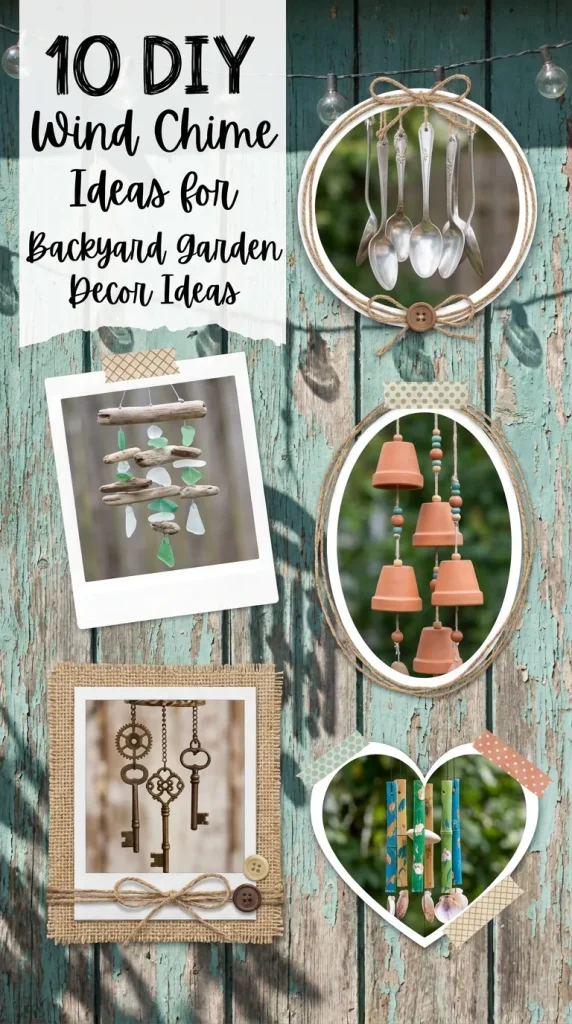
10 DIY Wind Chime Ideas for Backyard Garden Decor Ideas

There is nothing quite like step into a garden that delights all the senses. While lush flora, vibrant blossoms, and artful hardscaping captivate the eyes, adding gentle auditory elements takes outdoor living to an entirely new level. Wind chimes bring melodic charm, peaceful energy, and a touch of whimsical personality to any backyard sanctuary. Best of all, crafting your own wind chimes allows you to blend artistic creativity with eco-friendly upcycling.

Whether you want to repurpose antique treasures, gather elements from nature, or introduce vivid bursts of color to your patio, these 10 DIY wind chime ideas will help you transform simple materials into charming garden masterpieces.

1. Upcycled Sea Glass & Driftwood Wind Chime

Bring the tranquil spirit of the ocean to your backyard with a sea glass and driftwood wind chime. The soft, translucent colors of frosted glass paired with weathered wood create an airy, coastal aesthetic.

  • Materials: Weathered driftwood branch, sea glass pieces (drilled or wrapped in thin jewelry wire), strong monofilament cord or twine, and eye hooks.
  • How to Craft: Attach eye hooks evenly across the bottom of the driftwood branch. Wrap fine craft wire around each piece of sea glass, linking them sequentially into cascading strands of varying lengths. Tie each strand to an eye hook. Hang the branch from a sturdy rope for a soft, shimmering chime that catches both light and breeze.

2. Vintage Teacup & Spoon Cascade

Infuse your garden with Victorian charm or cottagecore romance using vintage china and mismatched silver spoons. When the wind moves, the gentle clinking of metal against porcelain produces a soft, cozy sound.

  • Materials: Antique teacup and matching saucer, silver-plated spoons, delicate chains, a outdoor craft drill, and jump rings.
  • How to Craft: Carefully drill a hole through the center of the saucer and teacup base using a tile or glass drill bit. Thread a chain through both, securing the teacup below the saucer. Drill small holes around the rim of the saucer or attach chains to the spoon handles, letting them suspend around the teacup to act as clappers and wind catchers.

3. Rustic Clay Pot & Wooden Bead Chime

Miniature terra cotta pots aren’t just for plants—they also make delightfully earthy, resonant wind chimes. Cascading clay pots create a warm, hollow chime that blends seamlessly into lush foliage.

  • Materials: 3 to 5 mini clay pots (varying sizes), wooden beads, weather-resistant jute cord, and outdoor acrylic paint.
  • How to Craft: Paint the pots with bohemian geometric patterns or leave them raw for a natural look. Knot a thick piece of twine, string a large wooden bead, and thread it up through the drain hole of the smallest pot. Continue threading upwards through progressively larger pots, placing knots and beads between them so they nest slightly inside one another without fully overlapping.

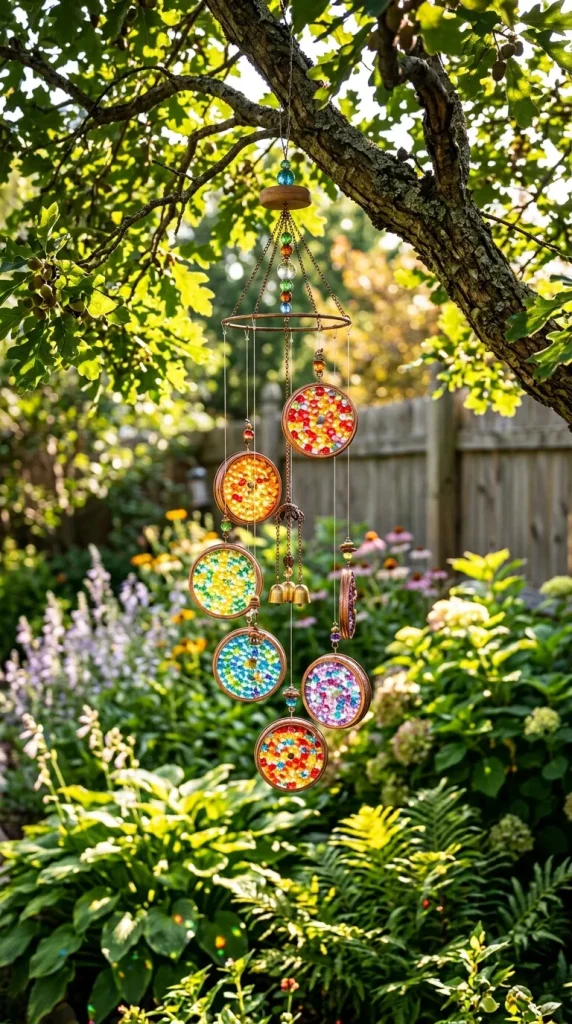
4. Mason Jar Lid Suncatcher Chime

Combine radiant sunlight with gentle movement by turning canning jar rings into colorful suncatcher chimes. This budget-friendly craft brightens shady pergola corners and porch eaves.

  • Materials: Mason jar outer lid rings, translucent melted pony beads or stained glass inserts, fishing line, and a wooden craft hoop.
  • How to Craft: Melt colorful plastic pony beads inside mason jar rings in an oven or toaster oven (in a well-ventilated space) to create faux stained glass disks. Once cool, drill a tiny hole at the top of each ring. Tie varying lengths of clear fishing line to the rings and suspend them in a circle around a wooden embroidery hoop.

5. Coastal Shell & Bamboo Wind Chime

If you love natural, organic textures, a bamboo and seashell wind chime offers a soothing, rustling sound reminiscent of tropical islands and breezy shorelines.

  • Materials: Sturdy bamboo stalk cut to size, mixed seashells (scallop, flat clams, or drilled spiral shells), hemp cord, and a small drill.
  • How to Craft: Drill small pilot holes through the top edge of your seashells. Drill horizontal holes through a main support segment of bamboo. Thread hemp cord through the shells, knotting between each to keep them spaced out. Secure the shell strings along the bamboo bar to create a dense curtain of shells that soft-clinks with every gust of air.

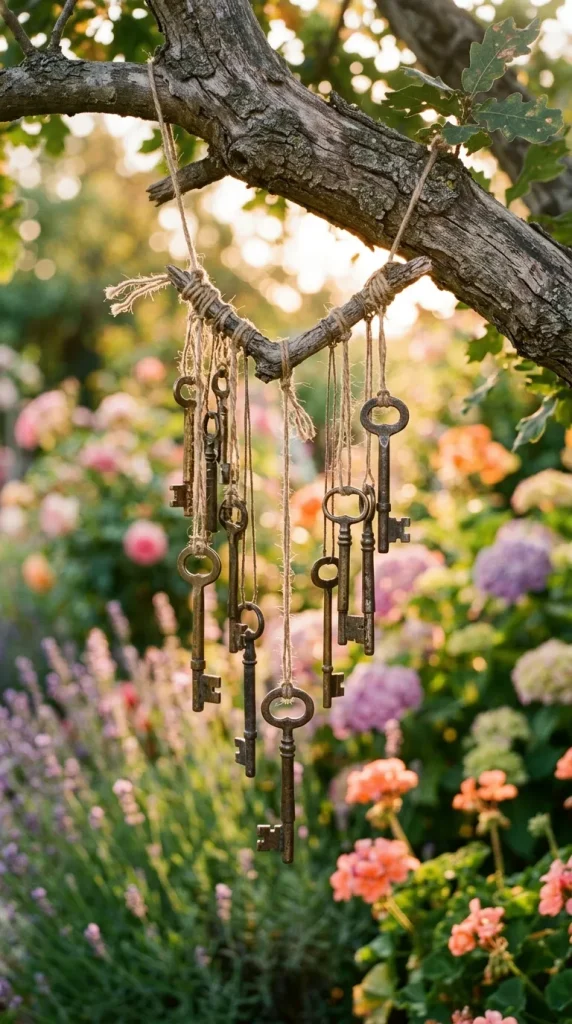
6. Antique Skeleton Key & Chain Chime

Give forgotten attic keys a new life in a vintage-inspired hardware chime. Keys produce a bright, metallic chime that is both visually captivating and musically delightful.

  • Materials: Collection of vintage brass or iron skeleton keys, old metal chandelier frame or sturdy tree branch, and metal jewelry chain links.
  • How to Craft: Clean and clear-coat your collected keys to prevent excessive rust, or leave them distressed for a rustic patina. Attach varying lengths of metal chain to each key. Loop the top of each chain around an old circular metal ring or a gnarly oak branch, positioning the keys close enough so they tap against each other when swayed by the wind.

7. Painted Tin Can Whimsical Mobile

A fantastic weekend project to complete with children, upcycled tin cans turn everyday household recycling into vibrant outdoor pop-art wind chimes.

  • Materials: Empty tin cans in multiple sizes, bright outdoor acrylic paints, glitter, metal washers, and nylon cord.
  • How to Craft: Thoroughly clean tin cans and sand any sharp edges. Paint each can in bold stripes, polka dots, or floral motifs. Drill a hole in the center of each can bottom. Thread cord through the cans with metal washers suspended inside to act as internal clappers. Nest the smaller cans inside larger ones or hang them side-by-side from a painted wooden bar.

8. Modern Geometric Brass Pipe Chime

For contemporary homes and minimalist gardens, a sleek brass pipe chime delivers rich, melodious tones similar to professional musical wind chimes.

  • Materials: Hollow brass or copper tubing (cut into different lengths), hardwood block, braided nylon rope, and heavy wooden ball (for the clapper).
  • How to Craft: Cut brass pipes into cascading lengths to achieve different musical notes. File the edges smooth and drill two horizontal holes near the top of each pipe. Thread cord through the pipes and mount them symmetrically to a central wooden disk. Hang a wooden sphere in the center surrounded by a wind sail at the bottom to catch the breeze cleanly.

9. Upcycled Wine Bottle & Crystal Chime

Sleek, colorful, and sophisticated, bottle wind chimes cast gorgeous reflections while providing a deep, resonant tone when struck.

  • Materials: Glass wine bottle (bottom cut off using a glass bottle cutter), glass beads, hanging chandelier crystals, and a wooden ring clapper.
  • How to Craft: Safely cut the bottom off a colored wine bottle and smooth the glass edge with sandpaper. Thread a chain through the cork neck, suspending a wooden ring inside the belly of the bottle to act as the striker, and extend the chain below with a heavy hanging crystal wind sail. When the wind moves the crystal, the wooden ring strikes the inner glass walls smoothly.

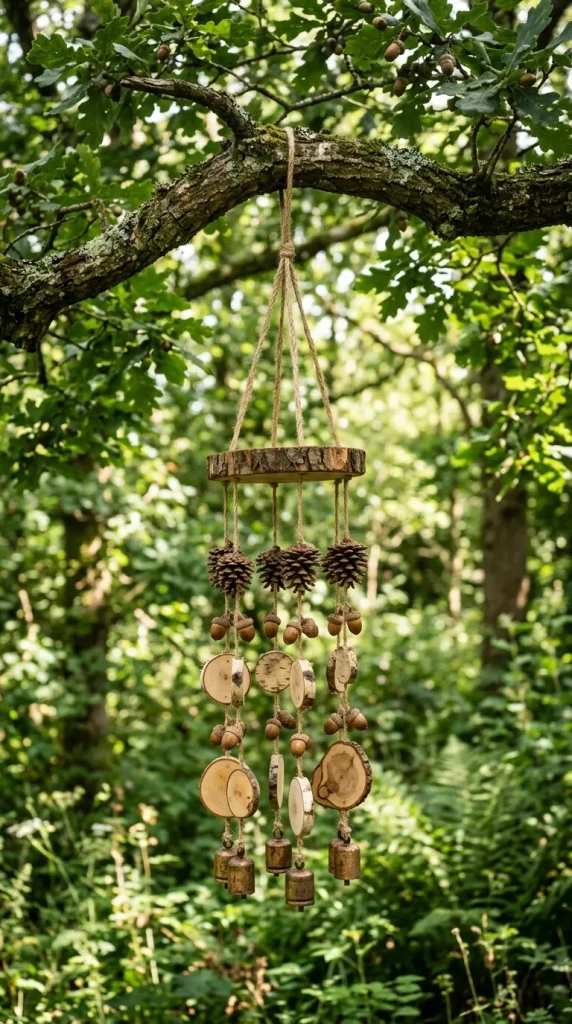
10. Woodland Pinecone & Acorn Chime

Embrace forest-inspired charm with an all-natural wind chime made from woodland finds. While quieter than metal or glass, this chime adds subtle rustling sounds and rustic warmth to garden bowers.

  • Materials: Pinecones, acorn caps, wooden slice disks, jute twine, and a sturdy fallen branch.
  • How to Craft: Collect pinecones of various sizes, wrapping wire or twine around their top scales. Drill small holes through wooden branch slices and thread them alongside pinecones onto strands of natural jute. Tie multiple strands across a thick, mossy branch. Add a protective clear matte sealer to protect the natural elements from weather exposure.

Conclusion

Creating your own garden wind chimes is an enjoyable blend of artistic expression, sustainable upcycling, and landscape design. Whether you prefer the gentle chime of vintage silverware or the quiet rustle of sea shells, these projects offer an easy way to personalize your backyard. Pick your favorite design, gather your materials, and let the gentle breeze bring continuous music and movement to your outdoor haven.