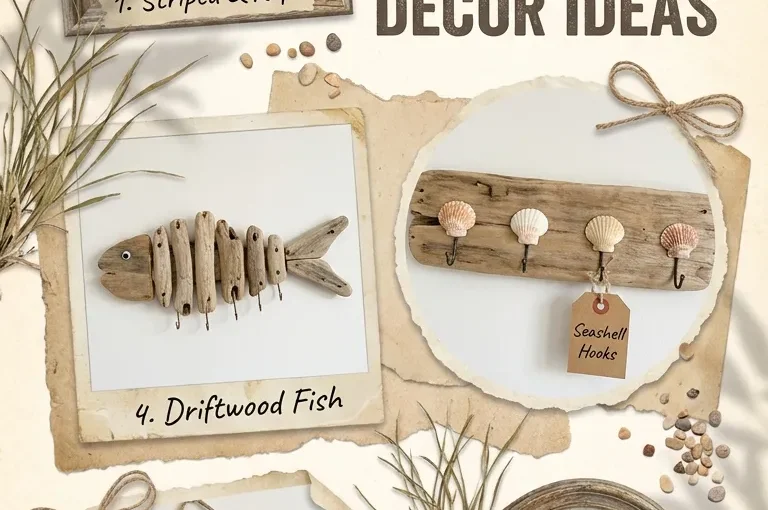
10 Summer Crafts Coastal Driftwood Key Holder Decor Ideas

Summer is the ideal season to refresh home entryways with functional, ocean-inspired decor. Entryways and mudrooms often get cluttered with daily essentials like keys, sunglasses, and dog leashes. Combining utility with coastal charm, a DIY driftwood key holder serves as both an organized storage solution and a serene, summer-themed art piece.

Driftwood brings a distinct tactile quality into the home. Sculpted by ocean currents, salt water, and sun, each piece features unique curves, distressed grain patterns, and sun-bleached tones. By fitting these natural branches with simple metal hooks, nautical rope, or subtle painted accents, you can transform simple shoreline finds into purposeful decor.

Whether you lean toward modern minimalism, rustic cottage style, or colorful coastal accents, these 10 DIY coastal driftwood key holder ideas will help you craft a organized, welcoming entryway.

1. The Single Plank Brass Hook Key Holder

Simplicity is key when highlighting the natural beauty of weathered wood. Select a relatively flat, wide driftwood plank with smooth, sun-bleached edges. Sand the surface lightly to remove loose debris while retaining the aged patina. Secure four to five vintage brass or antique bronze cup hooks along the bottom edge, spaced evenly apart. Mount the plank flush to the wall using hidden flush-mount brackets. The combination of warm brass hardware and grey-toned weathered wood creates an effortless, elevated look right by the front door.

2. Nautical Jute Knot & Branch Key Organizer

For an authentic nautical aesthetic, combine driftwood with heavy natural fibers. Choose a sturdy, medium-thickness driftwood branch with interesting knots or slight bends. Wrap natural jute or Manila rope tightly around both ends of the branch, securing the wraps with wood glue on the backside. Extend the rope upward to form a hanging loop that suspends the branch from a single decorative wall peg. Screw sturdy black iron hooks into the underside of the branch to hold heavy key rings and lanyards.

3. Striped Coastal Paint Accent Board

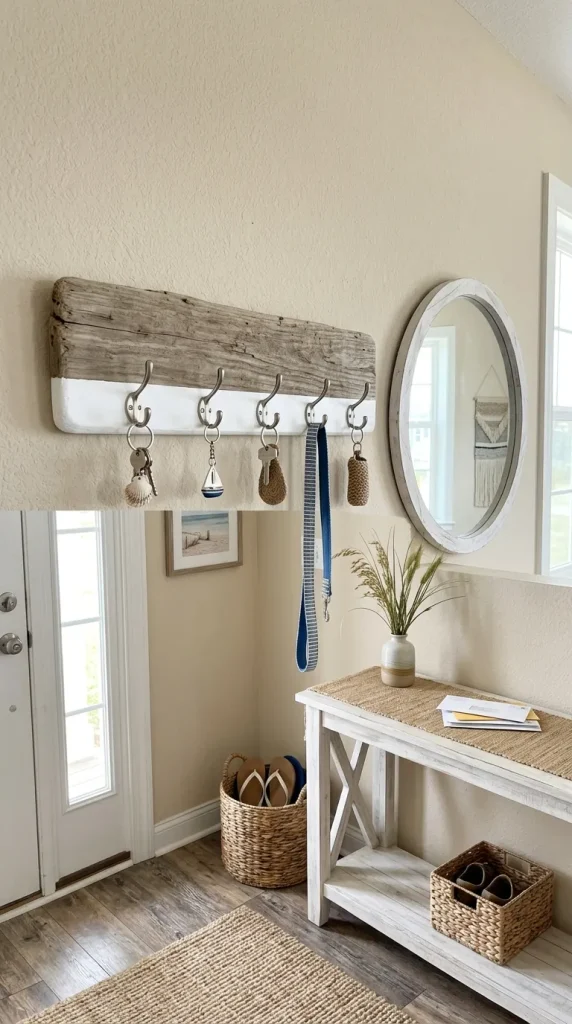
If you want to introduce a pop of summer color into your entryway, a partial dip-paint effect works brilliantly. Take a flat driftwood board and mask off the bottom third using painter’s tape. Apply two coats of crisp white, soft aqua, or ocean blue matte acrylic paint to the lower section, leaving the top two-thirds in its raw, weathered state. Once dry, install simple white or brushed nickel hooks along the painted band. The clean, painted line creates a modern contrast against the textured wood grain.
4. Driftwood House Silhouette Key Rack

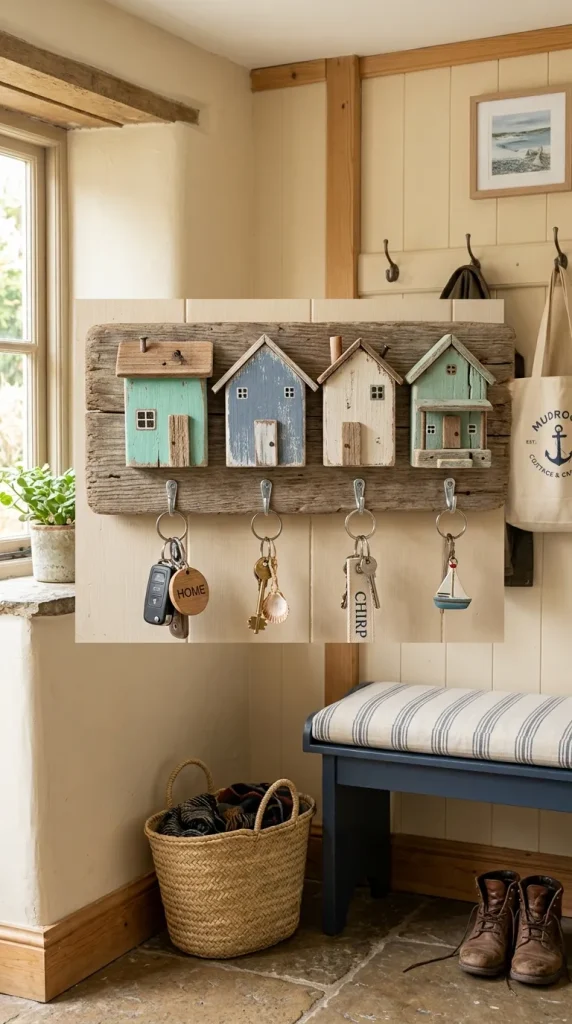
Capture the cozy charm of seaside cottages by constructing small wooden cottage silhouettes. Gather three to four small, blocky pieces of driftwood or cut thicker pieces into simple house shapes with pitched roofs. Paint the fronts in muted coastal shades—such as mist grey, sage green, sandy beige, and washed white. Mount these mini houses in a row on a sturdy driftwood base plank, adding a tiny metal hook beneath each cottage silhouette to designate keys for different family members.
5. Cast Iron Anchor & Driftwood Key Bar

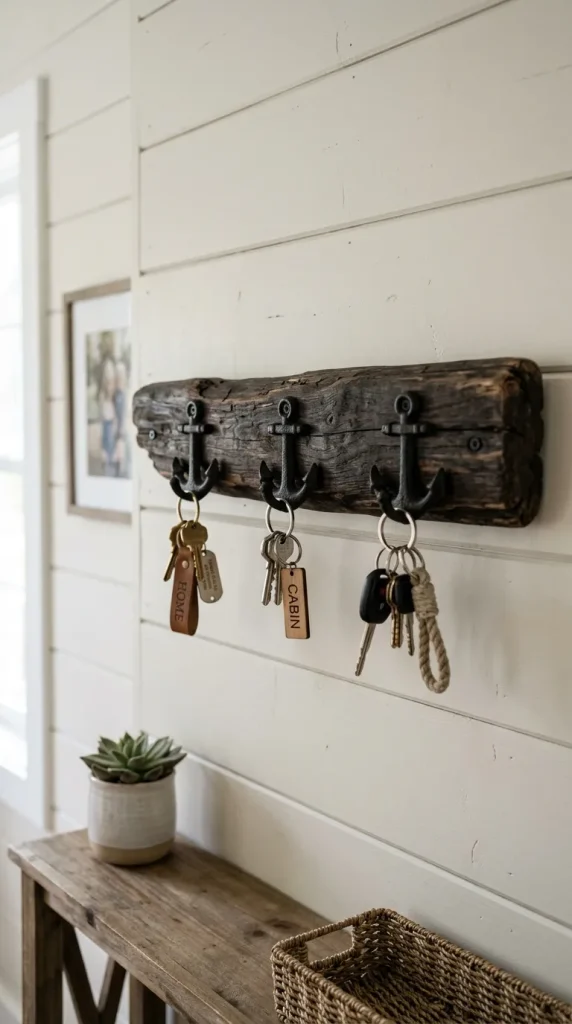
Anchor motifs are a quintessential coastal design choice that adds weight and structure to light driftwood. Select a solid, dark driftwood branch that can support heavier hardware. Mount two or three small cast iron anchor-shaped hooks directly onto the front face of the wood. The heavy black iron provides a rustic contrast against the soft grey and tan tones of the salt-cured wood, making this piece durable enough to hold heavy key sets, dog leashes, and small totes.
6. Stacked Multi-Layer Driftwood Key Shelf

For entryways needing extra organization, a multi-layered design offers both key storage and a small display ledge. Join two or three flat driftwood planks vertically using wood glue and small metal mending plates on the back. Position a slightly wider plank horizontally across the middle to serve as a narrow floating shelf for mail or sunglasses. Attach small cup hooks along the lower plank to keep your keys organized and off the counter.

7. Sea Glass & Driftwood Mosaic Key Holder

Incorporate soft, tumbled beach treasures by blending sea glass with driftwood. Select a wide, flat piece of wood as your base. Lightly trace a wave line or simple nautical motif across the front surface. Using clear waterproof adhesive, lay smooth pieces of pale green, aqua, and frosted white sea glass along the line to create a subtle mosaic inlay. Finish the piece by adding minimalist silver hooks underneath the sea glass design.

8. Asymmetrical Branch with Hanging Tags

Work with nature’s irregular forms by choosing an asymmetrical, multi-forked driftwood branch. Rather than forcing the branch into a straight line, mount it horizontally following its natural curve. Install small brass hooks along the main branch as well as the sturdier sub-branches. To add a personalized touch, hang small stamped wooden or brass tags above each hook labeled “Home,” “Car,” or “Mail” to keep the entire household organized.

9. Bleached Driftwood and White Clay Bead Rack

To fit Scandinavian-coastal or boho-inspired homes, pair pale driftwood with handmade clay details. Deeply bleach your chosen driftwood branch using a mild water-and-bleach soak, then let it dry thoroughly in direct summer sunlight to achieve a bright, ivory-toned finish. String handmade white terracotta or polymer clay beads onto thin cord loops attached to the mounting points. Add minimalist matte white metal hooks along the bottom edge for a serene, monochromatic look.

10. Recessed Shelving Unit with Driftwood Trim

Upgrade a standard wooden key box or shallow shadow box by framing it in raw driftwood twigs. Paint the interior of the shadow box a clean off-white or soft sky blue. Line the outer frame edges with thin, straight driftwood twigs glued tightly together. Mount a row of key hooks inside the recessed box to keep key sets neatly tucked away while displaying a decorative coastal frame on your entryway wall.

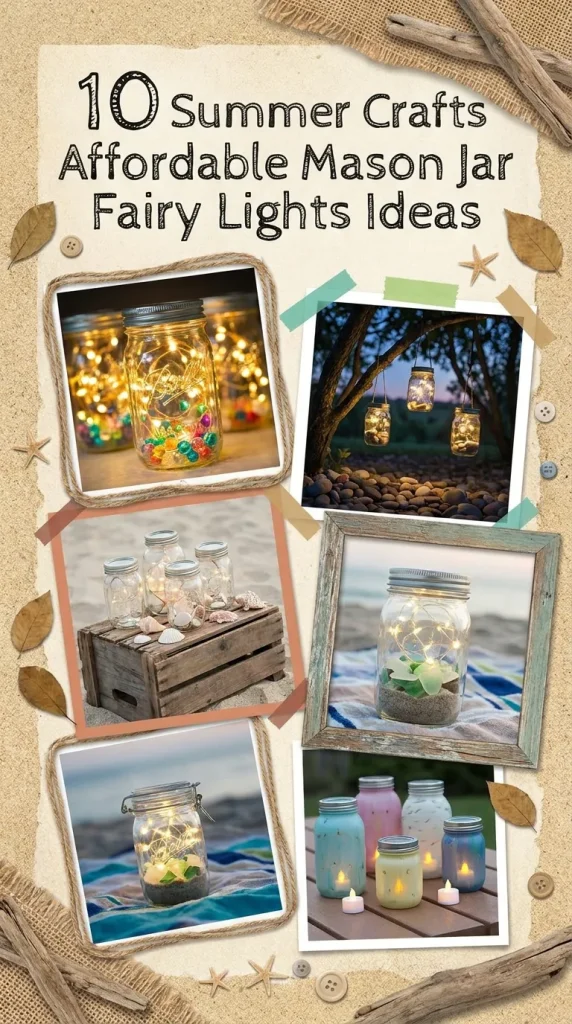
10 Summer Crafts Affordable Mason Jar Fairy Lights Ideas

Summer evenings invite us outside to linger on patios, porches, and backyards long after the sun goes down. Creating warm, inviting lighting doesn’t require expensive outdoor fixtures or complex wiring. Mason jars, paired with inexpensive warm-white LED fairy lights, offer one of the most versatile and budget-friendly foundations for DIY summer decor.

Whether you want to create magical table centerpieces, illuminate garden pathways, or hang glowing lanterns from porch beams, mason jars provide timeless rustic charm. Because battery-operated and solar-powered LED fairy light strands are widely available and extremely affordable, you can craft a whole set of custom lighting fixtures in an afternoon. Here are 10 creative, budget-friendly mason jar fairy light ideas to brighten your summer nights.

1. Frosted Glass Firefly Lanterns

Capture the nostalgic magic of catching fireflies on warm summer nights with a frosted glass finish. Lightly coat the outside of clean mason jars with a semi-translucent frosted glass spray paint or apply a layer of Mod Podge using a sponge brush for a soft, diffused look. Place a strand of micro fairy lights inside, securing the battery pack beneath the lid with adhesive tape. The frosted finish scatters the light, softening individual LED bulbs into a gentle, ethereal glow that mimics fireflies hovering inside a jar.

2. Twine-Wrapped Hanging Porch Lanterns

Turn standard glass jars into charming hanging lanterns using basic jute twine or macramé cord. Wrap twine tightly around the neck of the jar, creating a sturdy handle loop over the top for hanging from shepherd’s hooks, tree branches, or porch rafters. For added texture, wrap additional cord around the bottom or middle section of the jar in simple crisscross patterns. Drop in a fairy light strand, screw the lid ring on, and hang them around your outdoor living space for an instant ambient upgrade.

3. Pressed Summer Flower and Leaf Jars

Celebrate peak summer blooms by pressing flowers and leaves from your garden, then applying them directly to the inside or outside of your mason jars. Brush a thin layer of decoupage medium onto the jar, arrange your pressed petals—such as delicate ferns, cosmos, or pansies—and seal with another light coat. When the fairy lights are switched on inside, the translucent petals illuminate like stained glass, highlighting every vein and color variation in the floral arrangement.

4. Solar-Powered Garden Pathway Stakes

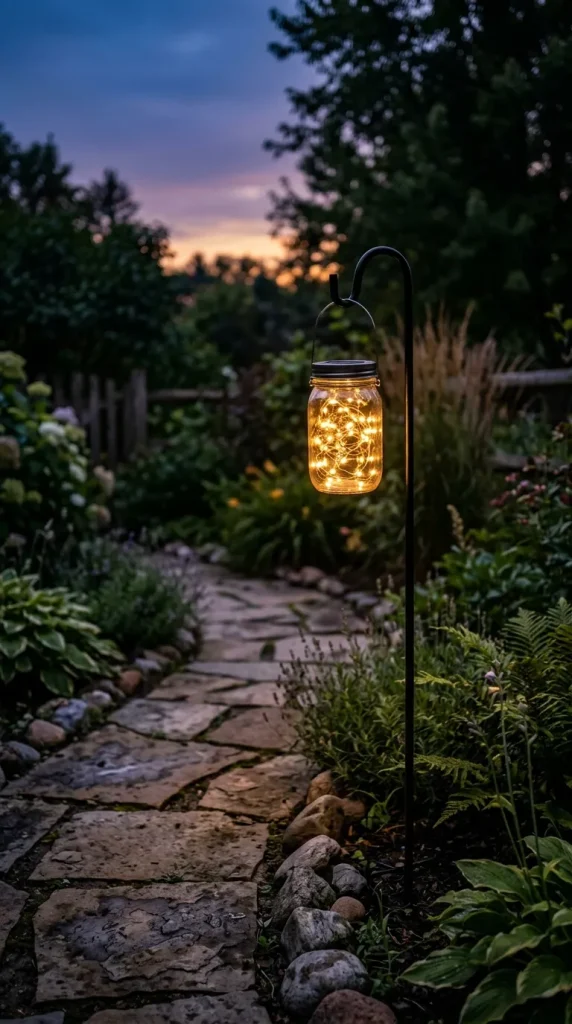
For an automatic evening display that requires zero manual switches, swap standard mason jar lids for affordable solar top inserts designed specifically for canning jars. Insert a fairy light strand attached to the solar lid, then mount the jars onto metal garden stakes using sturdy wire jar handles. Stake them along garden walkways, porch steps, or patio edges. During the day, the solar panels charge in the summer sun, automatically turning on at dusk to guide your steps with a warm, magical trail of light.

5. Tinted Coastal Glass Lanterns

Infuse your outdoor lighting with coastal color by tinting plain clear jars in soft shades of seafoam green, ocean blue, or warm amber. Mix a few drops of food coloring with Mod Podge and a splash of water, pour the mixture inside the jar, and swirl until the interior walls are completely coated. Drain any excess and let it dry completely (or bake on low heat in the oven to set). When lit from within by micro fairy lights, the colored glass projects vibrant, warm hues across outdoor dining tables.

6. Beachcomber Sand and Shell Lanterns

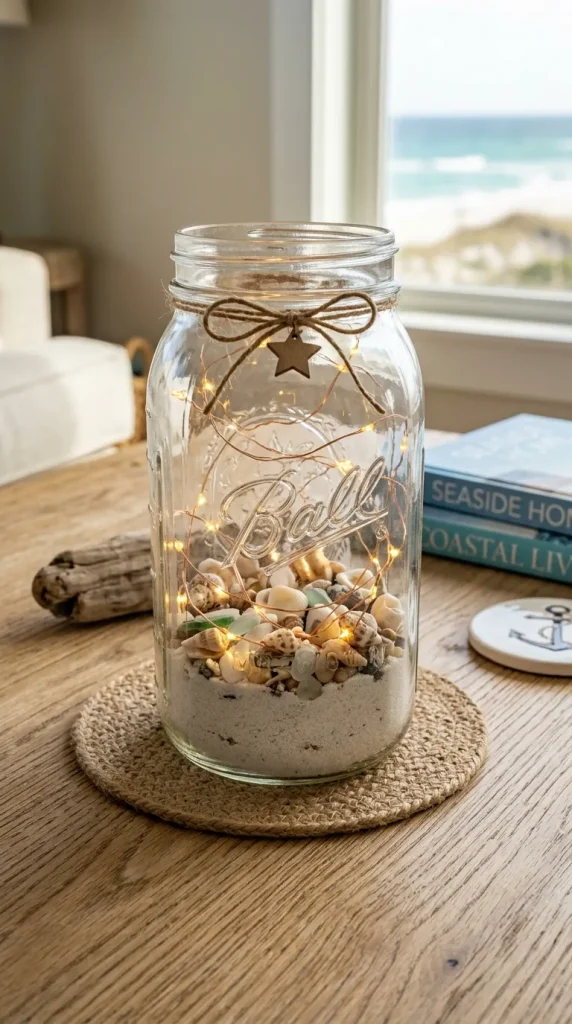
If you have a collection of small seashells, pebbles, or sea glass from seaside trips, turn them into rustic beach-themed lanterns. Fill the bottom two inches of a wide-mouth mason jar with clean white sand or fine gravel. Nestly lay small shells, tiny starfish, or polished beach stones on top of the sand bed. Intermingle a warm fairy light strand throughout the shells, coiling the excess wire neatly inside. This design looks just as charming as a sunny daytime accent as it does glowing softly after dusk.

7. Rustic Burlap and Lace Table Centerpieces

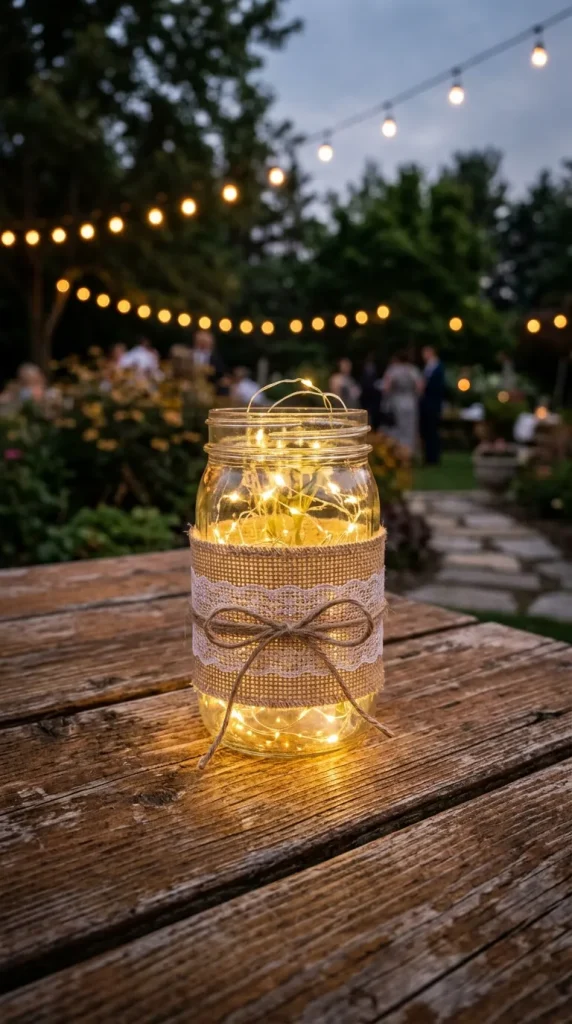
Perfect for summer backyard barbecues, outdoor dinner parties, or rustic weddings, this idea pairs raw texture with delicate detail. Cut a wide strip of natural burlap to wrap around the middle of the mason jar, gluing it in place. Layer a narrower strip of vintage-style white lace down the center of the burlap. Tie a simple jute twine bow around the neck of the jar. The contrast between the rough burlap fiber, soft lace pattern, and glowing interior creates an instant centerpiece for wooden picnic tables.

8. Faux Stained Glass Mosaic Jars

Create rich, jewel-toned patterns on your outdoor tables using tissue paper or stained glass paint. Tear colorful tissue paper into small geometric pieces, then decoupage them onto the exterior of the jar in an overlapping mosaic pattern. Once dry, use black dimensional fabric paint to outline the shapes, mimicking traditional leaded glass seams. When you tuck fairy lights inside, the jar radiates vibrant, colorful light patterns onto surrounding surfaces.

9. Floating Candle and Fairy Light Hybrid Jars

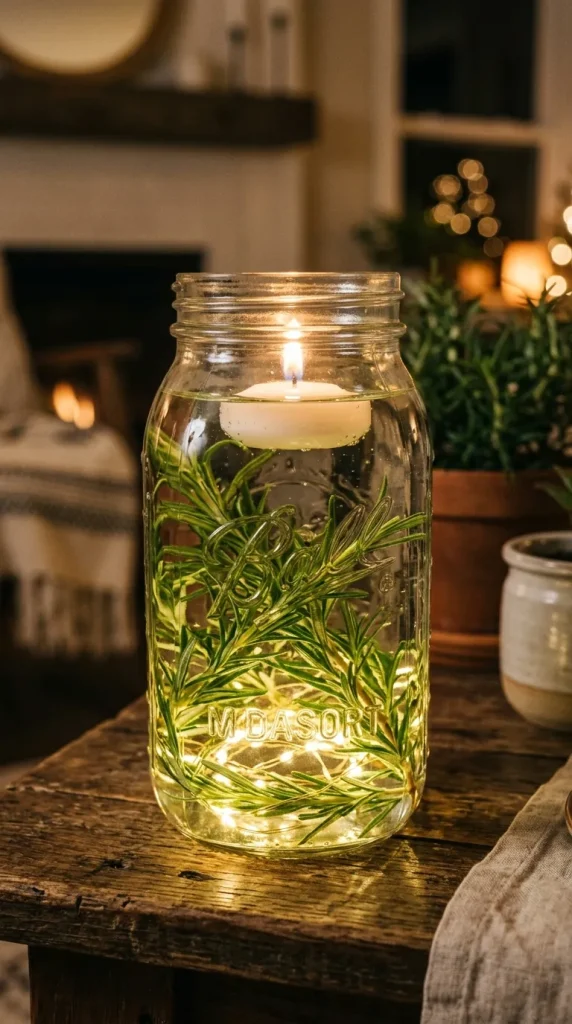
Combine the soft motion of water with the reliable sparkle of wire lights for a refreshing summer aesthetic. Place a submersible or waterproof fairy light strand at the bottom of a large gallon or quart mason jar. Fill three-quarters of the jar with clean water, adding a few sprigs of fresh rosemary, eucalyptus, or lemon slices for a subtle botanical touch. Float a small white tea light candle on the surface of the water for a layered lighting effect that blends flickering flame with twinkling LEDs.

10. Etched Geometric Constellation Jars

Bring the clear summer night sky down to your tabletop with custom constellation patterns. Coat the exterior of a mason jar with black or dark navy blue matte spray paint. Once fully dry, use a small nail, stylus, or wooden skewer to scrape or poke tiny holes into the painted surface, forming real or imagined star patterns and constellations. When you place fairy lights inside, light beams shine sharply through the tiny pinpricks, casting star-like dots onto nearby walls and tabletops.

 10 Fall Mason Jar Crafts Ideas

As the crisp autumn air rolls in and the leaves begin their vibrant transformation, there is an unmistakable urge to bring that cozy, rustic warmth indoors. When it comes to seasonal decorating on a budget, few items are as versatile, charming, and accessible as the humble mason jar. Whether you are aiming for a modern farmhouse look, a vibrant harvest display, or a spooky Halloween vibe, these glass jars can be transformed in endless ways.

The beauty of mason jar crafting lies in its accessibility. With basic materials like chalk paint, twine, mod podge, and elements from nature, you can create professional-looking home decor in an afternoon. Here are ten creative and cozy fall mason jar craft ideas to inspire your autumn crafting sessions.

1. The Distressed Chalk-Painted “FALL” Set

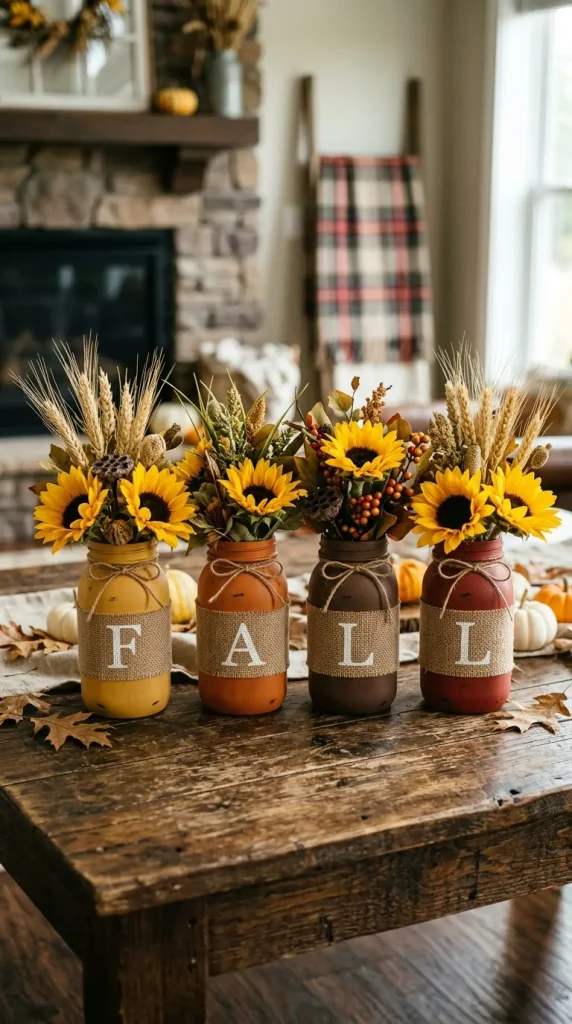
Nothing says cozy farmhouse style quite like distressed chalk paint. For this classic mantle centerpiece, select four matching mason jars. Paint each jar with two coats of matte chalk paint in warm autumn tones: think mustard yellow, burnt orange, rich chocolate brown, and deep crimson. Once dry, use a piece of fine-grit sandpaper to gently rub the raised details of the glass—such as the “Ball” logo and the rim—to reveal the clear glass underneath. Wrap a strip of burlap around each jar, stencil the letters F, A, L, and L onto them, and finish with a twine bow. Pop a few faux sunflowers or sprigs of wheat inside to complete the look.

2. Glowing Autumn Leaf Lanterns

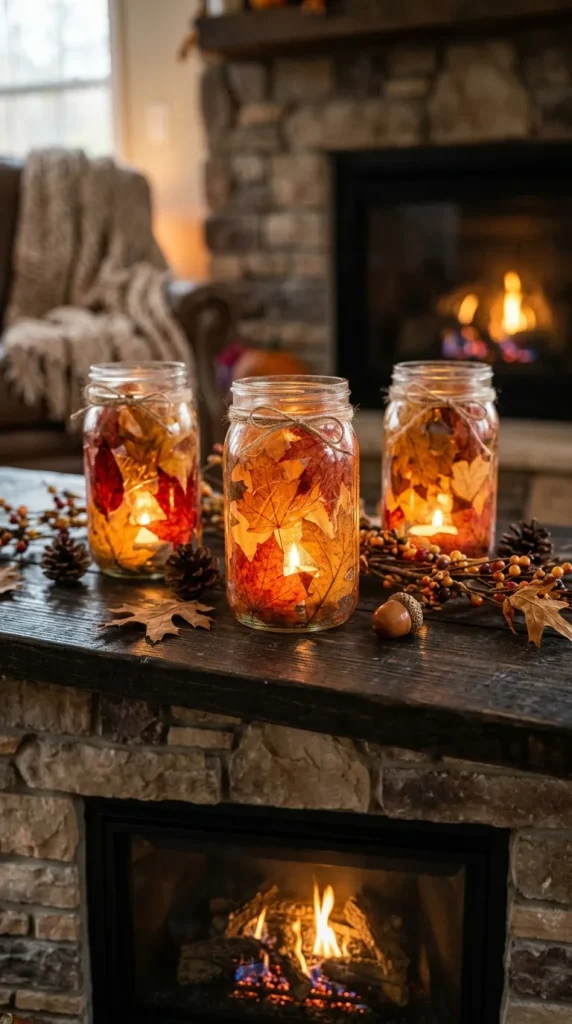
Bring the warm, golden hues of a forest floor into your living room with a leaf lantern. For this project, collect preserved fall leaves or high-quality faux silk leaves. Clean the outside of a mason jar thoroughly, then use a sponge brush to apply a layer of Mod Podge. Carefully press the leaves onto the glass, smoothing out any air bubbles. Seal the leaves with another generous coat of Mod Podge. Once fully dried, the Mod Podge cures clear, leaving you with a beautiful stained-glass effect. Drop a battery-operated tea light inside to watch the fiery red and orange leaf veins glow.

3. Cozy Burlap & Twine Wrapped Vases

If you prefer a neutral, textured aesthetic over bright colors, a burlap and twine wrap is incredibly elegant. Cut a wide band of natural burlap to fit around the midsection of a clean, clear mason jar, and secure it with hot glue. Next, wrap thick jute twine around the neck of the jar multiple times, tying it into a loose, rustic bow. You can slip a small spray of dried cotton, pinecones, or dried eucalyptus behind the twine. The simplicity of the clear glass paired with rough fibers perfectly encapsulates rustic elegance.

4. Splattered Pumpkin-Style Jars

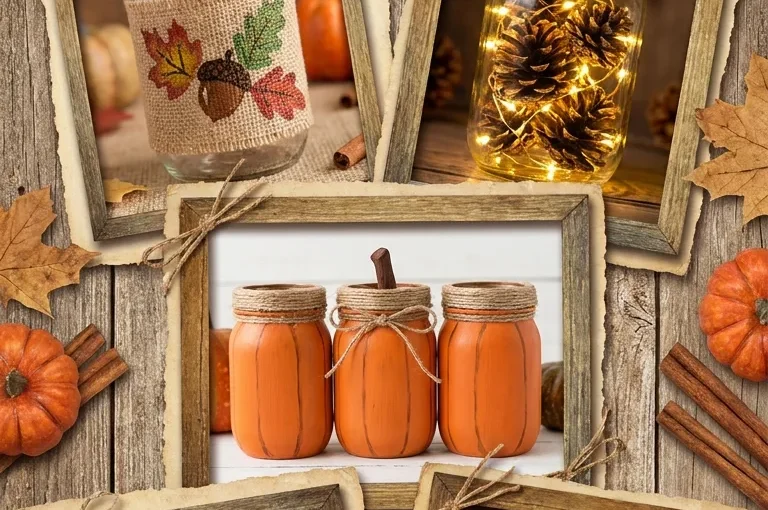
Transform your mason jars into adorable, plump pumpkins with a bit of paint and creativity. Paint your jars in a rich, warm pumpkin orange. Once dry, mix a tiny amount of brown acrylic paint with water, dip an old toothbrush or stiff paintbrush into the mixture, and gently flick the bristles to create a subtle, dark brown speckled pattern over the orange surface. For the finishing touch, wrap green floral wire or a thick piece of cinnamon stick around the jar’s rim to mimic a pumpkin stem and curly tendril.

5. Candy Corn Ombré Treat Jars

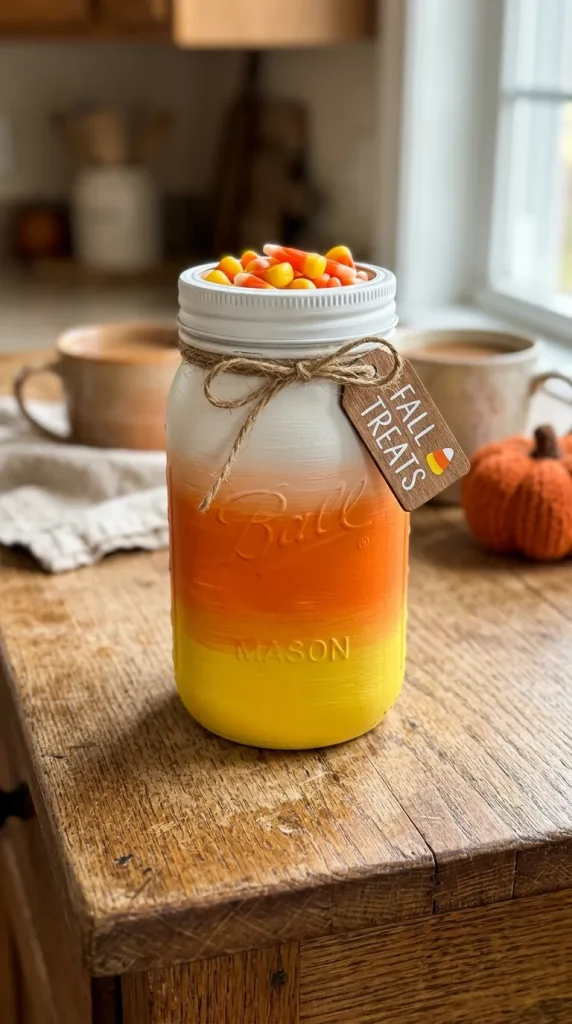
Celebrate the sweet side of autumn with candy corn-inspired jars that double as festive storage. Using spray paint or acrylics, paint the bottom third of the jar bright yellow, the middle third vibrant orange, and the top neck of the jar crisp white. Blend the edges slightly where the colors meet to create a smooth gradient. These jars look beautiful on kitchen countertops filled with actual candy corn, caramel apples ingredients, or color-coordinated kitchen utensils.

6. Glittering Harvest Gold Centerpieces

If your style leans a little more glamorous, add some sparkle to your autumn dining table with metallic gold glitter jars. Apply a coat of adhesive or Mod Podge to the lower half or the entire surface of the jar. Generously coat the wet glue with metallic gold, copper, or bronze glitter, tapping off the excess. Once dry, spray a clear sealant over the glitter to prevent shedding. When paired with flickering candle light, these metallic jars reflect a gorgeous, dancing shimmer that is perfect for Thanksgiving dinner tables.

7. Dried Wheat & Lavender Bundles

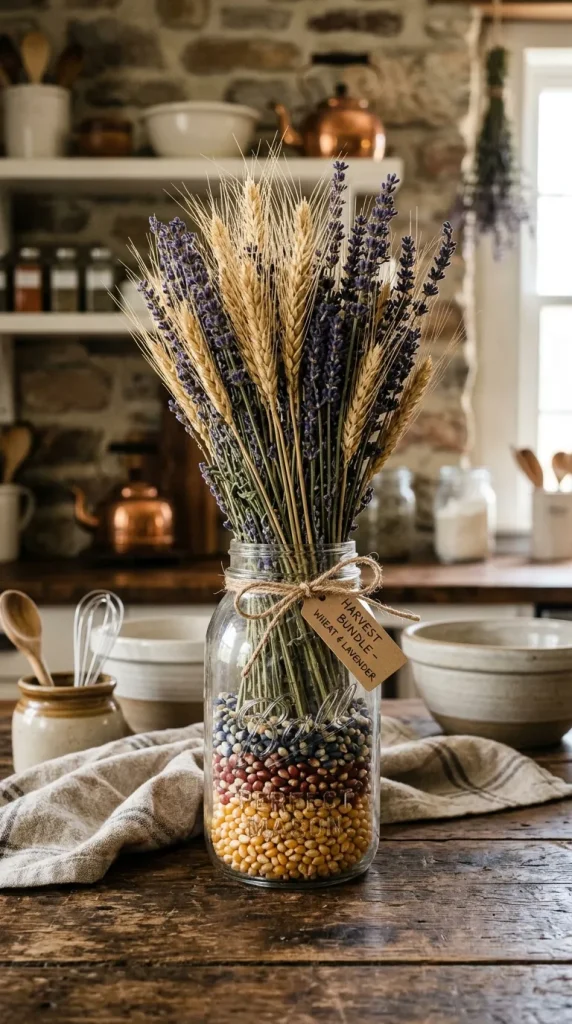
Embrace the harvest theme by using clear mason jars as structured planters for dried grains and florals. Instead of painting the outside, fill the bottom of a clear jar with raw popcorn kernels, dry acorns, or small pebbles to weigh it down and add texture. Insert a dense bundle of dried wheat stalks, dried lavender, and bunny tails. Tie a thick plaid or gingham ribbon around the neck of the jar to lean into a classic country aesthetic.

8. Autumn Potpourri Simmering Jars

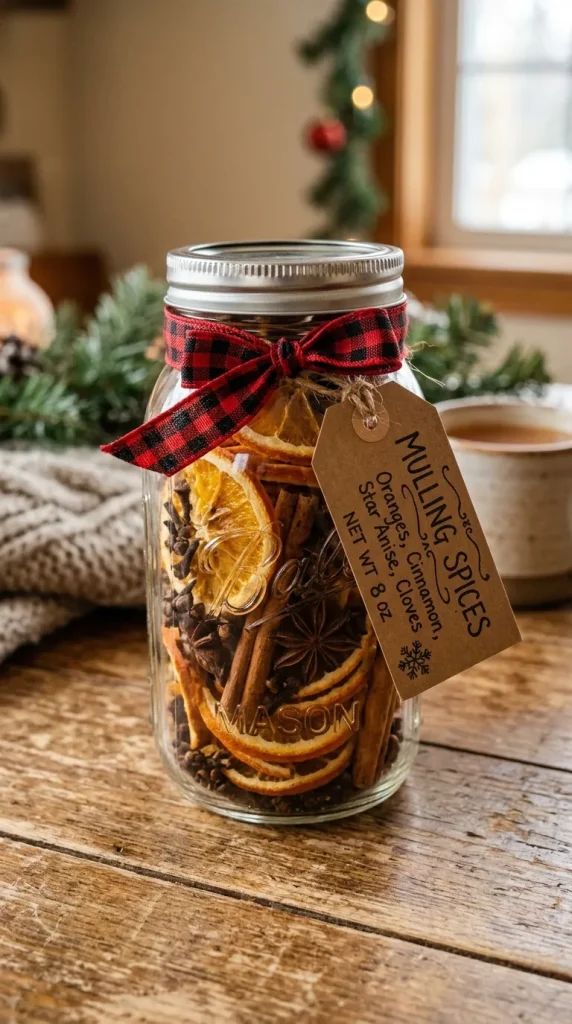
Keep your home smelling like freshly baked treats with a simmering potpourri jar. Pack a mason jar with sliced dried oranges, cinnamon sticks, whole cloves, star anise, and a splash of vanilla extract. Secure the lid tightly and decorate the top with a scrap of flannel fabric and a gift tag. These make incredibly thoughtful housewarming gifts; the recipient can simply empty the jar’s contents into a pot of simmering water on the stove to fill their home with the ultimate cozy fall fragrance.

9. Rustic Chalkboard Label Herb Planters

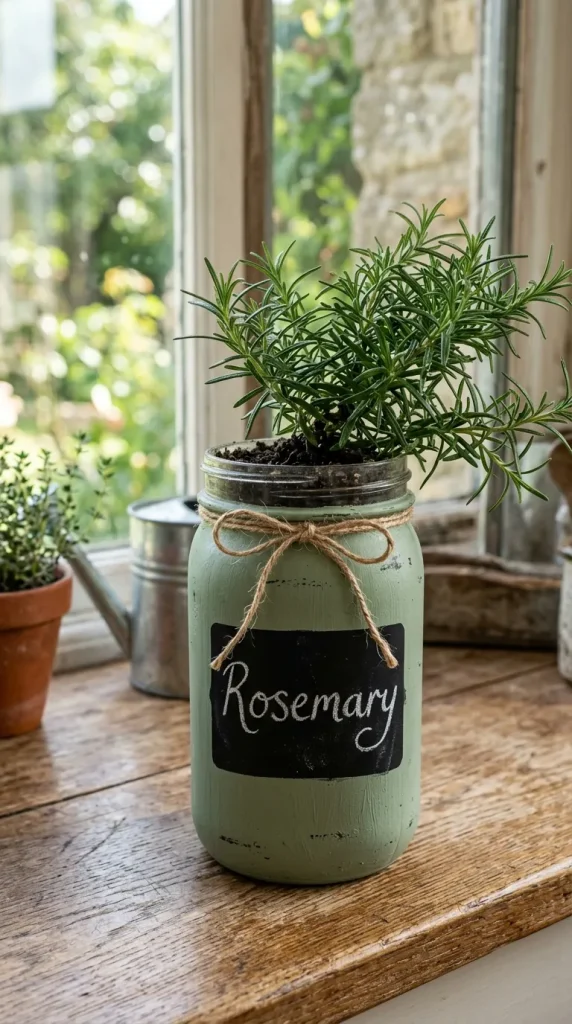
Autumn is a wonderful time to bring your herb garden indoors. Paint your mason jars with a dark charcoal gray or sage green chalk paint. Use a piece of sandpaper to distress the edges. Apply a small rectangle of chalkboard paint to the front of each jar, allowing you to write the names of your herbs—like rosemary, thyme, or sage—in chalk. Plant your herbs directly into the jars, making sure to place a layer of small rocks at the very bottom first to allow for proper soil drainage.

10. Whimsical Scarecrow Jars

For a fun, family-friendly craft project, turn a mason jar into a cute scarecrow character. Paint the entire jar in a warm beige or tan shade. Use black and orange paint pens to draw on a sweet, stitched-together face. Cut a small triangle of orange felt for the nose and glue it down. Wrap a piece of burlap around the rim to look like a hat, and hot glue some strands of natural raffia or straw peeking out from under the “hat” to mimic messy hair. It’s a whimsical addition to any bookshelf or classroom desk.

10 Fall Crafts for Home Ideas

When the crisp autumn air rolls in and the leaves begin their vibrant transformation into shades of amber, crimson, and gold, our instincts naturally turn toward nesting. Fall is the ultimate season for comfort, and there is no better way to welcome it than by infusing your living space with handmade charm. Crafting for autumn isn’t just about putting a pumpkin on the porch; it’s about capturing the textures, scents, and warm hues of the season to create a cozy sanctuary.

Bringing the outdoors inside is a fundamental element of autumn decor. By utilizing natural elements like acorns, dried leaves, pinecones, and copper accents, you can create sophisticated pieces that look expensive but cost very little to make. Whether you are an experienced crafter or looking for a simple weekend project, these ten inspired fall craft ideas will help you transform your home into a warm autumnal retreat.

1. Pressed Leaf Glass Framing

Instead of letting the beautiful colors of autumn fade away, preserve them as timeless wall art. Take a walk and collect vibrant fallen leaves—maple, oak, and ginkgo work beautifully. Press them inside a heavy book between sheets of parchment paper for a few days until they are completely flat and moisture-free. Buy a few double-glass floating frames, arrange the pressed leaves inside the glass panes, and lock them in place. The transparent background allows the intricate veins and fiery colors of the leaves to take center stage, creating a modern yet organic gallery wall.
2. Cinnamon Stick Pillar Candles

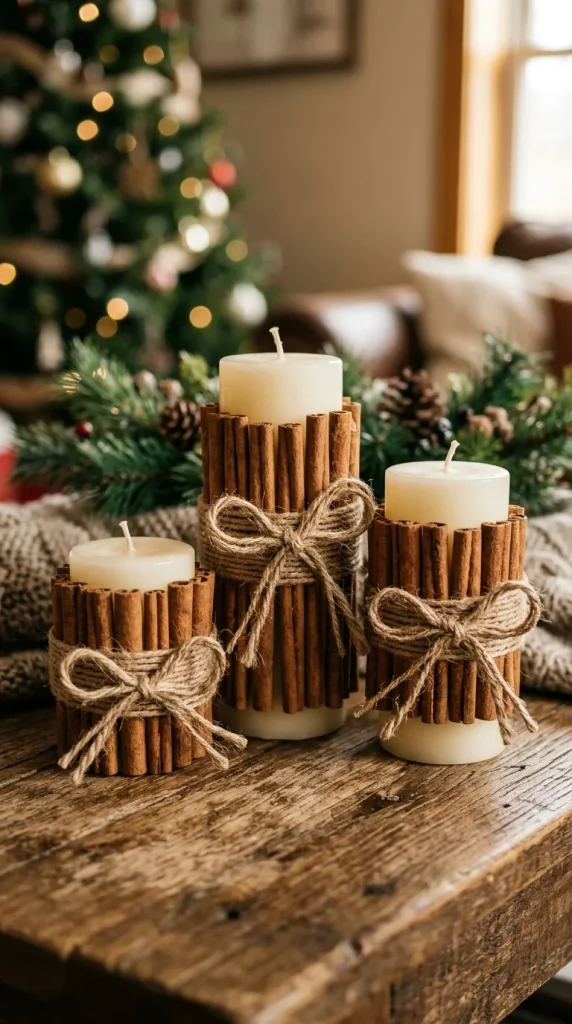
Scent and sight combine in this incredibly simple luxury craft. Take plain, unscented white or cream pillar candles of various heights. Apply a thick rubber band around the center of the candle, then tuck whole cinnamon sticks vertically underneath the band until the entire circumference of the candle is covered. Once the sticks are tightly packed, wrap rustic jute twine or a piece of plaid ribbon around the center multiple times to cover the rubber band and tie it in a neat bow. When you light the candle, the gentle heat warms the cinnamon, filling your room with a subtle, comforting autumn fragrance.

3. Metallic Copper-Leaf Acorns

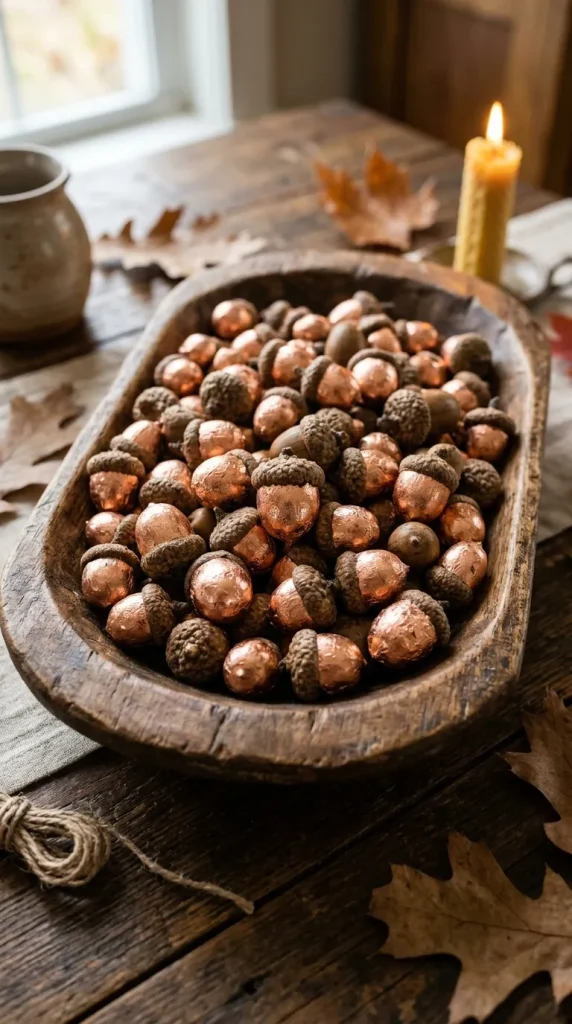
For a touch of rustic glamour, give humble backyard acorns a high-end metallic makeover. Collect acorns and wash them thoroughly, baking them on a low heat in the oven for a bit to ensure they are dry and clean. Separate the caps from the nuts. Paint the nut portion with a thin layer of adhesive size, then carefully apply sheets of imitation copper or rose gold leaf, burnishing it with a soft brush for a textured, shiny finish. Glue the natural, rugged wooden caps back onto the gleaming metallic bottoms. Display them in a shallow wooden dough bowl or a glass apothecary jar as a stunning coffee table centerpiece.

4. Flannel and Burlap Layered Wreath

Welcome your guests with a wreath that screams cozy autumn fashion. Start with a standard straw or foam wreath form. Cut old flannel shirts—preferably in rich forest greens, deep maroons, or classic orange plaids—and natural brown burlap into three-inch squares. Using a dull pencil or a wooden dowel, push the center of each fabric square into the wreath form, securing it with a drop of hot glue. Alternate between the rustic texture of the burlap and the soft warmth of the flannel until the form is completely lush and full. Finish with a hidden wire loop on the back for easy hanging on your front door.

5. Dried Citrus and Spice Garlands

Garlands aren’t just for Christmas; a spiced citrus garland adds a gorgeous, rustic pop of orange and deep red to your fall mantlepiece. Slice oranges, blood oranges, and apples thinly, then dry them out in a low-temperature oven or a food dehydrator until crisp. Using a large tapestry needle and baker’s twine, string the dried fruit discs together, alternating them with whole star anise, bay leaves, and wooden beads. Hang this over your fireplace or along a kitchen window where the sunlight can shine through the translucent fruit slices, releasing a nostalgic, spicy aroma.

6. Neutral Twine-Wrapped Pumpkin Platter

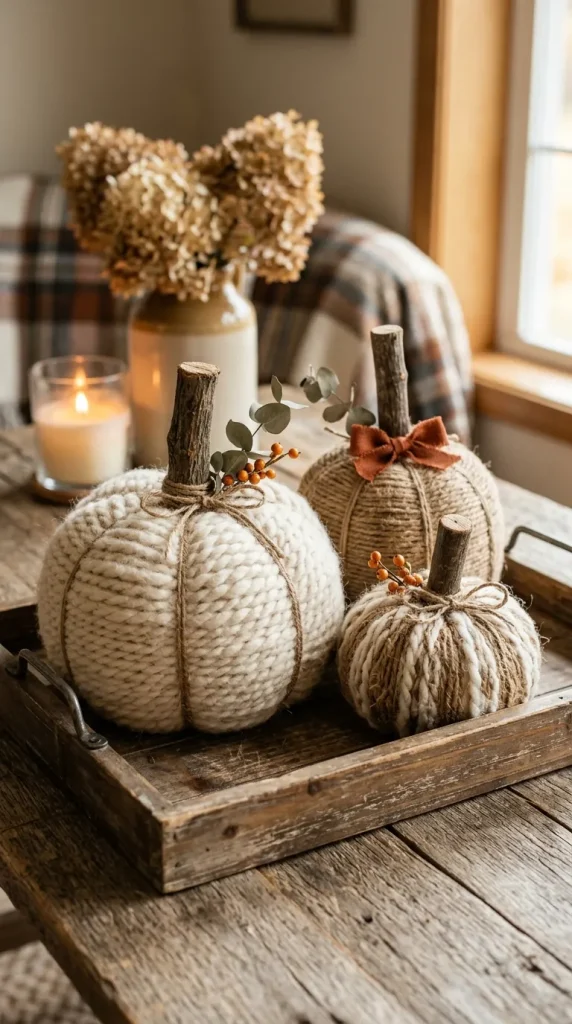
If bright orange doesn’t match your home’s aesthetic, embrace the popular neutral, farmhouse fall trend. Collect plastic or foam pumpkins from a local dollar store. Starting at the base of the pumpkin stem, wrap natural jute twine, white cotton rope, or thick cream yarn tightly around the pumpkin, gluing it down in sections as you spiral your way to the bottom. For an authentic touch, remove the fake plastic stem and hot-glue a real, dried pumpkin stem (saved from previous years) or a small piece of natural driftwood to the top. Arrange a cluster of these textured, monochromatic pumpkins on a rustic wooden tray.

7. Mason Jar Leaf Lanterns

Create a warm, flickering glow for your evening wind-downs with seasonal decoupaged lanterns. Thoroughly clean empty glass mason jars. Using matte Mod Podge and a foam brush, apply real dried leaves (or high-quality faux silk leaves if you want them to last for years) directly to the outside of the glass. Smooth out any air bubbles and apply a generous topcoat of the sealer. Once completely dry, wrap the rim of the jar with twine and place a battery-operated LED tealight candle inside. The leaves cast beautiful, warm amber shadows across the room, mimicking the cozy atmosphere of a campfire.

8. Book-Page Autumn Leaf Banner Banner

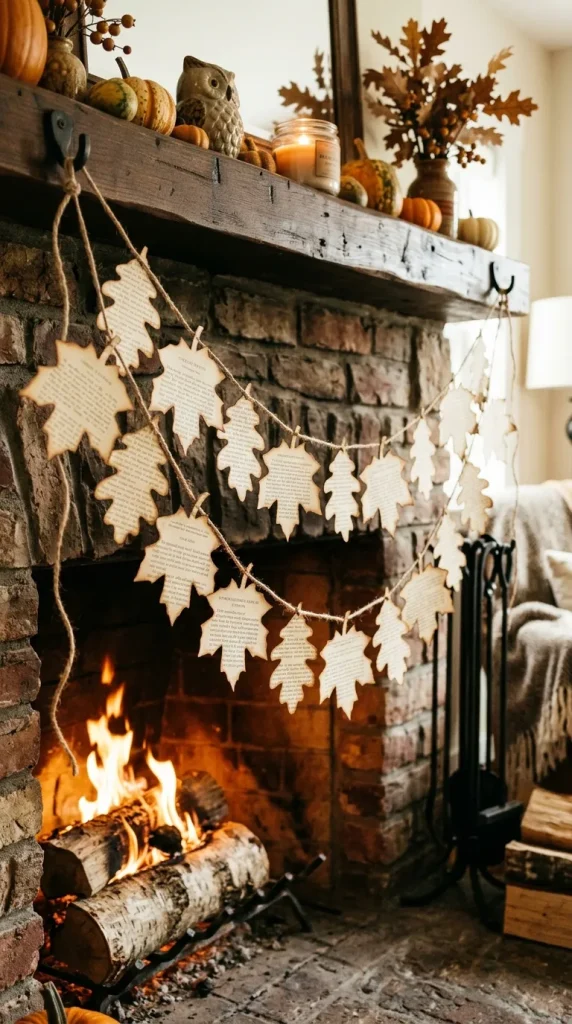
Give old, damaged vintage books a second life by turning their pages into a whimsical mantel banner. Cut simple leaf templates out of cardboard—oak, maple, and birch shapes work best. Trace these onto the text-heavy pages of an old book and cut them out. To give the pages an aged, autumnal look, lightly brush the edges of the paper leaves with a brown ink pad or a damp tea bag. Punch two small holes in the top of each leaf and thread them onto a piece of jute twine, spacing them evenly. This vintage-inspired craft adds a literary, cozy feel to any bookshelf or fireplace.

9. Bleached Mini Pumpkins with Botanical Stencils

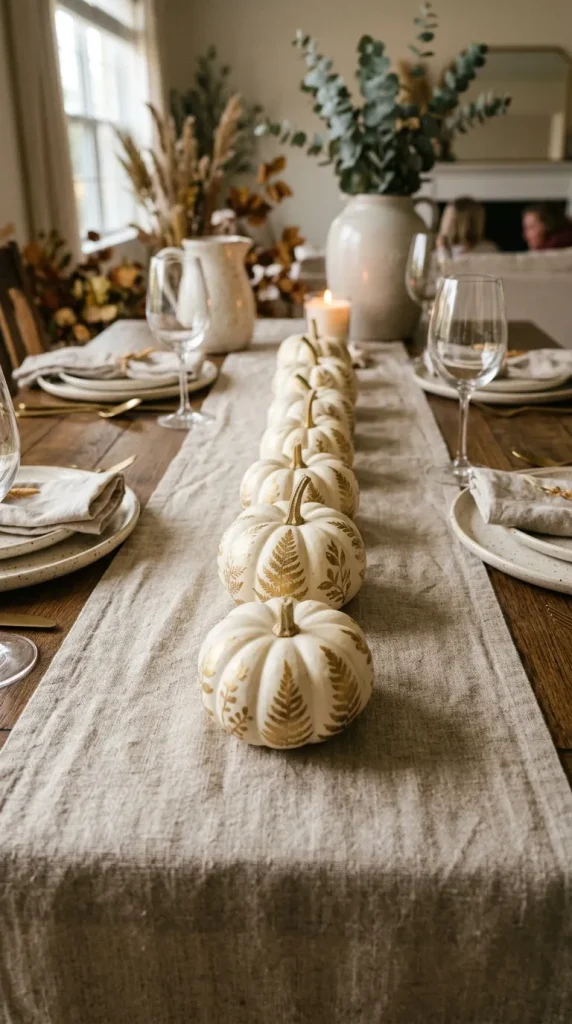
Instead of carving traditional jack-o’-lanterns, create elegant, long-lasting tabletop decor using mini white pumpkins (frequently called “Baby Boo” pumpkins). Clean the pumpkins and paint them with a chalky matte white or soft sage green paint. Once dry, press real fern fronds or delicate leaves flat against the pumpkin skin and gently dab a metallic gold or dark charcoal paint over the top with a sea sponge, creating a beautiful silhouette stencil effect. These look incredibly elegant lined up along a dining table runner for a Thanksgiving feast.

10. Chunky Knit Pumpkin Pillows

If you love the look of cozy knitwear, you can create adorable, plush pumpkin pillows without needing to know how to knit or crochet. Take an old chunky knit sweater and cut a large circle out of the body fabric. Sew a simple running stitch along the outer edge of the circle using a needle and strong thread. Pull the thread slightly to create a pouch, fill it heavily with polyester fiberfill stuffing, and pull the thread tight to close the top, securing it with a knot. Take a long piece of twine and wrap it tightly around the plush ball, pulling sections down to create the distinct ridges of a pumpkin. Top it off with a felt leaf and a real cinnamon stick stem.

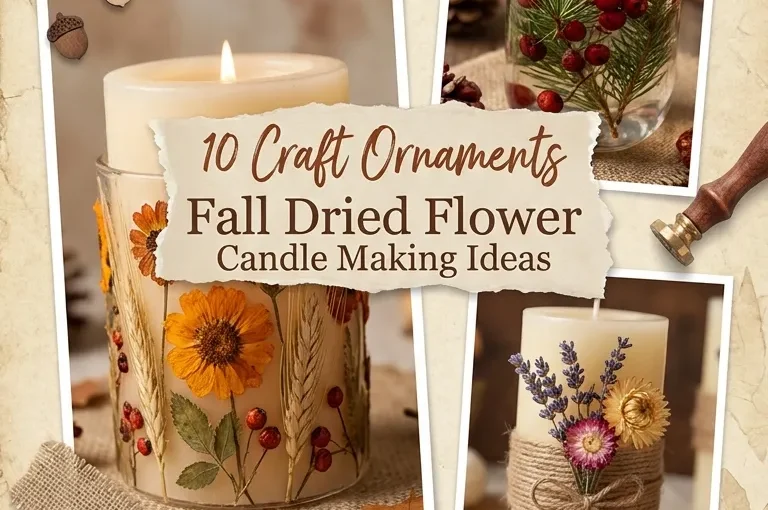
10 Craft Ornaments Fall Dried Flower Candle Making Ideas

The crisp autumn air, a warm cup of cider, and the soft glow of a candle—nothing captures the cozy essence of fall quite like homemade crafts. As the vibrant colors of summer give way to the earthy, rustic tones of autumn, it is the perfect time to bring nature indoors. Combining the timeless art of candle making with the delicate beauty of dried flowers offers a stunning way to celebrate the season.

Dried flower candles are not just beautiful decor pieces; they are a sensory experience. They blend visual artistry with soothing scents, making them perfect for autumn centerpieces, thoughtful handmade gifts, or a relaxing weekend project. Here are 10 creative craft ideas for fall-inspired dried flower candle making to transform your space this season.

1. The Pressed Amber Glass Jar

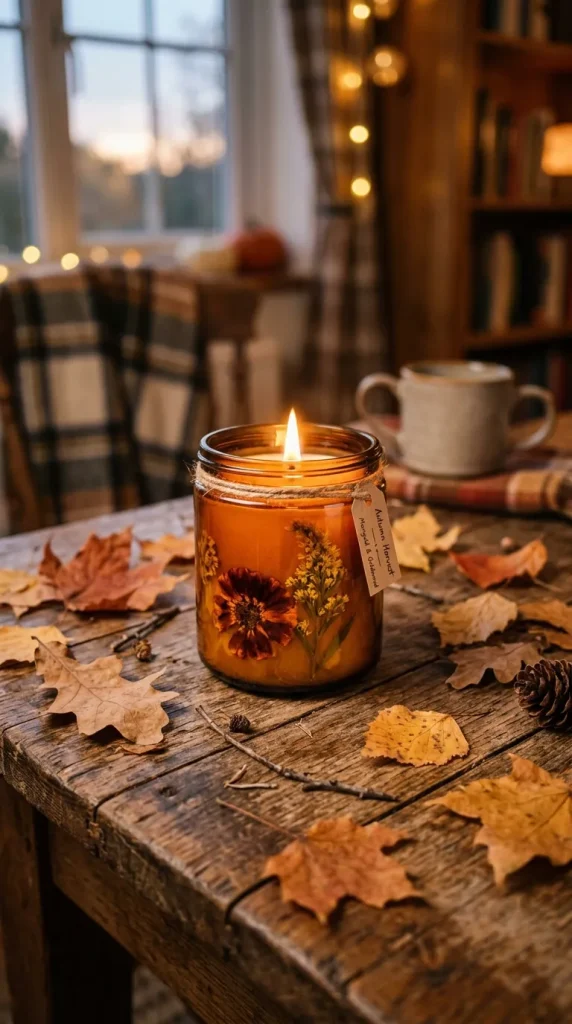
Amber glass instantly evokes a vintage, autumnal vibe. The warm tint of the glass beautifully complements autumn florals like deep orange marigolds, goldenrod, and dark red spray roses. For this project, press your fall flowers flat beforehand. When pouring your soy or beeswax candle, gently press the dried blooms against the inside walls of the amber jar using a little melted wax as glue. Once the main wax pool sets, the light of the flame will filter through both the amber glass and the delicate petals, creating a rich, golden ambiance.

2. Botanical Pillar Candle Wraps

If you prefer a classic pillar candle, you can use dried florals to create a striking exterior wrap. Instead of mixing the flowers into the hot wax, you will apply them directly to the surface of a pre-made or freshly molded white or cream pillar candle. Arrange whole dried fall elements—such as miniature oak leaves, small strawflowers, and sprigs of heather—around the outside of the pillar. Secure them by gently brushing a thin layer of melted wax over the top, or use a heat gun on a low setting to slightly melt the pillar’s surface, embedding the florals safely into the wax.

3. Terracotta Pot Fall Florals

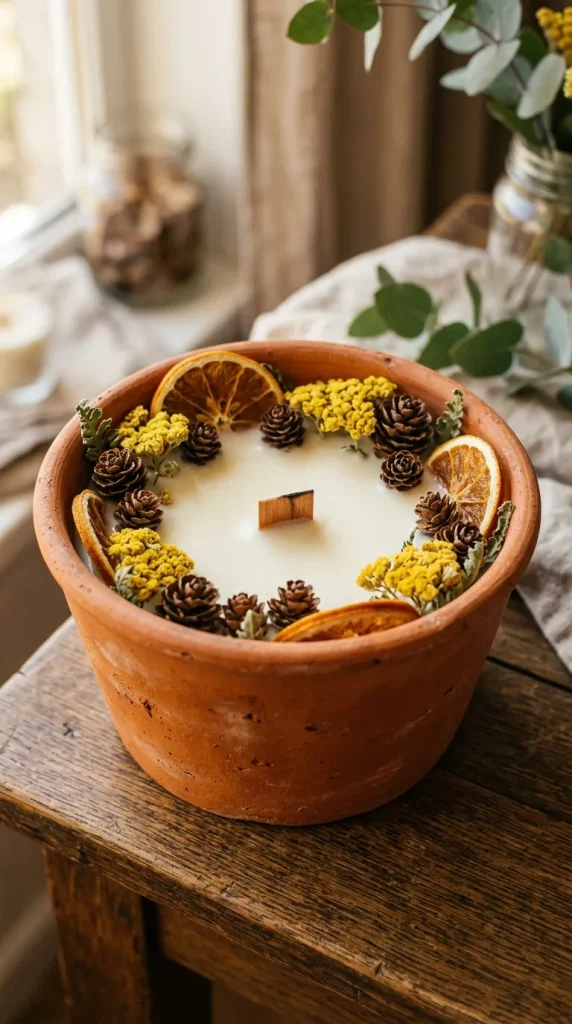
Terracotta pots aren’t just for garden plants. Their rustic, clay finish makes them an exceptional vessel for fall-themed candles. Before pouring the wax, seal the inside of a small terracotta pot with a water-based sealant to prevent wax from seeping through the porous clay. Fill the candle with a spiced fragrance oil like cinnamon or pumpkin spice, and just as the top layer of wax begins to solidify, arrange a mini-garden of dried botanicals around the wick. Think tiny pinecones, dried orange slices, and sprigs of yellow yarrow.

4. Floating Autumn Blossom Bowls

For a breathtaking dining room centerpiece, floating blossom candles offer an elegant touch. Use shallow, heat-safe ceramic or glass bowls as your vessels. Pour a lightly scented wax and add a few short wicks. Instead of embedding large flowers, scatter loose, delicate petals of autumn-blooming flowers—like bronze chrysanthemums and dark dahlias—across the surface before the wax cures. When lit, the shallow pool of wax beautifully illuminates the floating floral display.

5. Chunk-Style Wax Mosaic with Dried Florals

Bring a textured, mosaic look to your candle crafting. For this technique, create small chunks of colored wax beforehand—ideally in rich autumn hues like burgundy, olive green, and burnt orange. Mix small pieces of dried flowers, like lavender or chamomile buds, directly into these wax chunks. Place the colorful chunks into a clear glass jar or pillar mold, and then pour clear or cream-colored wax over them. As the candle burns, the hidden textures of the embedded florals and contrasting wax shapes gradually reveal themselves.

6. Cinnamon Stick and Dried Flower Pillars

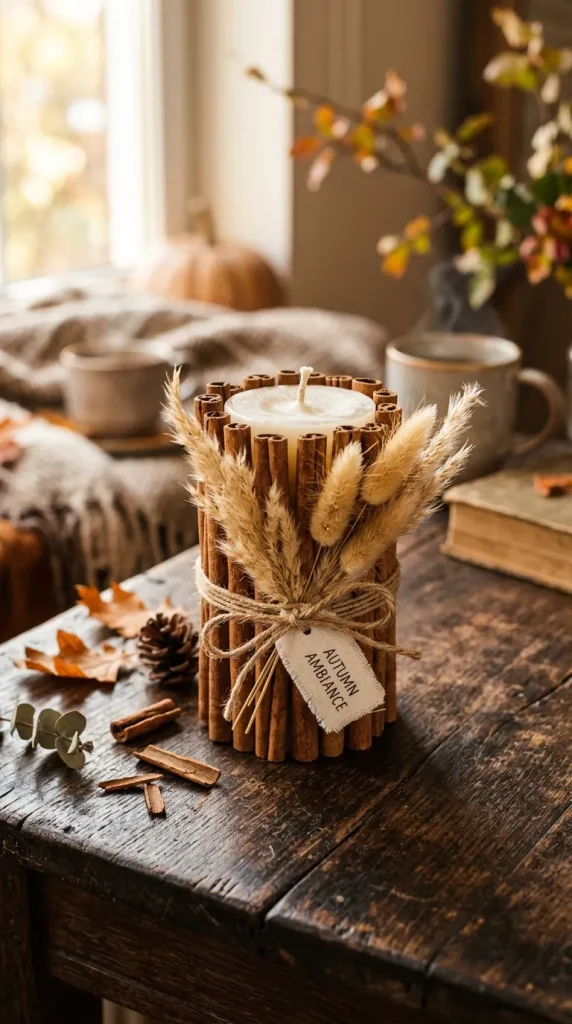
Nothing says fall quite like the scent of cinnamon. This idea combines the visual beauty of dried flowers with the structural aesthetic of spices. Take a standard candle mold and place upright cinnamon sticks around the perimeter. In between the cinnamon sticks, slip in stems of dried fall flowers like pampas grass, rabbit-tail grass, or deep red clover. Pour your wax into the mold. When unmolded, you will have a stunning, textured pillar candle where the rustic bark of the cinnamon sticks perfectly frames the delicate dried botanicals.

7. Embedded Dried Fruit and Floral Wax Melts

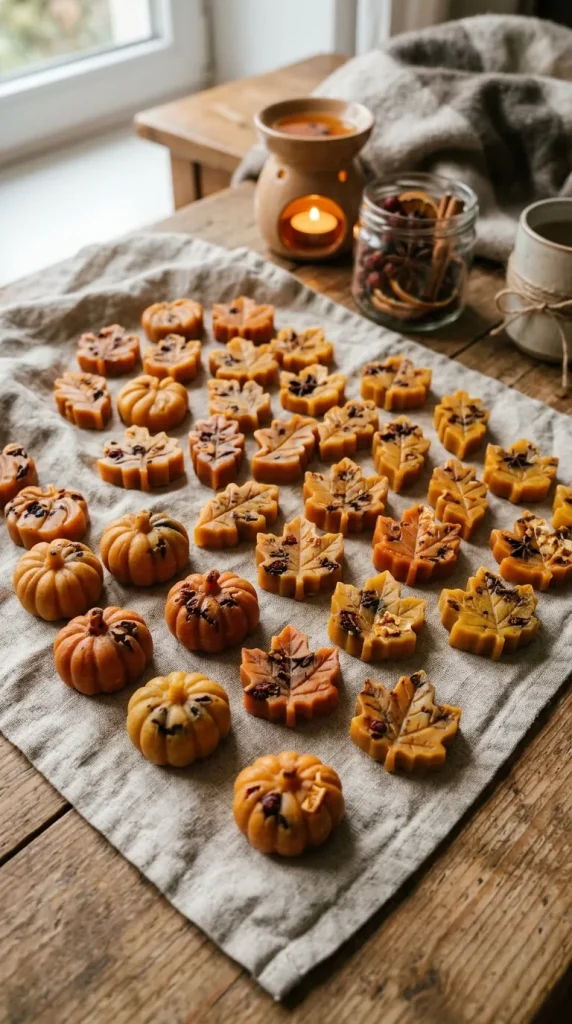
If you aren’t ready to commit to a full candle, wax melts are a fantastic alternative. Using silicone molds in the shapes of pumpkins, maple leaves, or simple circles, pour melted soy wax blended with fall fragrance oils. Before the melts cool completely, press tiny fragments of dried botanicals into the back of each melt. A combination of crushed dried rose hips, mini dried orange peel pieces, and individual star anise petals creates a beautiful, rustic mosaic that looks stunning sitting in a wax warmer.

8. Woodland Hollow Birch Log Candles

Bring the actual forest floor into your home by using faux or safely sourced, hollowed-out birch log segments as candle vessels. Ensure the wooden cavity is fitted with a metal or glass insert to keep the project completely safe from fire hazards. Pour a woodsy-scented wax (like cedarwood or balsam fir) into the insert. On the very top surface of the wax, nestle a selection of dried woodland florals: bits of green forest moss, tiny dried ferns, and white strawflowers. The contrast of the rough birch bark against the delicate cream flowers is pure autumn magic.

9. Layered Autumn Gradient with Botanicals

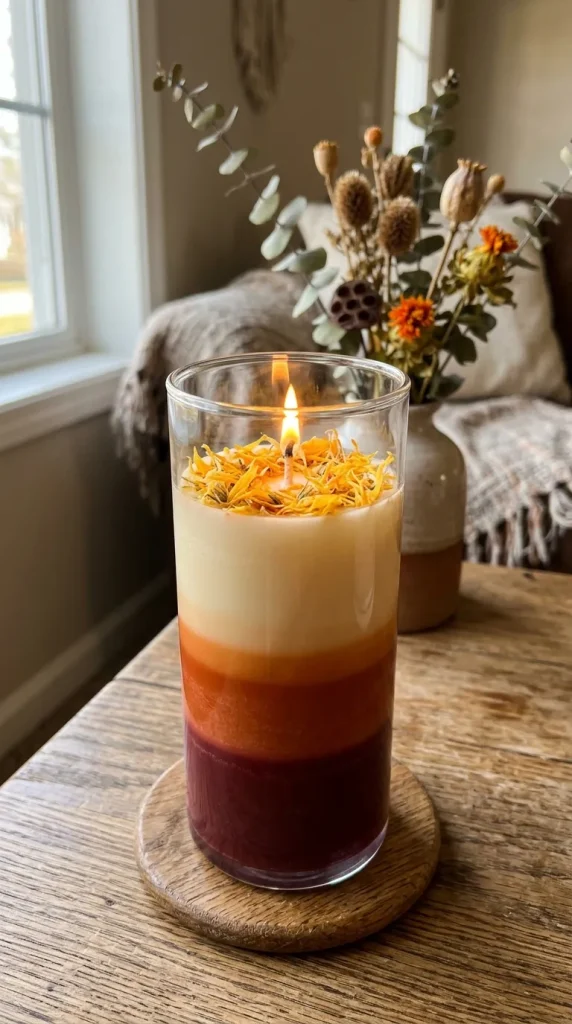
Capture the changing colors of the autumn canopy with a layered gradient candle. Choose a tall, clear glass container so the layers are fully visible. Pour three to four distinct layers of wax, letting each set slightly before pouring the next. Start with a deep plum or burgundy at the bottom, transition to a burnt orange, and finish with a soft cream layer at the top. In the top cream layer, embed bright yellow and gold dried flower petals like safflower or calendula, perfectly mimicking the look of falling leaves against a cool autumn sky.

10. Vintage Tea Cup Floral Candles

For a cozy, cottagecore aesthetic, look no further than vintage teacups. Find mismatched porcelain cups at thrift stores featuring gold rims or delicate floral patterns. Fill them with a cozy scent like vanilla, chai, or apple cider. Because the scale of a teacup is small and intimate, decorate the top surface with delicate, intricate dried flowers. Blue cornflowers, tiny white baby’s breath, and small orange globe amaranth flowers create a charming, whimsical contrast against the vintage porcelain.

Safety First: A Crucial Note on Floral Candles

While dried flower candles are undeniably stunning, safety must always come first when crafting with flammable botanicals.

  • Keep Florals Away from the Wick: Always place your dried flowers, leaves, or fruits near the perimeter of the candle jar or pillar, keeping them as far away from the open flame as possible.
  • Use Small/Crushed Elements: Heavy, bulky flowers can shift into the melt pool and catch fire. Stick to smaller petals or finely crushed botanicals.
  • Never Leave Unattended: Like all candles, botanical candles should only be burned while within your sight. If a piece of flower drifts too close to the flame, blow out the candle and use a metal tool to safely remove the debris.

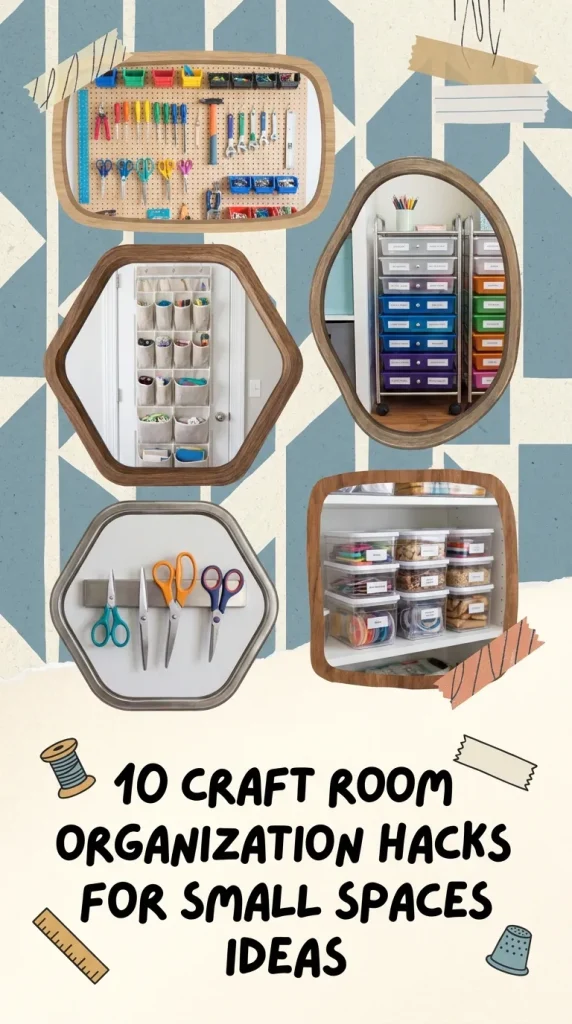
10 Craft Room Organization Hacks for Small Spaces Ideas

For any maker, artist, or DIY enthusiast, the craft room is more than just a place to store supplies—it is a sanctuary where ideas come to life. However, when your creative zone is confined to a spare corner, a tiny closet, or a dual-purpose room, that sanctuary can quickly devolve into chaos. A cluttered space leads to a cluttered mind, and nothing kills artistic momentum faster than spending forty minutes hunting for a specific shade of embroidery floss or a misplaced hot glue gun.

The secret to maximizing a small craft area lies in changing how you view space. When floor real estate is limited, you have to think vertically, hiddenly, and multi-functionally. By shifting your focus from “where do I put this?” to “how can this space work harder?”, you can transform even the tightest nook into an ultra-efficient, highly inspiring studio.

Here are 10 clever organization hacks designed to unlock the full potential of your small-scale craft space.

1. The Pegboard Revolution

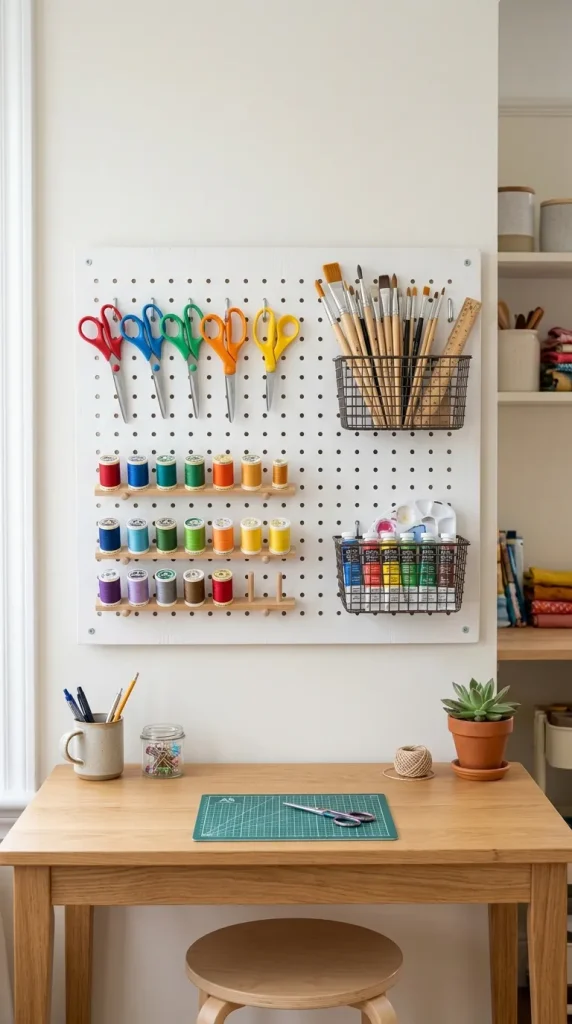
If you only implement one hack from this list, make it the classic pegboard. Pegboards are the ultimate small-space champions because they turn bare, underutilized walls into dynamic, customizable storage hubs. By utilizing various hooks, baskets, and shelves, you can hang everything from heavy fabric shears and cutting mats to rolls of tape and buckets of paintbrushes. The beauty of a pegboard is its adaptability; as your crafting hobbies evolve, you can effortlessly rearrange the layout without drilling new holes in your wall.

2. The Over-the-Door Organizer Metamorphosis

Do not overlook the back of your door—it represents a massive amount of hidden storage potential. Standard clear pocket shoe organizers are perfect for holding clear stamps, acrylic paint tubes, yarn skeins, or glue sticks. Because the pockets are clear, you can instantly see your inventory at a glance. If you want something a bit sturdier, look for over-the-door metal rack systems that hold deeper wire baskets, giving you a place for heavier items like heat guns, iron-on vinyl rolls, or reference books.
3. Spice Racks for Tiny Embellishments

Wooden or acrylic spice racks mounted directly to the wall or the side of a bookshelf are perfectly sized for small craft supplies. They provide a shallow, secure ledge to align jars filled with buttons, sequins, beads, glitter, and ribbon. Keeping these tiny embellishments at eye level prevents them from getting buried at the bottom of deep drawers, ensuring you actually use what you have.

4. Magnetic Strips for Metal Tools

Borrowed from the culinary world, magnetic knife strips are an incredibly sleek way to corral metal crafting tools. Mount a few strips along your backsplash or directly beneath your shelving to hold scissors, metal rulers, tweezers, die-cutting plates, and safety pins. This keeps your most frequently used tools off your actual desk surface while ensuring they remain safely within arm’s reach.

5. Multi-Tiered Rolling Carts

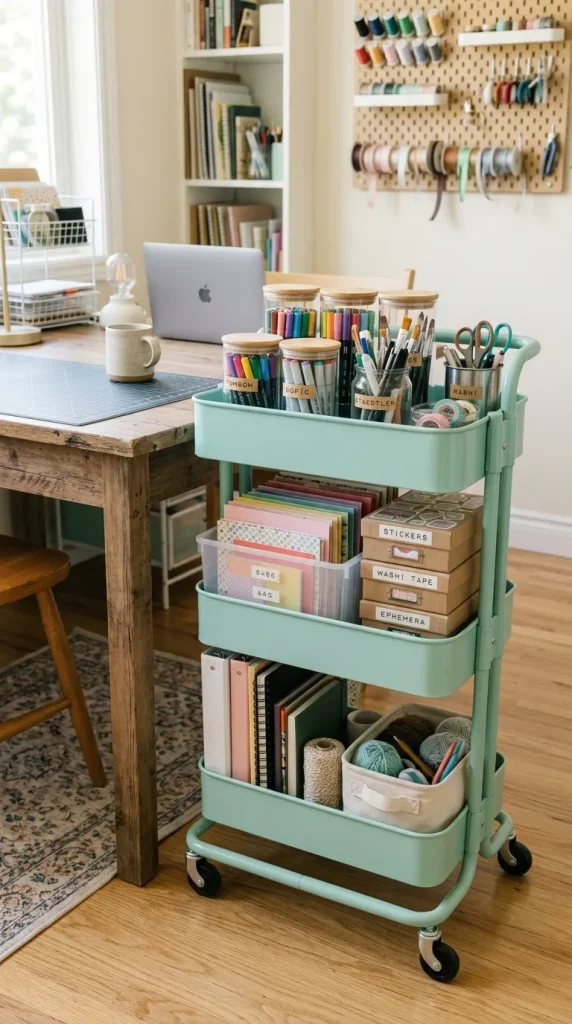
A three-tiered metal utility cart is a lifesaver for small or multi-purpose spaces. You can organize each tier by project type or material—for instance, the top rack for your current project, the middle for paper crafting, and the bottom for vinyl. When inspiration strikes, simply roll the cart up to your kitchen table or desk. When it is time to clean up, the cart smoothly tucks away into a closet or an unused corner.

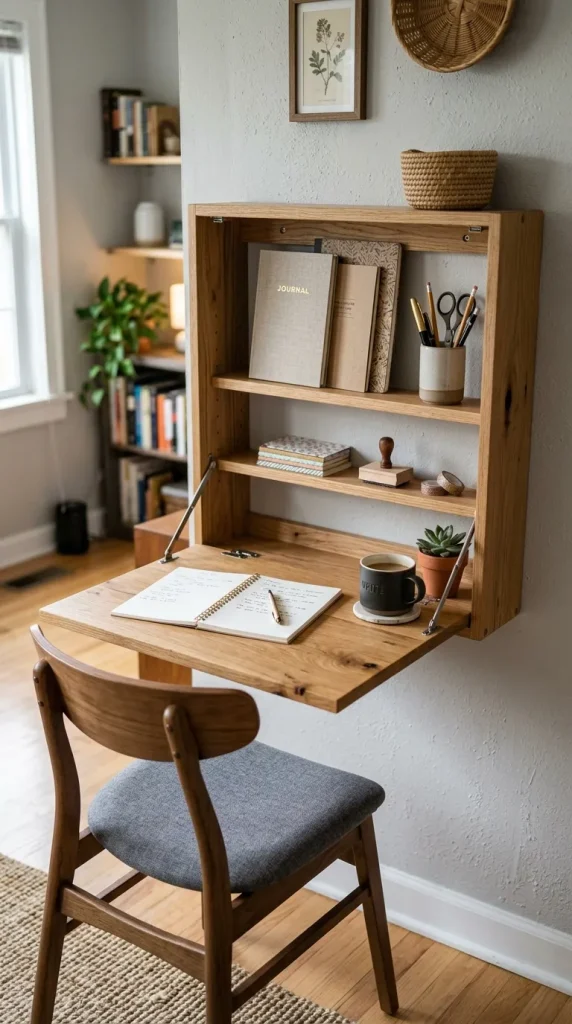
6. The Clamshell Storage Desk

When space is at a premium, a standard desk can feel like a massive luxury. Consider investing in or building a drop-leaf or fold-down Murphy desk. These units mount to the wall and look like a simple shallow cabinet when closed. When unlatched, the door drops down to form a sturdy work surface, revealing built-in shelves packed with your essential tools. It is the ultimate “now you see it, now you don’t” solution for hybrid spaces.

7. Clear Mason Jars on Lazy Susans

Grouping items together is organizational law, but deep corners can make things hard to reach. Place a rotating Lazy Susan lazy Susan in the center of your table or on a shelf, and load it up with matching clear glass mason jars. Fill the jars with markers, colored pencils, paintbrushes, and knitting needles. A quick spin brings exactly what you need right to your fingertips, saving you from knocking over bottles to reach the back.

8. Under-Shelf Hanging Baskets

Never leave the empty air underneath your shelves unutilized. Wire under-shelf baskets slip easily onto existing shelves, instantly creating a secondary layer of storage below. This is an ideal spot to store flat items that otherwise take up large footprints, such as sheets of cardstock, sticker books, felt squares, or small cutting mats.

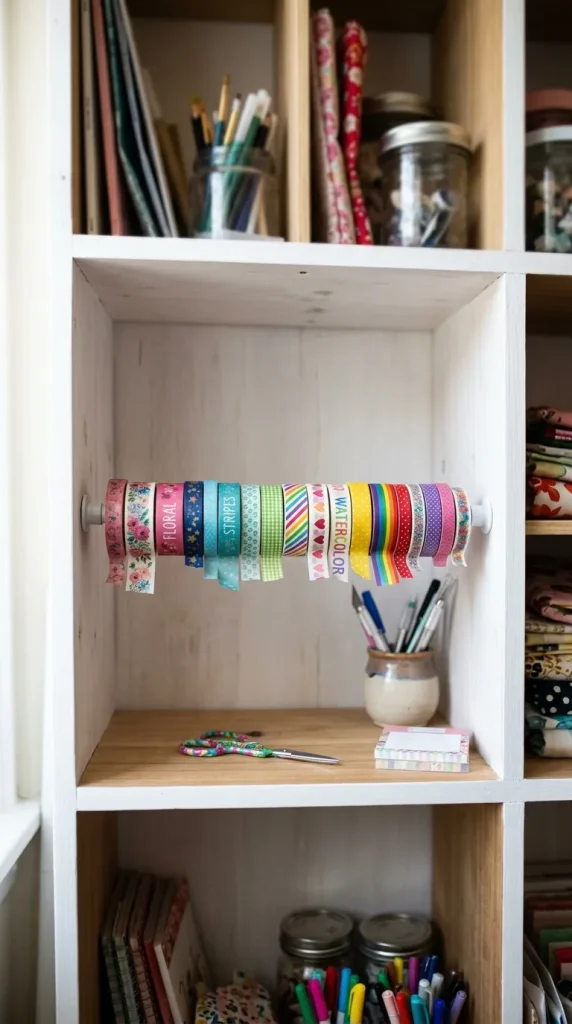
9. Tension Rod Ribbon Dispensers

If you are a wrapping paper, ribbon, or Washi tape enthusiast, you know how easily these items unroll and tangle. By installing small, inexpensive tension rods inside a bookshelf opening or a shallow cabinet, you can slide your spools directly onto the rod. This keeps them perfectly lined up, prevents unravelling, and allows you to pull and snip exactly the length of ribbon you need without ever removing the spool.

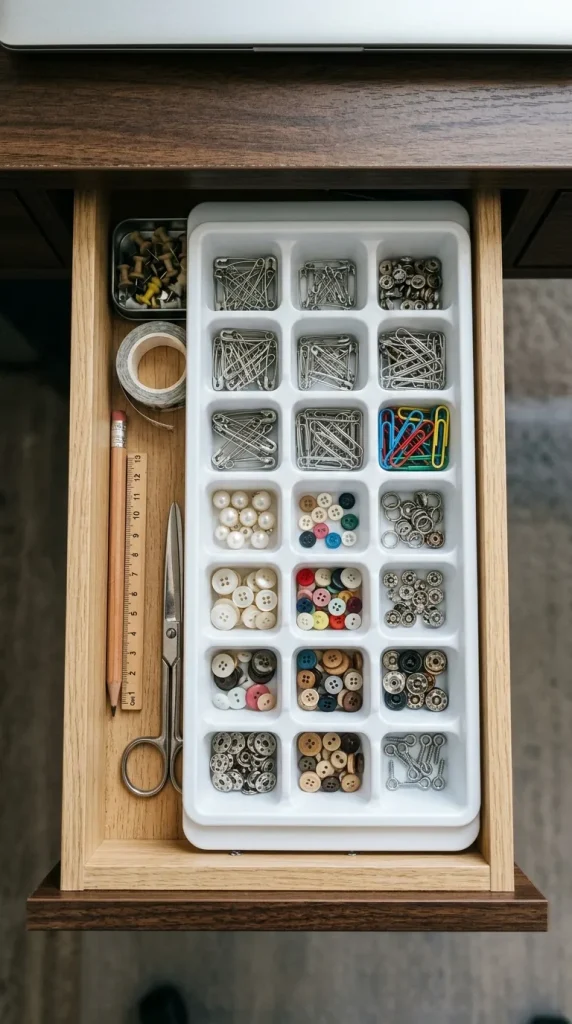
10. Drawer Dividers and Ice Cube Trays

Deep desk drawers are notorious for becoming “junk drawers” where small supplies go to die. Reclaim that space by using shallow drawer organizers or even cheap plastic ice cube trays. The tiny compartments of an ice cube tray are absolutely perfect for sorting tiny components like brads, jewelry findings, eyelets, safety pins, and paperclips.

Conclusion

Organizing a small craft space is not about restricting your creativity; it is about respecting your process. When every tool has a home and your materials are beautifully displayed, your environment actively invites you to create. By implementing these vertical, rolling, and hidden storage hacks, you can turn even the smallest room into a powerhouse of productivity and inspiration. Stop fighting the clutter, claim your walls, and let your creativity flow freely.