10 Wedding Decor Destination Beach Shell Aisle Runners DIY Ideas

There is something undeniably magical about a beach wedding. The rhythmic sound of crashing waves, the salty breeze rustling through linen, and the endless horizon of the ocean create a romantic atmosphere that no traditional venue can truly replicate. For couples who choose the shore as their altar, nature provides the ultimate backdrop. However, translating that expansive natural beauty into a cohesive, intimate ceremony space requires thoughtful design—starting right where you walk.

The ceremony aisle is the narrative spine of your wedding. It is the path you take toward a new chapter, and every eye will be trained on it. For a destination beach wedding, standard fabric aisle runners can be problematic; the wind catches them, sand shifts beneath them, and high heels snag easily on loose cloth. The solution? A beautiful, organic, and wind-resistant shell aisle runner.

By utilizing seashells, starfish, and local coastal elements, you can anchor your path while perfectly complementing the seaside landscape. Best of all, these concepts are highly customizable and DIY-friendly. Here are 10 inspiring ideas to create your own DIY shell aisle runner for a breathtaking beach ceremony.

1. The Scallop Shell Border

For a clean, classic coastal look, construct a structural border using uniform white scallop shells. Gently press the curved backs of the shells into the sand, overlapping them slightly to create a continuous, scalloped edge on either side of the aisle. This creates a crisp, intentional boundary that separates the guest seating from your walking path. Leave the center of the aisle as pure, smoothed sand for a minimalist, elegant aesthetic.

2. Cascading Coquina Shingle

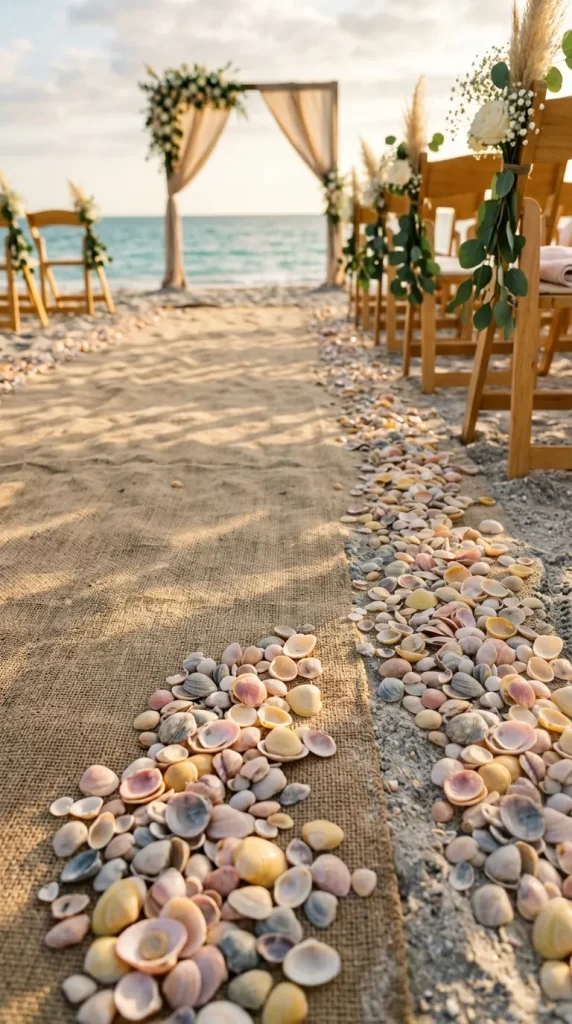
If you prefer a fluid, natural look, borrow a page from the shoreline itself. Gather a high volume of small, multi-colored coquina or clam shells. Instead of a rigid line, scatter them in a wide, sweeping cascade along the edges of the aisle, letting them naturally thin out toward the center. The variety of pastel pinks, soft yellows, and grays will catch the sunlight beautifully, mimicking the natural drift of the tide.

3. Starfish and Driftwood Anchors

Combine textures by using weathered driftwood branches to define your aisle boundaries. Place smooth, sun-bleached driftwood logs along the perimeter of the seating areas, and use a durable, eco-friendly adhesive to accent the wood with large, dried starfish and white murex shells. The weight of the driftwood keeps the arrangement perfectly in place, even during a stiff ocean breeze, while adding a rustic, organic dimension.

4. Floating Shell Mandalas

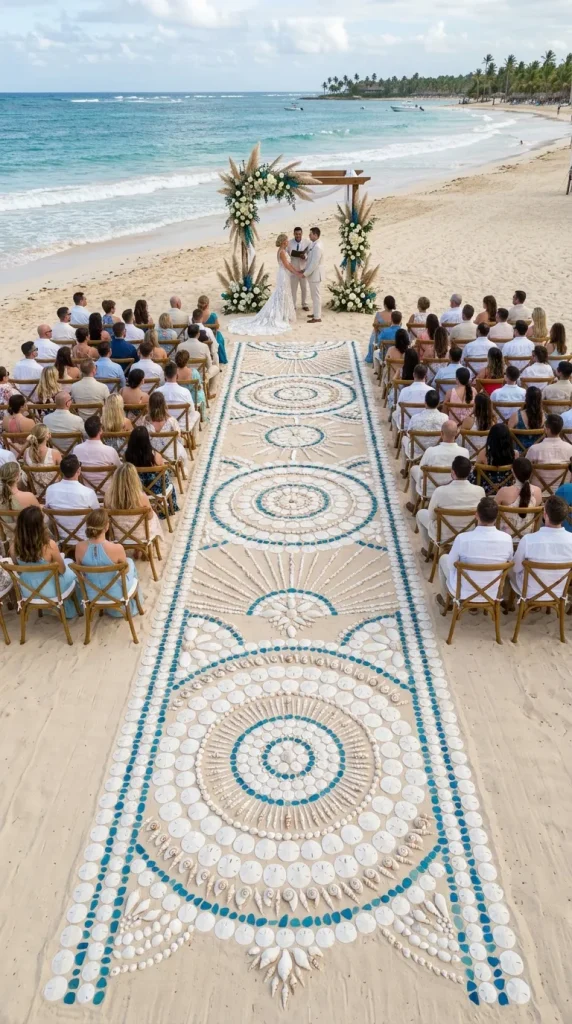
Transform your aisle into a gallery of natural art by creating micro-mandalas or geometric patterns directly in the sand. Every few feet along the path, arrange a mix of spiral auger shells, flat sand dollars, and polished sea glass into circular or starburst patterns. This technique requires patience on the morning of the wedding but results in stunning, intricate details that look incredible in close-up photography.

5. Nautical Rope and Conch Shell Pillars

For a distinct maritime vibe, lay thick, heavy jute or nautical rope down the lengths of the aisle. At the end of every row of chairs, anchor the rope with a large, heavy queen conch shell. You can place a cluster of smaller bivalve shells around the base of each conch to hide the rope ends. The rope keeps a perfectly straight line, while the pink-hued interiors of the conch shells add a subtle pop of romantic color.

6. The Sun-Bleached Sand Dollar Path

Sand dollars carry an inherent air of delicate elegance. Create a modern, high-contrast runner by lining the aisle with a dense border of large, white sand dollars. To add height and prevent them from being stepped on, angle them upward in the sand, facing inward toward the path. Pair them with simple white folding chairs to maintain a sophisticated, monochromatic coastal palette.

7. Seaglass and Crushed Shell Mosaic

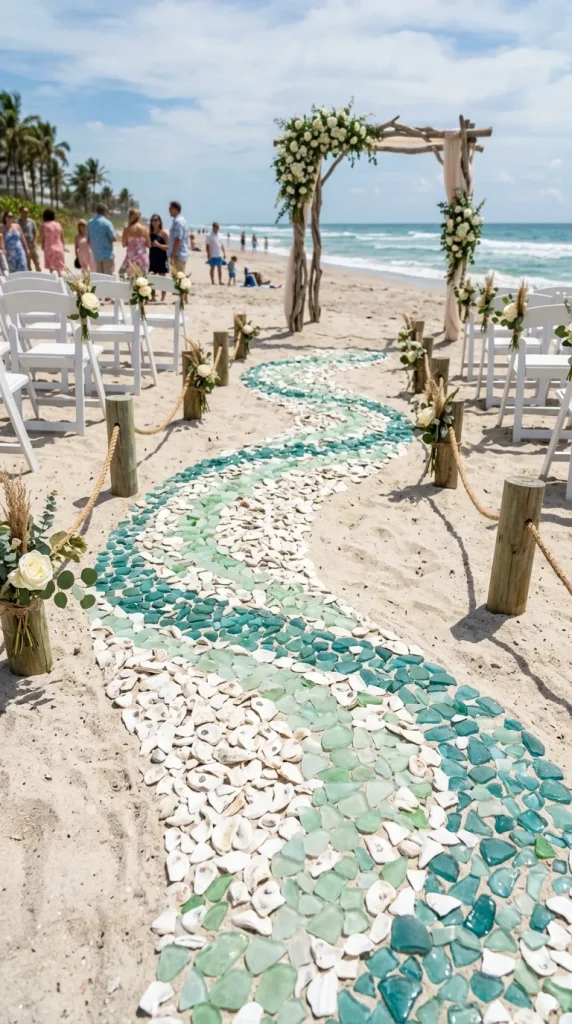
Infuse your walk with a touch of color and sparkle. Mix crushed white oyster shells—which can be bought in bulk—with pieces of tumbled sea glass in shades of mint green, teal, and soft blue. Pour this mixture in a continuous 6-inch wide ribbon down both sides of the aisle. As the sun moves across the sky, the glass and the iridescent interiors of the crushed shells will shimmer like the surface of the water.

8. Lanterns Filled with Ocean Treasures

If you are worried about guests accidentally kicking loose shells, container gardening techniques can save the day. Line your aisle with classic glass lanterns of varying heights. Fill the bottom third of each lantern with white beach sand, and arrange an assortment of local shells, starfish, and a single pillar candle inside. This keeps your shell theme neatly contained and allows you to easily transition the decor to the evening reception.

9. Woven Seagrass Mats with Shell Fringe

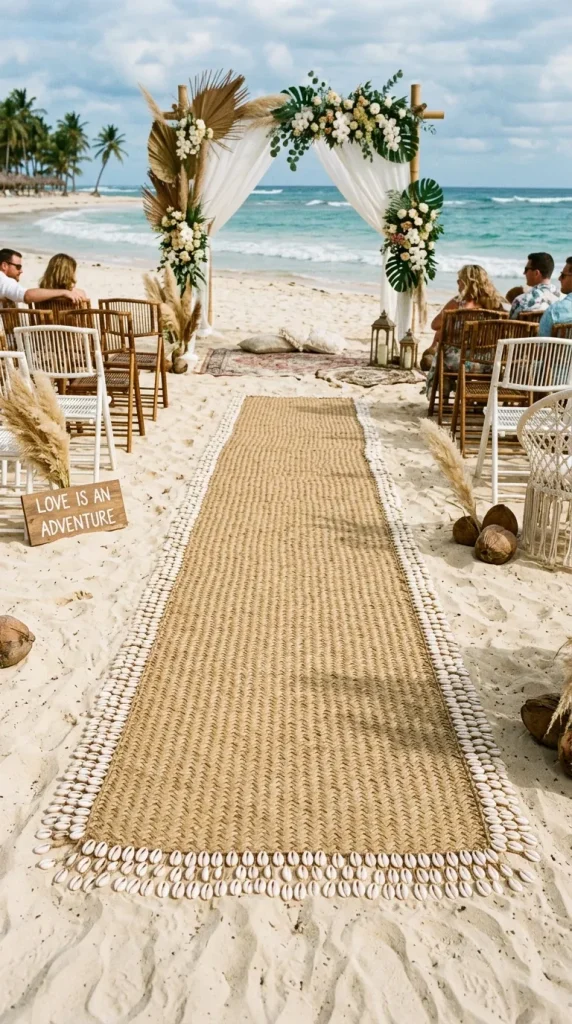
If you want a solid surface to walk on to protect your shoes, purchase a woven seagrass or jute runner mat. Secure it firmly to the sand using long landscaping staples. Then, spend an afternoon pre-wedding gluing a thick fringe of small cowrie or auger shells along the long edges of the fabric. The woven texture feels incredibly grounded and tropical, while the dangling shells add movement and detail.

10. Tropical Floral and Shell Fusion

Marry the treasures of the sea with the vibrant life of a tropical destination. Lay down a base layer of wide green monstera or palm leaves along the edges of the sand path. On top of the foliage, nestle oversized white shells, coral fragments, and bright local blooms like hibiscus or plumeria. The contrast of the deep green leaves, white shells, and vivid florals creates a lush, high-energy runway perfect for a Caribbean or Hawaiian setting.

Tips for Executing a DIY Shell Runner

When taking on a DIY beach installation, timing and preparation are everything. First, always source your shells ethically. If you are gathering them yourself, ensure they are empty and clean. Alternatively, purchasing them in bulk from sustainable craft suppliers ensures uniformity and cleanliness.

Second, appoint a trusted helper or a day-of coordinator to assemble the runner just a few hours before the ceremony. The shifting nature of beach sand, rising tides, and public beach foot traffic mean that an installation done too early can easily be disturbed.

Lastly, remember to smooth the sand completely using a wide garden rake before laying down your shells. A flat, pristine canvas of sand will make your DIY shell runner stand out with sharp, professional clarity, welcoming you to a beautifully styled seaside forever.

10 Wedding Decor Summer Beach Ceremony Arbors Ideas

There is something undeniably magical about a summer beach wedding. The rhythmic sound of crashing waves, the gentle sea breeze, the feel of warm sand beneath your feet, and the endless horizon altogether create a naturally breathtaking backdrop. However, because the ocean landscape is so vast and open, creating a defined, intimate space for your vows is essential. This is where the wedding ceremony arbor comes in.

An arbor acts as the visual anchor for your ceremony. It frames the couple, provides a stunning focal point for guests, and serves as the centerpiece for some of the most important photographs of your life. For a summer beach wedding, an arbor needs to strike a delicate balance: it must look beautiful, complement the natural seaside environment, and withstand the elements like wind and bright sun.

Whether your style is laid-back and bohemian, modern and minimalist, or lavish and tropical, here are 10 inspiring wedding arbor ideas perfectly suited for a sun-kissed summer beach ceremony.

1. The Classic Driftwood Frame

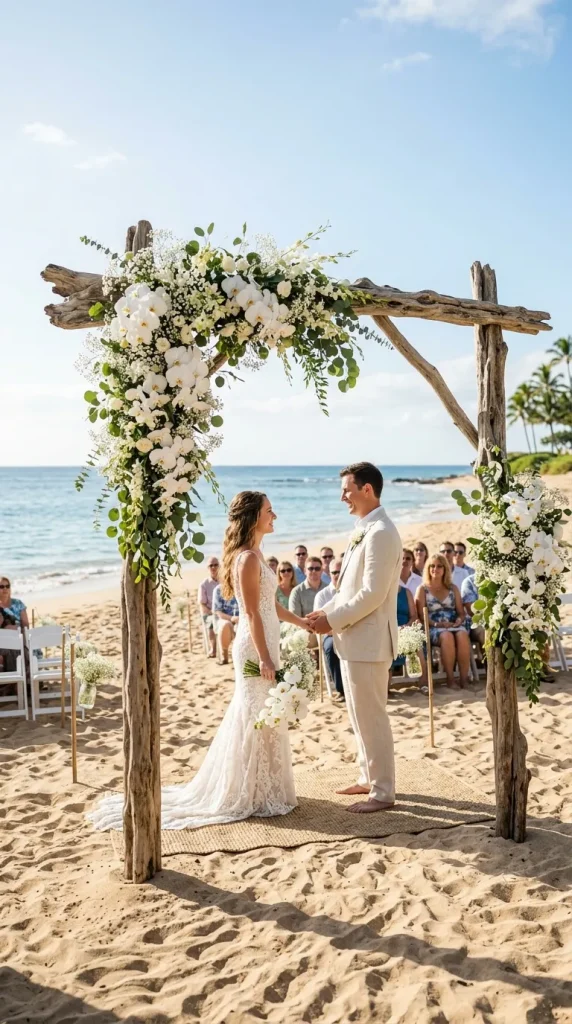
Embrace the natural treasures of the shoreline by opting for an arbor constructed entirely from authentic, weathered driftwood. The sun-bleached, gray-toned wood blends seamlessly with coastal surroundings. To keep it feeling bridal, drape the top and one side with asymmetrical clusters of crisp white orchids, delicate baby’s breath, and subtle trailing greenery. The contrast between the rugged, textured wood and the soft, elegant florals captures the raw beauty of the coast.

2. Tropical Anthurium and Palm Paradise

If you want to lean into a vibrant, destination-vibe aesthetic, a tropical paradise arbor is the way to go. Build a sturdy, dark wood rectangular frame and pack it densely with oversized monstera leaves, emerald palm fronds, and striking fan palms. Inject pops of summer color by weaving in bright pink anthuriums, coral ginger lilies, and orange bird of paradise blooms. This bold look stands out beautifully against the blue sky and ocean.

3. Minimalist Circular Eternity Ring

For a modern twist on beach decor, a circular arbor symbolizes eternity and looks incredibly striking against the flat horizon of the sea. A simple copper or gold metallic ring allows the ocean view to peek through the center. Soften the metal by dressing it with pampas grass, white roses, and dried bleached palms concentrated on just one curve of the circle, creating an elegant, asymmetrical frame that feels both contemporary and timeless.

4. Breezy Bamboo and Gauzy Linen

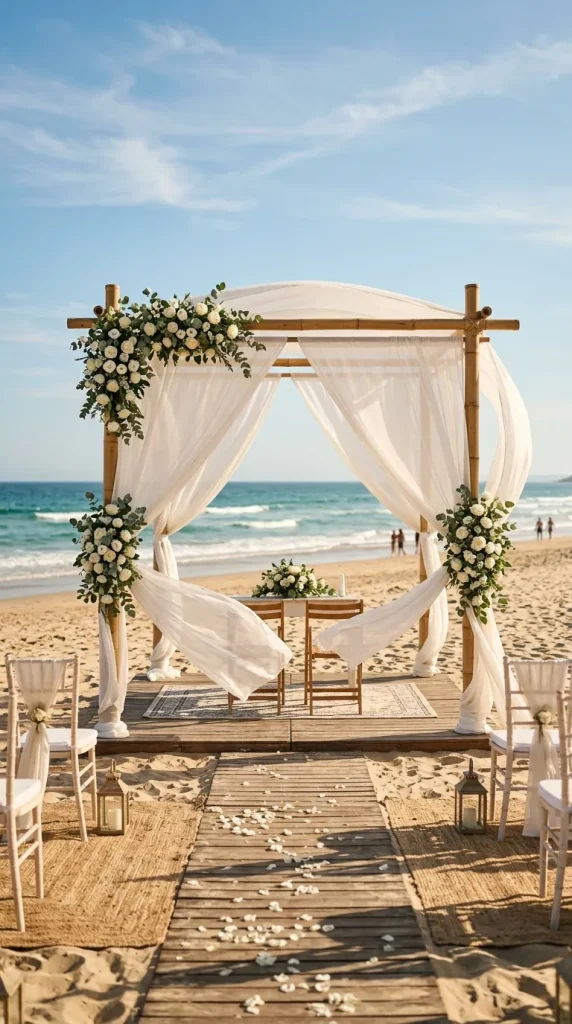
Capture the ultimate relaxed, effortless beach vibe with a classic four-post bamboo chuppah or canopy. The lightweight, tan bamboo poles look perfectly at home in the sand. Weave yards of sheer, lightweight white linen or cheesecloth fabric across the top, letting the long tails billow gently in the ocean breeze. Accent the corners with small, neat clusters of white garden roses and eucalyptus leaves to keep the fabric secure and stylish.

5. Nautical Ship Rope and Timber

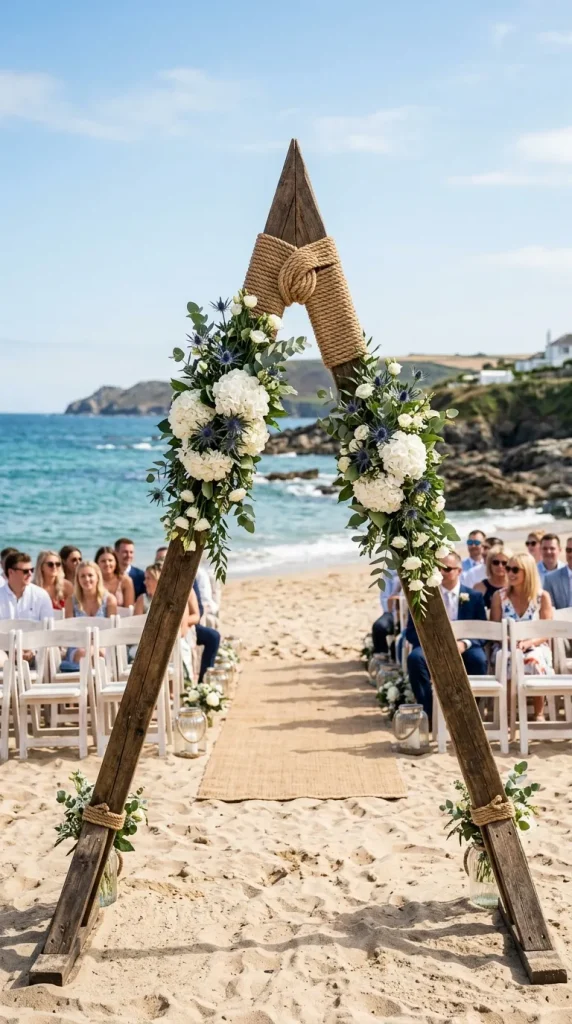
For a sophisticated, nautical-inspired celebration, look to the elements of classic sailing. Construct a sharp, clean-lined triangular timber frame. Instead of traditional floral garlands, wind thick, natural jute ship rope around the apex and base of the structure. Finish the design with clean white hydrangeas and subtle sea holly accents at the core connection points, creating a crisp, tailored look fit for a seaside estate.

6. Bohemian Macramé Tapestry

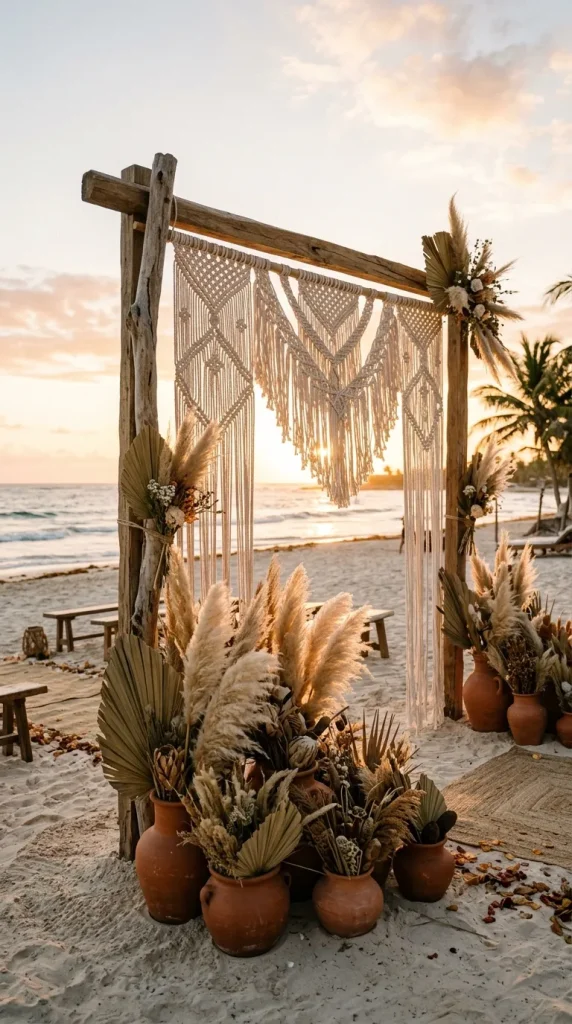
Perfect for the free-spirited couple, a boho beach arbor infuses texture and artistry into the landscape. Hang an intricate, hand-woven cream macramé tapestry from a simple wooden crossbeam structure. The fringed edges and geometric knots look stunning when the sunlight shines through them. Frame the base of the arbor with terra-cotta pots filled with dried bunny tails, pampas grass, and sun-baked palm spears.

7. Sun-Drenched Citrus and Coral

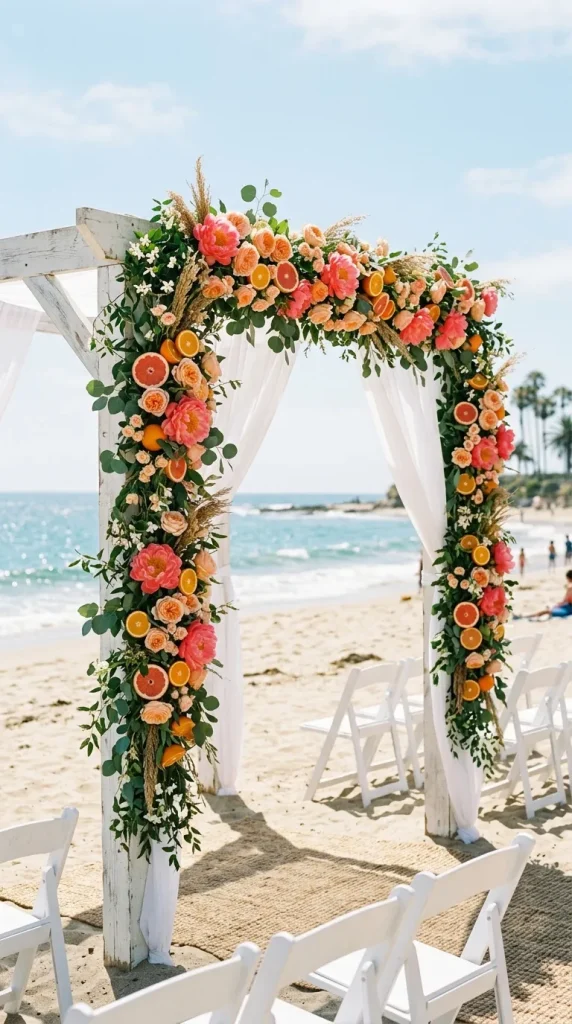
Celebrate the bright, joyful energy of summer by incorporating a punchy, warm color palette. Decorate a clean white wooden arch with an abundance of coral peonies, peach garden roses, and trailing jasmine vines. Interspersed throughout the floral arrangements, nestle real, halved grapefruits, whole oranges, and kumquats. The citrus elements add an unexpected, playful pop of color and a fresh, summery fragrance to the altar.

8. The Floating Floral Monoliths

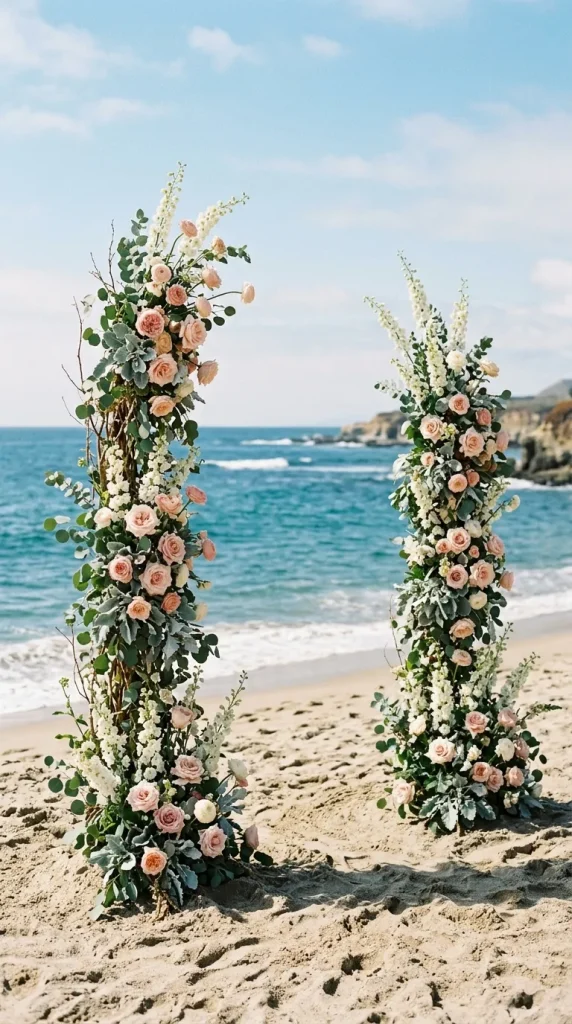
If you want an unobstructed view of the ocean while you say your vows, opt for ground-based floral pillars instead of a connected arch. Create two asymmetrical, free-standing columns that appear to grow straight out of the sand. Fill them with a romantic mix of blush spray roses, white delphiniums for height, and soft dusty miller greenery. Because there is no top bar, the endless ocean view remains entirely open.

9. Seashell and Sea Glass Whimsy

For a design deeply connected to the ocean’s treasures, incorporate a handmade, whimsical element. Hang delicate strands of polished white capiz shells, iridescent sea glass, and small starfish from a driftwood archway. As the ocean breeze moves through the strands, the shells create a gentle, soothing musical sound. Complement the hanging details with simple, low-lying white floral arrangements at the base.

10. Tuscan Olive and White Rose Elegance

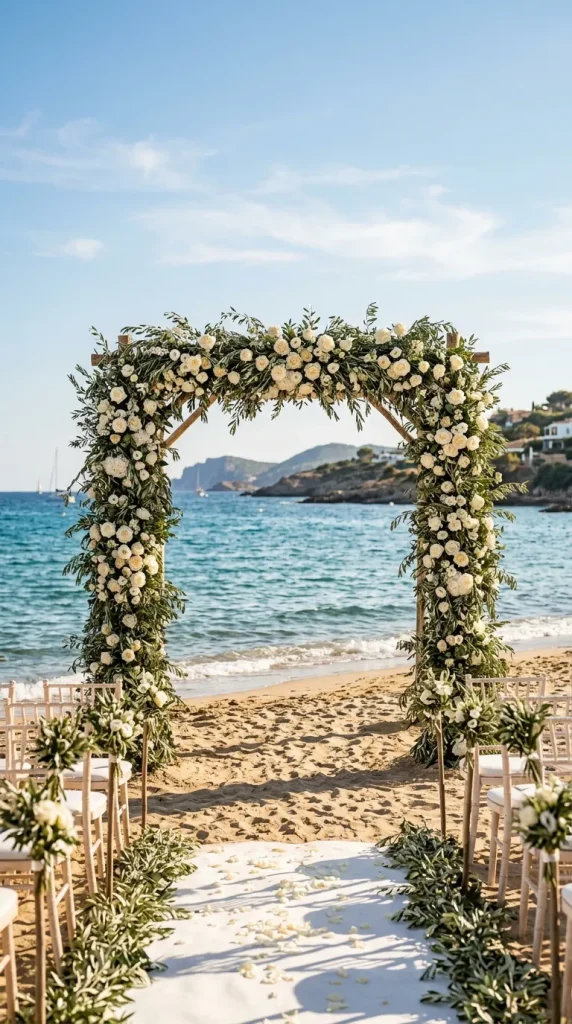
Bring a touch of Mediterranean romance to the coastline by pairing classic Italian garden elements with the beach. Wrap a dark iron or wood archway in a lush, dense garland of silvery-green olive branches and bay leaves. Nestle heavy clusters of premium white reflexed roses and white ranunculus into the greenery. The muted tones of the olive leaves look incredibly sophisticated against the golden sand and blue water.

Tips for a Flawless Beach Arbor Installation

When executing an arbor design on the beach, functionality is just as important as beauty. First, consider the wind. Ocean breezes can easily topple a top-heavy structure. Ensure your design team uses extra-long stakes driven deep into the sand, or hides heavy weights, sandbags, or concrete blocks inside decorative floral boxes at the base of the frame.

Second, think about sun exposure. Summer heat can quickly wilt delicate blooms. If your ceremony is in the afternoon, opt for hardy florals like tropical varieties, orchids, roses, or dried elements that can withstand hours of direct sunlight without drooping.

Finally, check local beach regulations. Many public beaches have strict rules against digging deep holes, leaving permanent structures, or using certain synthetic materials. Always opt for eco-friendly, easily removable installations to ensure the beautiful shoreline remains pristine long after your celebration ends.

10 DIY Bedroom Decor Wall Art for Small Rooms Ideas 

Transforming a small bedroom doesn’t require a massive budget or a major renovation. When floor space is at a premium, your walls become your greatest asset. Blank walls are full of untapped potential, and blank space can easily be converted into a gallery of personal expression. The right wall art can actually trick the eye into making a compact room feel larger, brighter, and more curated.

DIY wall art allows you to customize colors, textures, and scales to perfectly fit your unique layout. By focusing on vertical elements, reflective surfaces, and lightweight textures, you can elevate your design without cluttering your physical space.

Here are 10 creative, budget-friendly DIY bedroom decor wall art ideas specifically tailored to maximize and beautify small rooms.

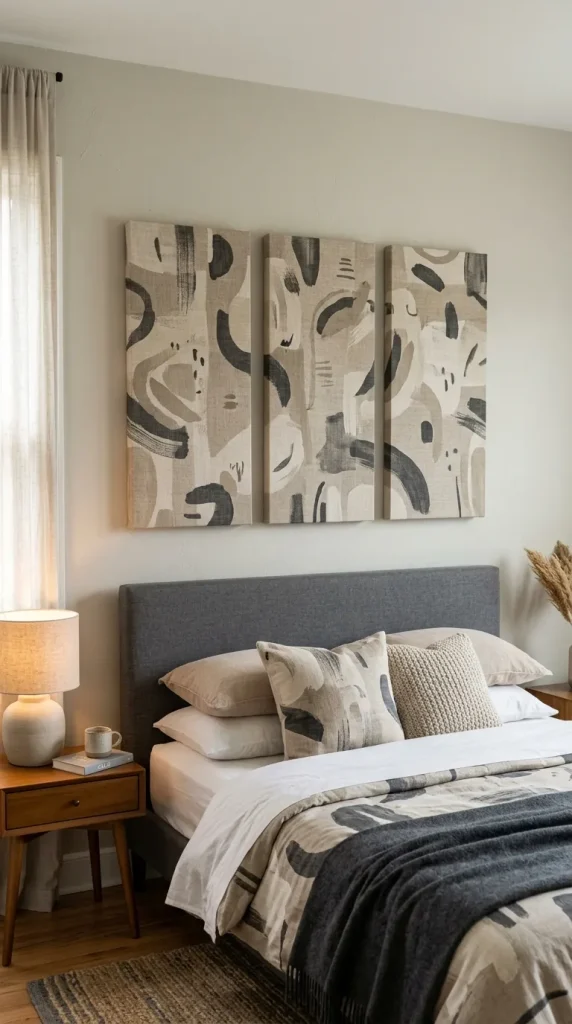
1. The Oversized Split-Canvas Engineering Print

Large art can actually make a small room feel bigger by creating a singular, dramatic focal point instead of many tiny, cluttered ones. However, giant frames are expensive and heavy. The solution is an engineering print. You can print a high-resolution landscape or abstract photo at a local print shop for just a few dollars. Cut the print into three equal vertical sections and mount them onto three lightweight stretched canvases using Mod Podge. Hanging this triptych above a bed draws the eye upward and creates an illusion of architectural grandeur.

2. Pressed Botanical Floating Frames

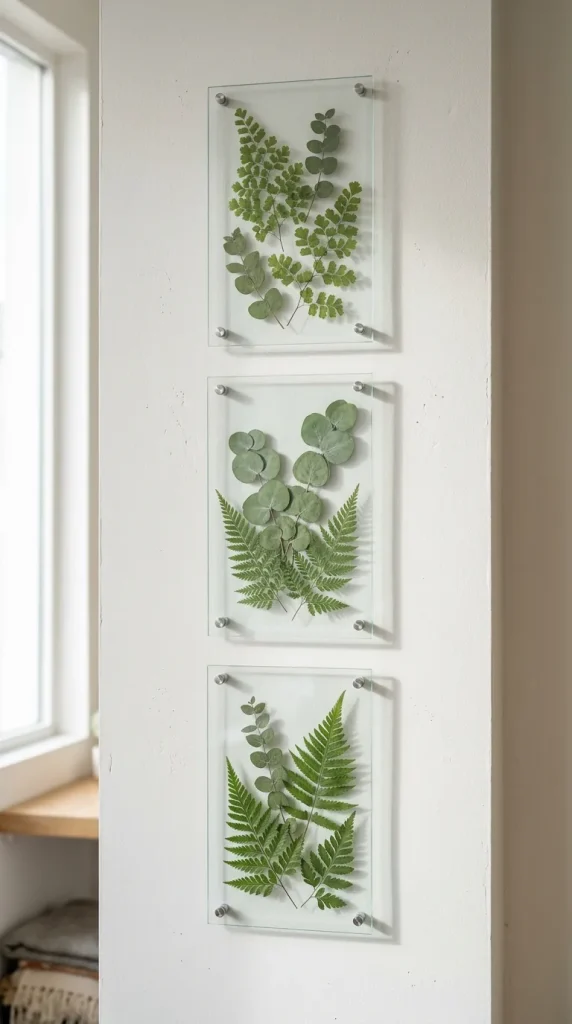
Bringing elements of nature into a small room creates a serene, airy atmosphere. Gather flat leaves—like ferns, eucalyptus, or monstera fronds—and press them inside heavy books for a week. Once dried, place them between the glass panels of inexpensive floating frames. Because floating frames have transparent backgrounds, the wall color shows through, keeping the visual weight of the artwork incredibly light. This prevents the walls from feeling closed in.
3. Bohemian Yarn and Driftwood Wall Hanging

Texture adds warmth to a small bedroom without stealing physical space. A DIY yarn hanging brings a soft, cozy, bohemian texture to your walls. Find a clean, sturdy branch or a piece of driftwood. Cut strands of yarn in various neutral shades (cream, beige, and soft terracotta) at double your desired length. Attach them to the branch using simple lark’s head knots. Trim the bottom of the yarn into a sharp V-shape or a clean straight line for a modern, textured look that softens hard wall angles.

4. Arch Painted Accent “Headboard”

If your small bedroom doesn’t have space for a bulky headboard, paint one directly onto the wall. Using a pencil, a string, and a tack as a makeshift compass, draw a large arch on the wall behind your bed. Paint the inside of the arch a rich, moody hue or a soft pastel. This acts as a piece of faux-architectural wall art that anchors your bed, defines the space, and adds incredible visual depth without taking up a single millimeter of floor real estate.

5. Minimalist 3D Textured Spackle Canvas

Monochromatic art is perfect for small rooms because it introduces visual interest without overwhelming the eyes with chaotic colors. Grab a large canvas, a tub of lightweight joint compound (spackle), and a notched putty knife. Spread the spackle across the canvas and use the knife, a comb, or even your fingers to create sweeping arcs, waves, or clean geometric lines. Once it dries completely, paint over the entire canvas with a flat white, cream, or beige paint. The result is a high-end, gallery-worthy piece that relies entirely on shadow and light.

6. Symmetrical Thrifted Mirror Gallery

Mirrors are the oldest trick in the design book for expanding small spaces because they bounce light around the room and create the illusion of an extra window. Scour thrift stores for 4 to 6 small, uniquely shaped frames. Remove the backings, spray paint the frames in a cohesive color (like matte black or soft gold), and insert mirror glass custom-cut at a local hardware store. Hang them in a tight, symmetrical grid to create a sophisticated, light-reflective focal point.

7. Floating Corner Bookcase Art

Corners are often completely wasted in small bedrooms. You can turn an empty corner into a functional, sculptural art installation using invisible floating bookshelves. Screw these small L-shaped brackets into the corner walls vertically and stack your favorite books on top of them. By arranging the books by cover color or stacking them horizontally, your literary collection becomes a dynamic, vertical art piece that frees up valuable floor space where a traditional bookcase would sit.

8. Washi Tape Geometric Mural

If you are renting or love to change your decor frequently, washi tape is your best friend. It is incredibly cheap, comes in endless colors, and peels off cleanly without damaging paint. Map out a geometric design—such as a series of interlocking triangles, a minimalist chevron pattern, or a faux line-art silhouette—directly on your wall using a level and a pencil. Trace over the lines with high-quality black or metallic gold washi tape for an instant, graphic accent wall.

9. Fabric-Wrapped Acoustic Panels

Beautiful fabric can double as high-end wall art while pulling double-duty to dampen echoes, making a small room feel quieter and more peaceful. Purchase inexpensive acoustic foam panels or cut pieces of thick insulation cardboard. Wrap them tightly in your favorite textiles—such as vintage linen, bold mudcloth, or soft velvet—and secure the fabric to the back with a staple gun. Hang a row of three or four panels tightly together above a desk or bed for a structured, cozy, and functional art installation.

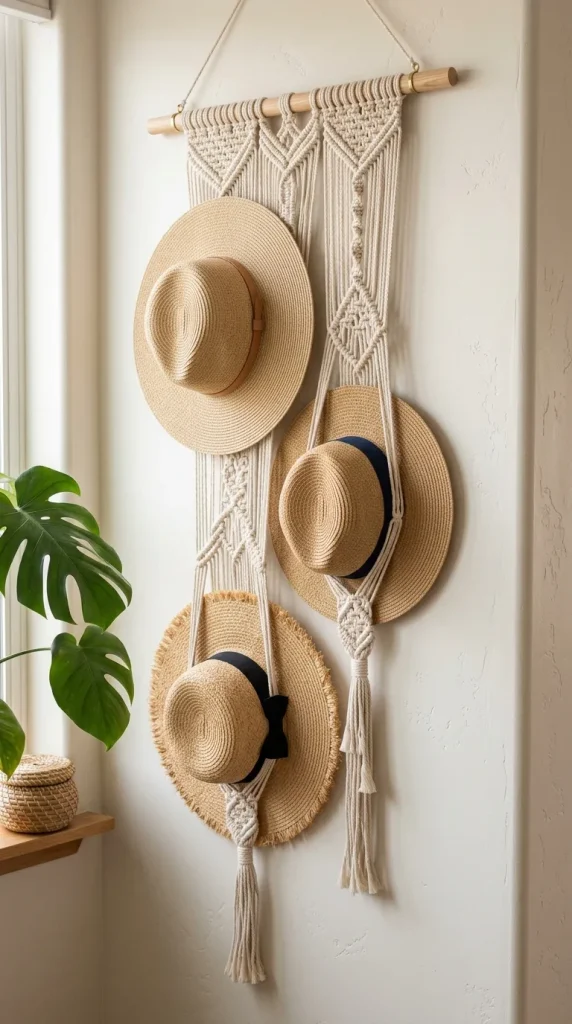
10. Hanging Macrame Hat or Bag Display

Functional storage can easily be transformed into intentional wall art. If you have a collection of wide-brimmed sun hats, woven bags, or beautiful scarves, don’t hide them away in a cramped closet. Mount a sleek wooden dowel or a copper pipe high on your wall. Use S-hooks or macrame cords to suspend your accessories at varying heights. This creates a rotating, highly personal fashion installation that keeps your favorite items organized, accessible, and beautifully displayed.

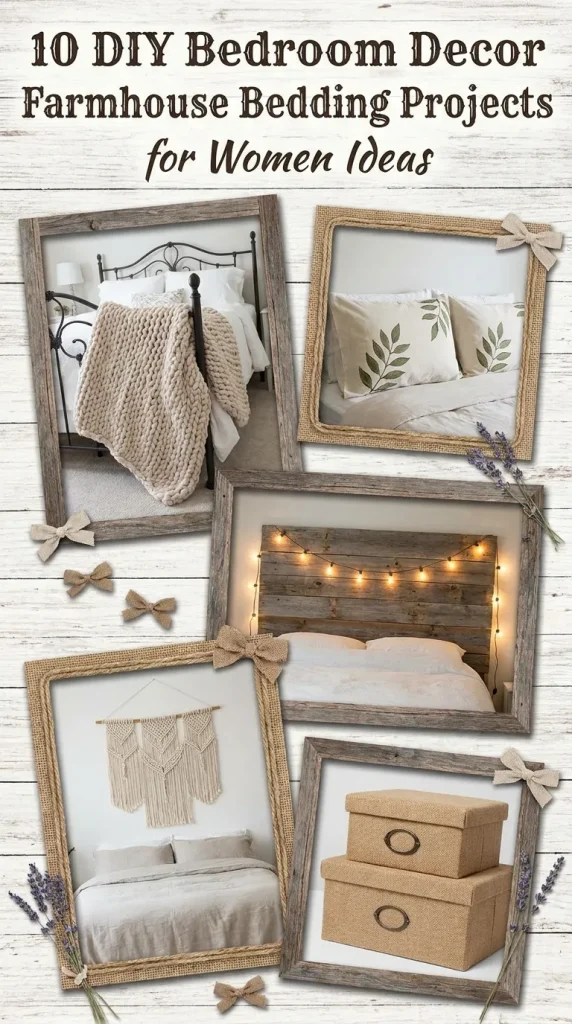
10 DIY Bedroom Decor Farmhouse Bedding Projects for Women Ideas

The farmhouse aesthetic is all about warmth, comfort, and a touch of rustic charm. It’s a style that invites you to kick off your shoes, relax, and feel instantly at home. At the heart of any farmhouse bedroom is the bed itself—a cozy sanctuary of soft textures, muted tones, and handmade details. If you are looking to transform your sleeping space into a serene, rustic retreat without breaking the bank, roll up your sleeves.

Here is a deep dive into 10 beautiful, budget-friendly DIY farmhouse bedding projects designed specifically for women who love to create, upcycle, and style their own spaces.

1. The Ruffled Drops Linen Bed Skirt

A standard store-bought bed skirt often looks stiff and sterile. You can create a soft, romantic farmhouse anchor for your bed using neutral linen or drop cloth material. Linen brings that perfect, slightly wrinkled texture that defines high-end farmhouse style. By cutting fabric strips to 1.5 times the length of your bed frame, you can create beautiful, cascading ruffles. Gather the fabric using a simple basting stitch on a sewing machine, then attach it to an old fitted sheet or directly to the box spring platform. The result is a pooling, romantic edge that beautifully hides under-bed storage.

2. Hand-Stitched Grain Sack Accent Pillows

Grain sacks are a staple of authentic farmhouse decor, but genuine vintage ones can cost a fortune. You can easily replicate the look using heavy oatmeal-colored cotton canvas or cotton duck fabric. Use fabric paint and painter’s tape to roll on the classic, crisp ticking stripes down the center—usually a thick stripe flanked by two thinner ones in navy blue, charcoal grey, or barn red. For a genuinely rustic touch, use thick embroidery floss to hand-stitch a faux monogram or family initial right above the stripes. Fill them with plush down inserts for that perfectly choppable, lived-in look.

3. The Cozy Hand-Knit Chunky Chenille Throw

Nothing says comfort like an oversized, chunky knit blanket draped effortlessly across the foot of the bed. You don’t even need knitting needles for this project; arm-knitting has made this incredibly accessible. Using ultra-soft, jumbo chenille yarn in cream, soft taupe, or sage green, you can weave a luxurious throw blanket in under two hours using just your forearms. The massive loops provide incredible visual texture, contrasting beautifully against smooth sheets and structured duvets.

4. Vintage Quilt Euro Shams

If you love hitting thrift stores or flea markets, keep an eye out for cutter quilts—vintage quilts that are beautifully broken in but have too many stains or tears to be used as a full blanket. You can rescue the pristine sections of these quilts and transform them into oversized Euro shams. The faded floral patterns, hand-stitched details, and worn cotton batting add instant history and soul to a modern bed layout. Simply cut the quilt to size, finish the edges with a simple bias tape binding, and add an envelope closure on the back using a neutral muslin fabric.

5. Bleached Drop Cloth Duvet Cover

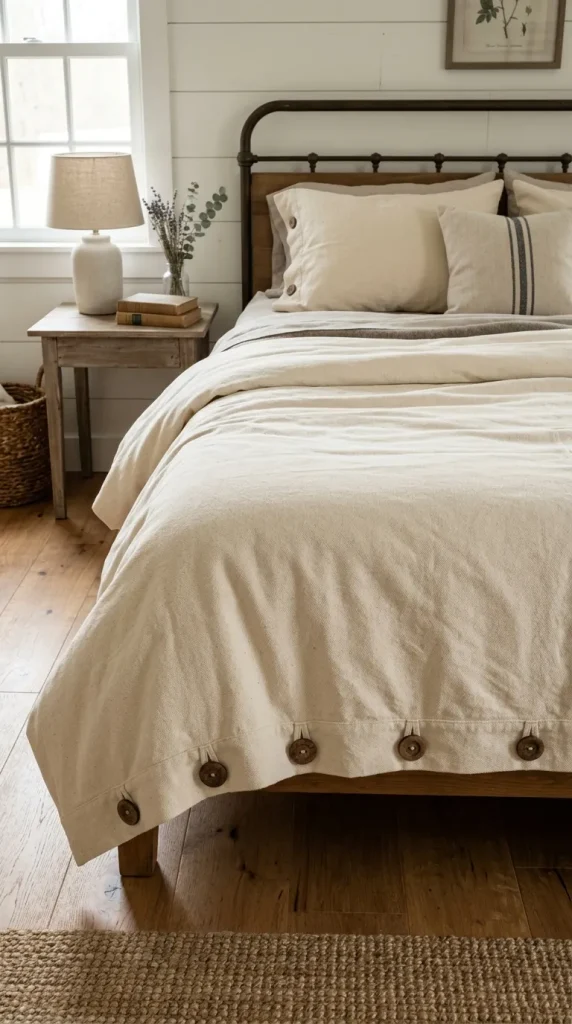
Canvas drop cloths from the hardware store are a DIY decorator’s secret weapon. They are incredibly durable, inexpensive, and made of 100% cotton or a cotton-blend that mimics expensive raw linen when treated correctly. To make a duvet cover, soak two large drop cloths in a bath of hot water and bleach to strip out the harsh gray-tan color, softening the fabric into a beautiful, warm cream color. Sew three sides together, add a series of simple wooden buttons or fabric ties along the bottom opening, and you have a heavy, textured duvet cover that looks like it belongs in a boutique catalog.

6. Delicate Lace-Trimmed Flat Sheets

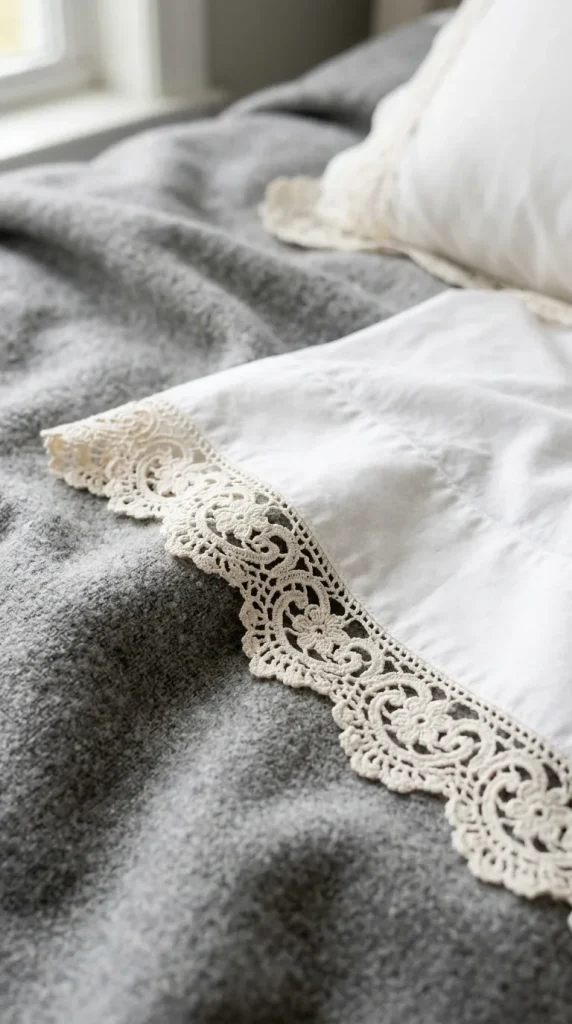
Give a plain white or soft gray sheet set an instant heirloom upgrade by adding vintage lace trim to the top cuff of the flat sheet and the edges of the pillowcases. You can find beautiful crocheted lace or eyelet trim at local craft stores or vintage shops. Carefully pin the lace along the top edge of the sheet, ensuring it faces downward when the bed is made and the sheet is folded back over the duvet. It’s a subtle, feminine detail that catches the eye and adds a layer of delicate texture to the bed.

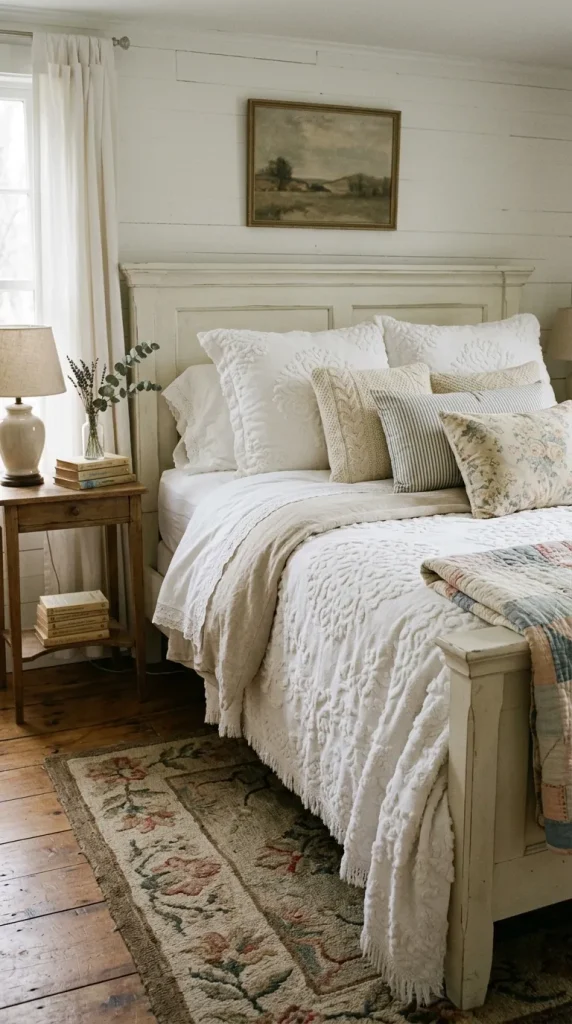
7. The Tufted Chenille Bedspread Upcycle

Chenille bedspreads from the 1950s and 60s are famous for their tufted, velvety lines and cozy, nostalgic feel. If you find a vintage chenille bedspread that feels a bit too dated for your entire bed, consider cutting it down into a structured coverlet or a long bed scarf. The iconic raised tufts create a wonderful geometric or floral texture that breaks up flat fabrics. Fray the edges slightly and wash it a few times to get that perfect, fluffy, timeworn fringe along the borders.

8. Stenciled Botanical Coverlet

If you prefer a clean, minimalist farmhouse look, a botanical stenciled coverlet offers a gorgeous botanical touch. Start with a plain, lightweight cotton quilt or blanket in white or ivory. Using a large, delicate stencil of olive branches, eucalyptus leaves, or ferns, lightly dab soft charcoal or muted green fabric paint across the fabric. Focus the design on just the lower third of the blanket or scatter it lightly for a whimsical, hand-printed textile look. Heat-set the paint with an iron so it remains soft and washable.

9. Tie-Back Muslin Pillowcases

Muslin is a lightweight, breathable cotton fabric with a beautiful crinkled texture that requires absolutely no ironing—the ultimate farmhouse luxury. Sew simple pillowcases from unbleached cotton muslin, but leave the open end extra-long. Instead of a traditional hem, attach wide fabric strips to the opening so you can tie the ends into beautiful, floppy bows. It keeps the pillows snugly inside while adding a relaxed, cottage-core charm to your pillow stack.

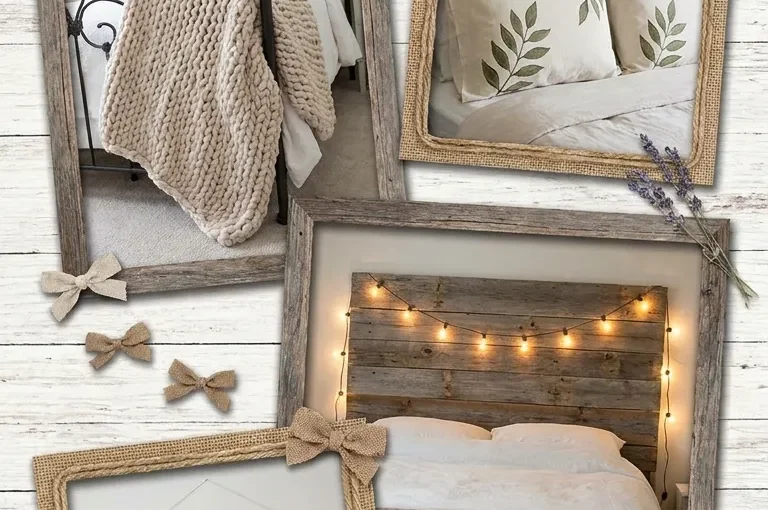
10. Reclaimed Wood Headboard and Quilt Rack

While not strictly bedding, how you frame your bed completes the look. A simple DIY headboard made from weathered, cleaned pallet wood or reclaimed barn boards acts as the ultimate backdrop for your new bedding. To complement it, build a simple wooden ladder or wall rack to hang your extra DIY throws and quilts. It keeps your projects organized while turning your extra bedding into a beautiful, layered wall display.

 10 Fall Mason Jar Crafts Ideas

As the crisp autumn air rolls in and the leaves begin their vibrant transformation, there is an unmistakable urge to bring that cozy, rustic warmth indoors. When it comes to seasonal decorating on a budget, few items are as versatile, charming, and accessible as the humble mason jar. Whether you are aiming for a modern farmhouse look, a vibrant harvest display, or a spooky Halloween vibe, these glass jars can be transformed in endless ways.

The beauty of mason jar crafting lies in its accessibility. With basic materials like chalk paint, twine, mod podge, and elements from nature, you can create professional-looking home decor in an afternoon. Here are ten creative and cozy fall mason jar craft ideas to inspire your autumn crafting sessions.

1. The Distressed Chalk-Painted “FALL” Set

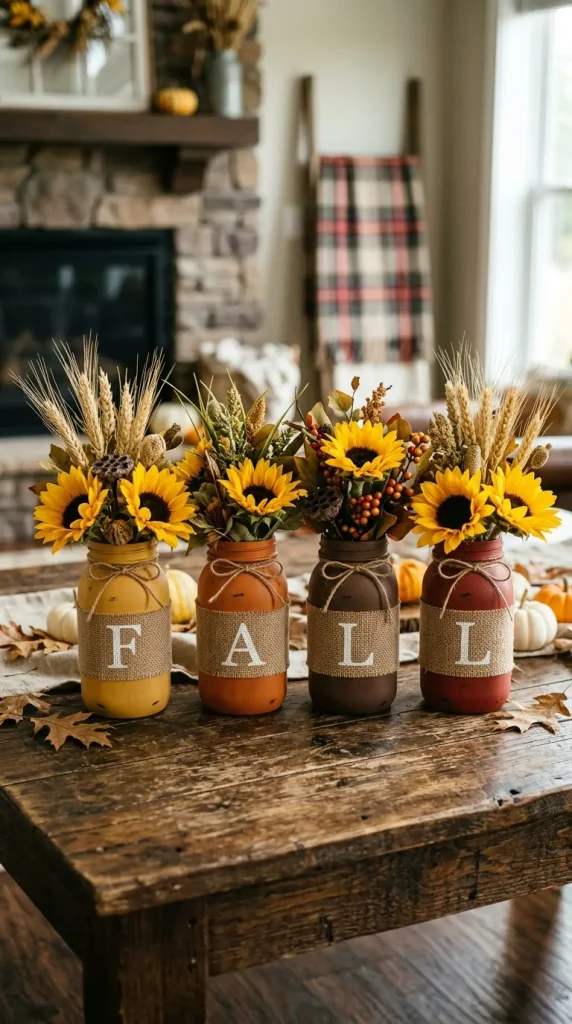
Nothing says cozy farmhouse style quite like distressed chalk paint. For this classic mantle centerpiece, select four matching mason jars. Paint each jar with two coats of matte chalk paint in warm autumn tones: think mustard yellow, burnt orange, rich chocolate brown, and deep crimson. Once dry, use a piece of fine-grit sandpaper to gently rub the raised details of the glass—such as the “Ball” logo and the rim—to reveal the clear glass underneath. Wrap a strip of burlap around each jar, stencil the letters F, A, L, and L onto them, and finish with a twine bow. Pop a few faux sunflowers or sprigs of wheat inside to complete the look.

2. Glowing Autumn Leaf Lanterns

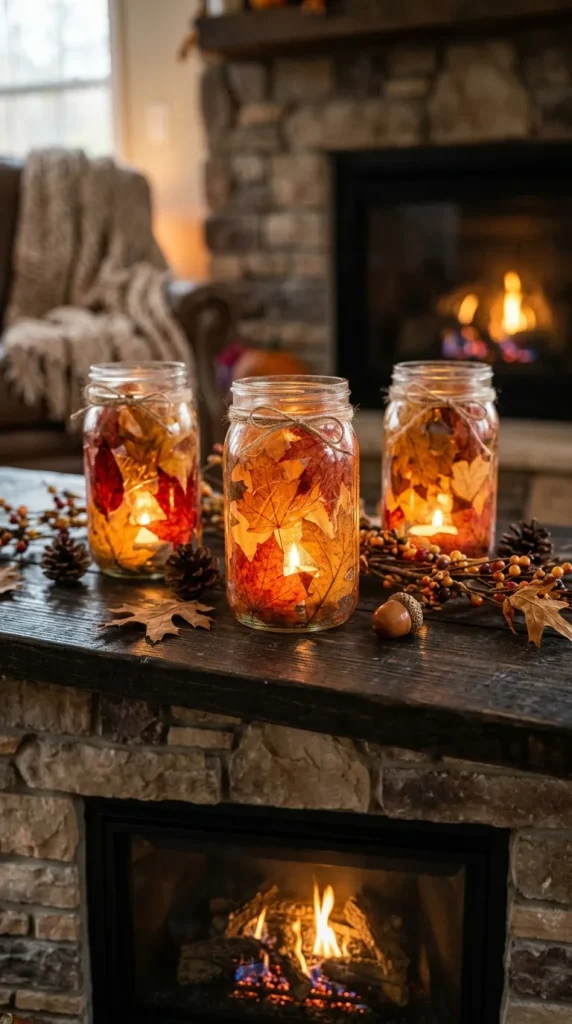
Bring the warm, golden hues of a forest floor into your living room with a leaf lantern. For this project, collect preserved fall leaves or high-quality faux silk leaves. Clean the outside of a mason jar thoroughly, then use a sponge brush to apply a layer of Mod Podge. Carefully press the leaves onto the glass, smoothing out any air bubbles. Seal the leaves with another generous coat of Mod Podge. Once fully dried, the Mod Podge cures clear, leaving you with a beautiful stained-glass effect. Drop a battery-operated tea light inside to watch the fiery red and orange leaf veins glow.

3. Cozy Burlap & Twine Wrapped Vases

If you prefer a neutral, textured aesthetic over bright colors, a burlap and twine wrap is incredibly elegant. Cut a wide band of natural burlap to fit around the midsection of a clean, clear mason jar, and secure it with hot glue. Next, wrap thick jute twine around the neck of the jar multiple times, tying it into a loose, rustic bow. You can slip a small spray of dried cotton, pinecones, or dried eucalyptus behind the twine. The simplicity of the clear glass paired with rough fibers perfectly encapsulates rustic elegance.

4. Splattered Pumpkin-Style Jars

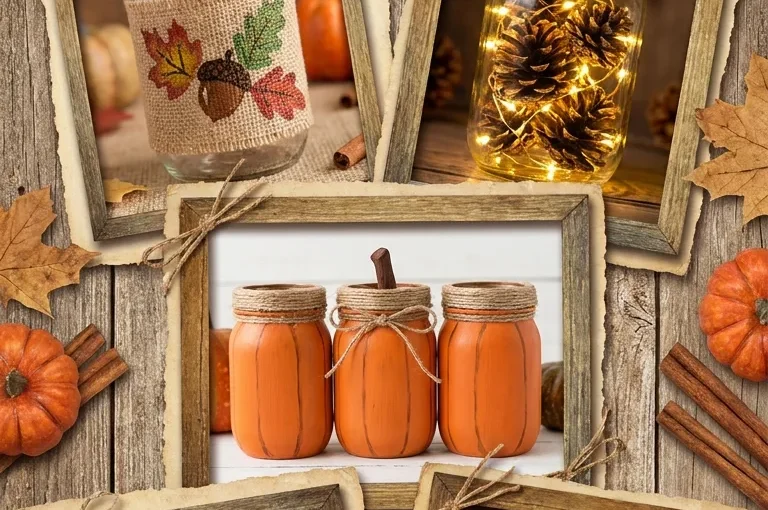
Transform your mason jars into adorable, plump pumpkins with a bit of paint and creativity. Paint your jars in a rich, warm pumpkin orange. Once dry, mix a tiny amount of brown acrylic paint with water, dip an old toothbrush or stiff paintbrush into the mixture, and gently flick the bristles to create a subtle, dark brown speckled pattern over the orange surface. For the finishing touch, wrap green floral wire or a thick piece of cinnamon stick around the jar’s rim to mimic a pumpkin stem and curly tendril.

5. Candy Corn Ombré Treat Jars

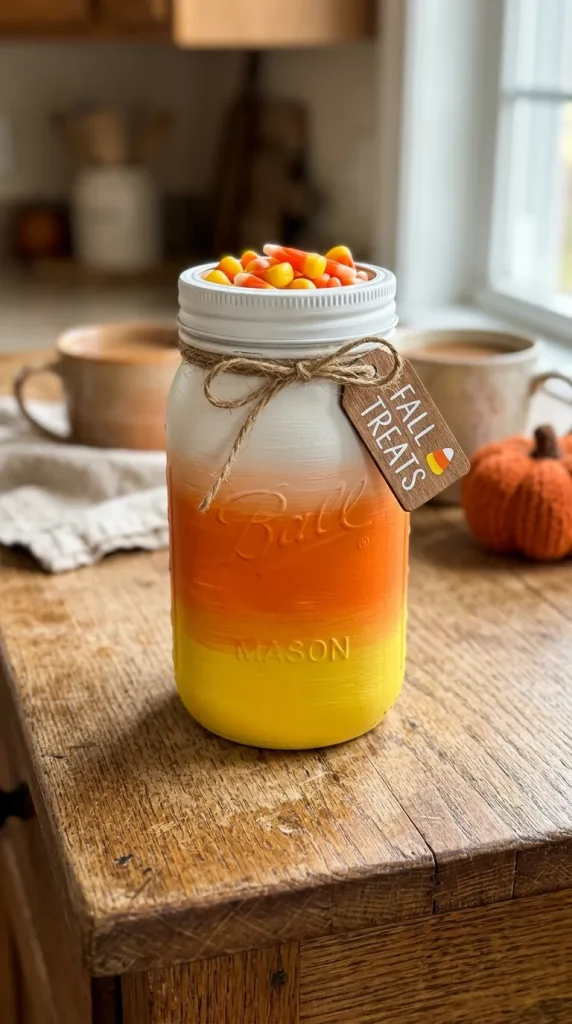
Celebrate the sweet side of autumn with candy corn-inspired jars that double as festive storage. Using spray paint or acrylics, paint the bottom third of the jar bright yellow, the middle third vibrant orange, and the top neck of the jar crisp white. Blend the edges slightly where the colors meet to create a smooth gradient. These jars look beautiful on kitchen countertops filled with actual candy corn, caramel apples ingredients, or color-coordinated kitchen utensils.

6. Glittering Harvest Gold Centerpieces

If your style leans a little more glamorous, add some sparkle to your autumn dining table with metallic gold glitter jars. Apply a coat of adhesive or Mod Podge to the lower half or the entire surface of the jar. Generously coat the wet glue with metallic gold, copper, or bronze glitter, tapping off the excess. Once dry, spray a clear sealant over the glitter to prevent shedding. When paired with flickering candle light, these metallic jars reflect a gorgeous, dancing shimmer that is perfect for Thanksgiving dinner tables.

7. Dried Wheat & Lavender Bundles

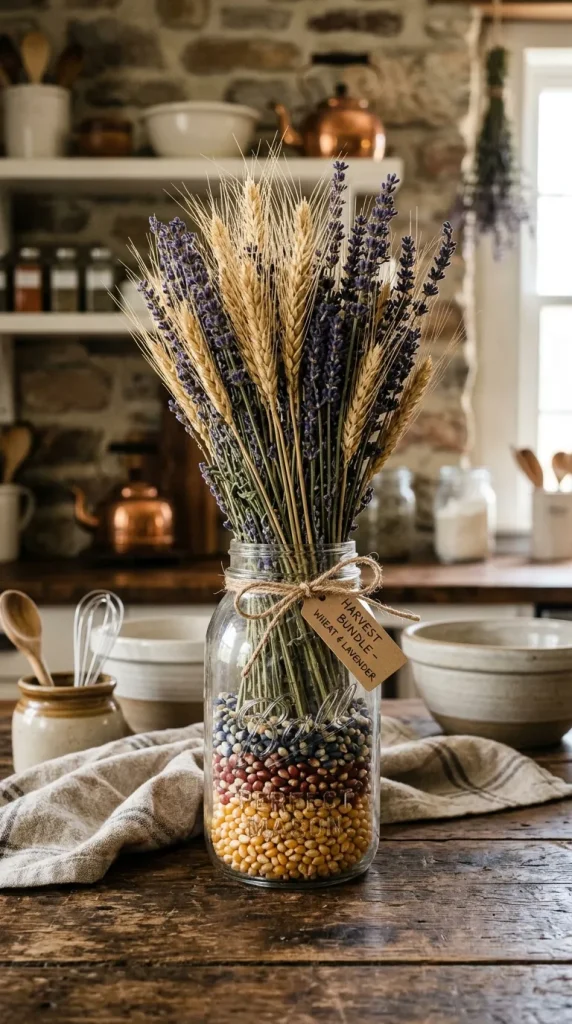
Embrace the harvest theme by using clear mason jars as structured planters for dried grains and florals. Instead of painting the outside, fill the bottom of a clear jar with raw popcorn kernels, dry acorns, or small pebbles to weigh it down and add texture. Insert a dense bundle of dried wheat stalks, dried lavender, and bunny tails. Tie a thick plaid or gingham ribbon around the neck of the jar to lean into a classic country aesthetic.

8. Autumn Potpourri Simmering Jars

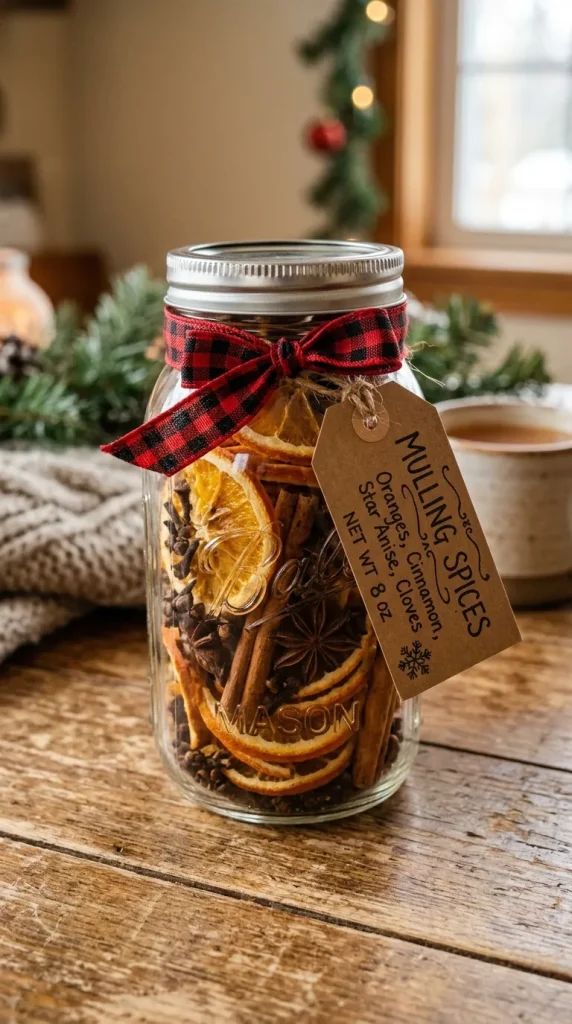
Keep your home smelling like freshly baked treats with a simmering potpourri jar. Pack a mason jar with sliced dried oranges, cinnamon sticks, whole cloves, star anise, and a splash of vanilla extract. Secure the lid tightly and decorate the top with a scrap of flannel fabric and a gift tag. These make incredibly thoughtful housewarming gifts; the recipient can simply empty the jar’s contents into a pot of simmering water on the stove to fill their home with the ultimate cozy fall fragrance.

9. Rustic Chalkboard Label Herb Planters

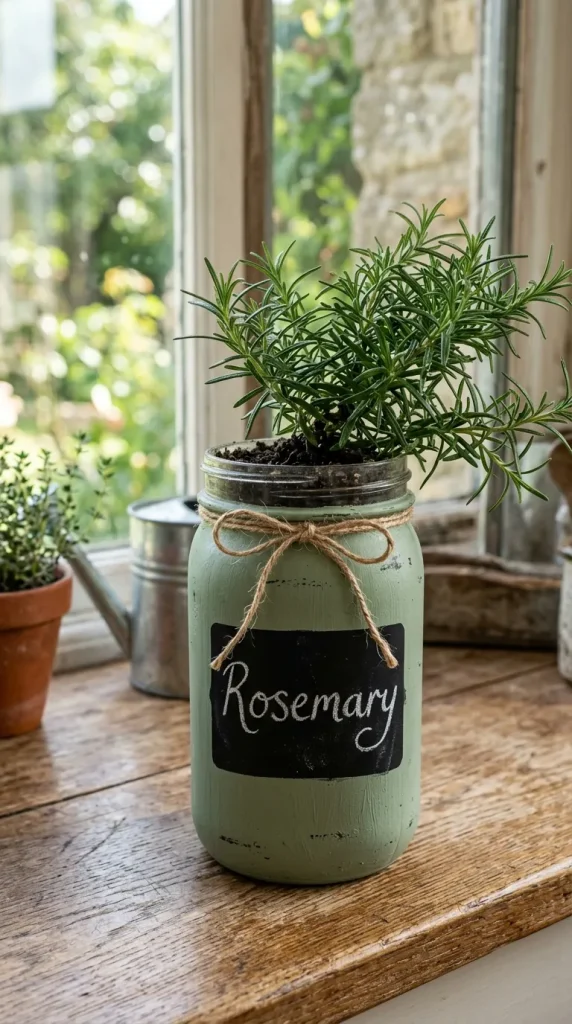
Autumn is a wonderful time to bring your herb garden indoors. Paint your mason jars with a dark charcoal gray or sage green chalk paint. Use a piece of sandpaper to distress the edges. Apply a small rectangle of chalkboard paint to the front of each jar, allowing you to write the names of your herbs—like rosemary, thyme, or sage—in chalk. Plant your herbs directly into the jars, making sure to place a layer of small rocks at the very bottom first to allow for proper soil drainage.

10. Whimsical Scarecrow Jars

For a fun, family-friendly craft project, turn a mason jar into a cute scarecrow character. Paint the entire jar in a warm beige or tan shade. Use black and orange paint pens to draw on a sweet, stitched-together face. Cut a small triangle of orange felt for the nose and glue it down. Wrap a piece of burlap around the rim to look like a hat, and hot glue some strands of natural raffia or straw peeking out from under the “hat” to mimic messy hair. It’s a whimsical addition to any bookshelf or classroom desk.

10 Fall Crafts for Home Ideas

When the crisp autumn air rolls in and the leaves begin their vibrant transformation into shades of amber, crimson, and gold, our instincts naturally turn toward nesting. Fall is the ultimate season for comfort, and there is no better way to welcome it than by infusing your living space with handmade charm. Crafting for autumn isn’t just about putting a pumpkin on the porch; it’s about capturing the textures, scents, and warm hues of the season to create a cozy sanctuary.

Bringing the outdoors inside is a fundamental element of autumn decor. By utilizing natural elements like acorns, dried leaves, pinecones, and copper accents, you can create sophisticated pieces that look expensive but cost very little to make. Whether you are an experienced crafter or looking for a simple weekend project, these ten inspired fall craft ideas will help you transform your home into a warm autumnal retreat.

1. Pressed Leaf Glass Framing

Instead of letting the beautiful colors of autumn fade away, preserve them as timeless wall art. Take a walk and collect vibrant fallen leaves—maple, oak, and ginkgo work beautifully. Press them inside a heavy book between sheets of parchment paper for a few days until they are completely flat and moisture-free. Buy a few double-glass floating frames, arrange the pressed leaves inside the glass panes, and lock them in place. The transparent background allows the intricate veins and fiery colors of the leaves to take center stage, creating a modern yet organic gallery wall.

2. Cinnamon Stick Pillar Candles

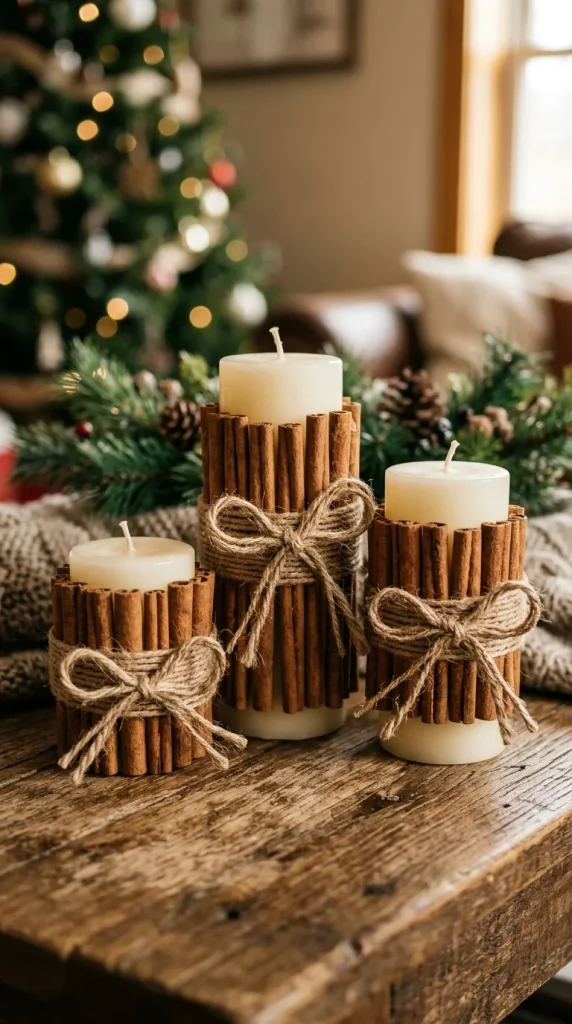
Scent and sight combine in this incredibly simple luxury craft. Take plain, unscented white or cream pillar candles of various heights. Apply a thick rubber band around the center of the candle, then tuck whole cinnamon sticks vertically underneath the band until the entire circumference of the candle is covered. Once the sticks are tightly packed, wrap rustic jute twine or a piece of plaid ribbon around the center multiple times to cover the rubber band and tie it in a neat bow. When you light the candle, the gentle heat warms the cinnamon, filling your room with a subtle, comforting autumn fragrance.

3. Metallic Copper-Leaf Acorns

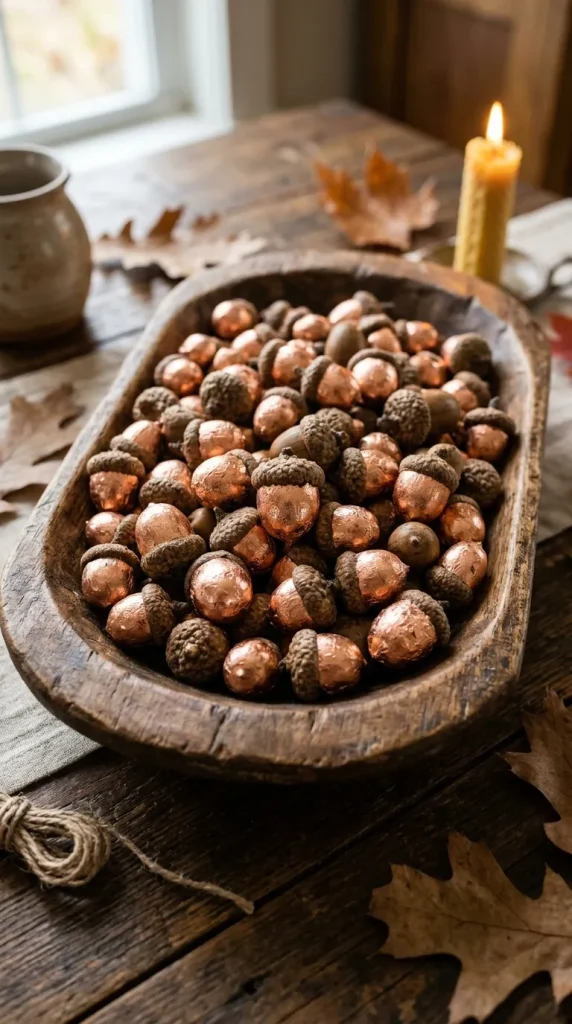
For a touch of rustic glamour, give humble backyard acorns a high-end metallic makeover. Collect acorns and wash them thoroughly, baking them on a low heat in the oven for a bit to ensure they are dry and clean. Separate the caps from the nuts. Paint the nut portion with a thin layer of adhesive size, then carefully apply sheets of imitation copper or rose gold leaf, burnishing it with a soft brush for a textured, shiny finish. Glue the natural, rugged wooden caps back onto the gleaming metallic bottoms. Display them in a shallow wooden dough bowl or a glass apothecary jar as a stunning coffee table centerpiece.

4. Flannel and Burlap Layered Wreath

Welcome your guests with a wreath that screams cozy autumn fashion. Start with a standard straw or foam wreath form. Cut old flannel shirts—preferably in rich forest greens, deep maroons, or classic orange plaids—and natural brown burlap into three-inch squares. Using a dull pencil or a wooden dowel, push the center of each fabric square into the wreath form, securing it with a drop of hot glue. Alternate between the rustic texture of the burlap and the soft warmth of the flannel until the form is completely lush and full. Finish with a hidden wire loop on the back for easy hanging on your front door.

5. Dried Citrus and Spice Garlands

Garlands aren’t just for Christmas; a spiced citrus garland adds a gorgeous, rustic pop of orange and deep red to your fall mantlepiece. Slice oranges, blood oranges, and apples thinly, then dry them out in a low-temperature oven or a food dehydrator until crisp. Using a large tapestry needle and baker’s twine, string the dried fruit discs together, alternating them with whole star anise, bay leaves, and wooden beads. Hang this over your fireplace or along a kitchen window where the sunlight can shine through the translucent fruit slices, releasing a nostalgic, spicy aroma.

6. Neutral Twine-Wrapped Pumpkin Platter

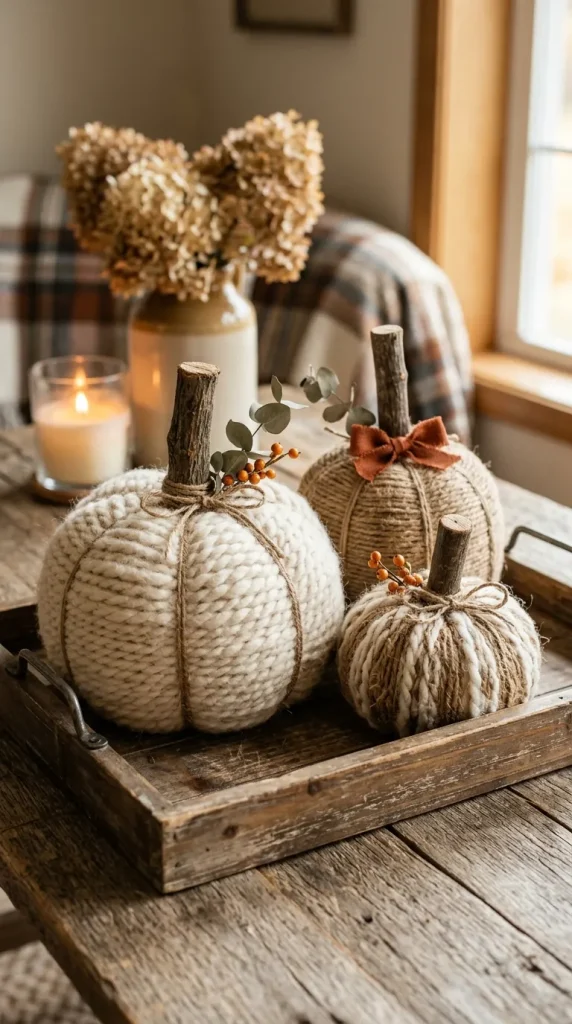
If bright orange doesn’t match your home’s aesthetic, embrace the popular neutral, farmhouse fall trend. Collect plastic or foam pumpkins from a local dollar store. Starting at the base of the pumpkin stem, wrap natural jute twine, white cotton rope, or thick cream yarn tightly around the pumpkin, gluing it down in sections as you spiral your way to the bottom. For an authentic touch, remove the fake plastic stem and hot-glue a real, dried pumpkin stem (saved from previous years) or a small piece of natural driftwood to the top. Arrange a cluster of these textured, monochromatic pumpkins on a rustic wooden tray.

7. Mason Jar Leaf Lanterns

Create a warm, flickering glow for your evening wind-downs with seasonal decoupaged lanterns. Thoroughly clean empty glass mason jars. Using matte Mod Podge and a foam brush, apply real dried leaves (or high-quality faux silk leaves if you want them to last for years) directly to the outside of the glass. Smooth out any air bubbles and apply a generous topcoat of the sealer. Once completely dry, wrap the rim of the jar with twine and place a battery-operated LED tealight candle inside. The leaves cast beautiful, warm amber shadows across the room, mimicking the cozy atmosphere of a campfire.

8. Book-Page Autumn Leaf Banner Banner

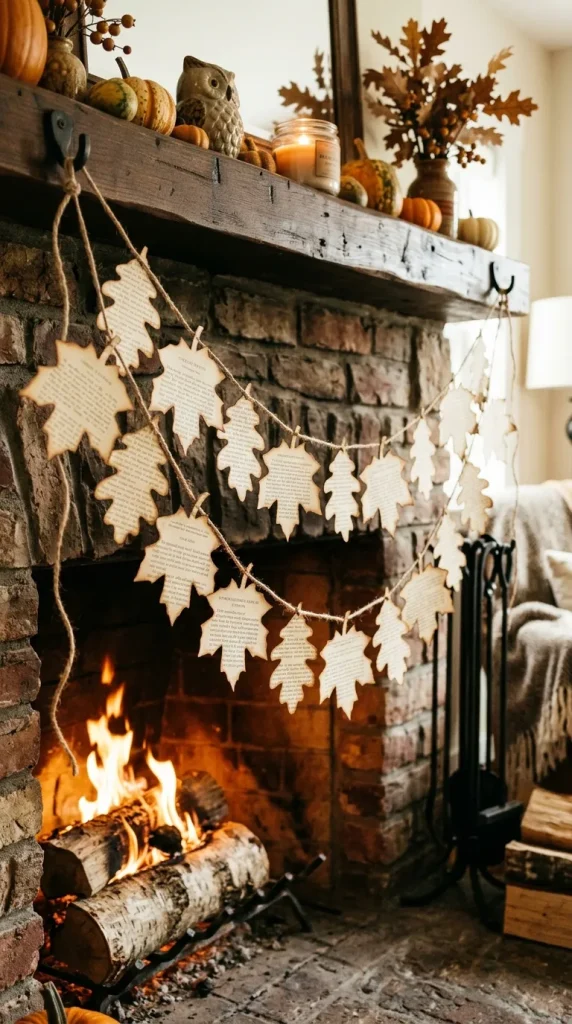
Give old, damaged vintage books a second life by turning their pages into a whimsical mantel banner. Cut simple leaf templates out of cardboard—oak, maple, and birch shapes work best. Trace these onto the text-heavy pages of an old book and cut them out. To give the pages an aged, autumnal look, lightly brush the edges of the paper leaves with a brown ink pad or a damp tea bag. Punch two small holes in the top of each leaf and thread them onto a piece of jute twine, spacing them evenly. This vintage-inspired craft adds a literary, cozy feel to any bookshelf or fireplace.

9. Bleached Mini Pumpkins with Botanical Stencils

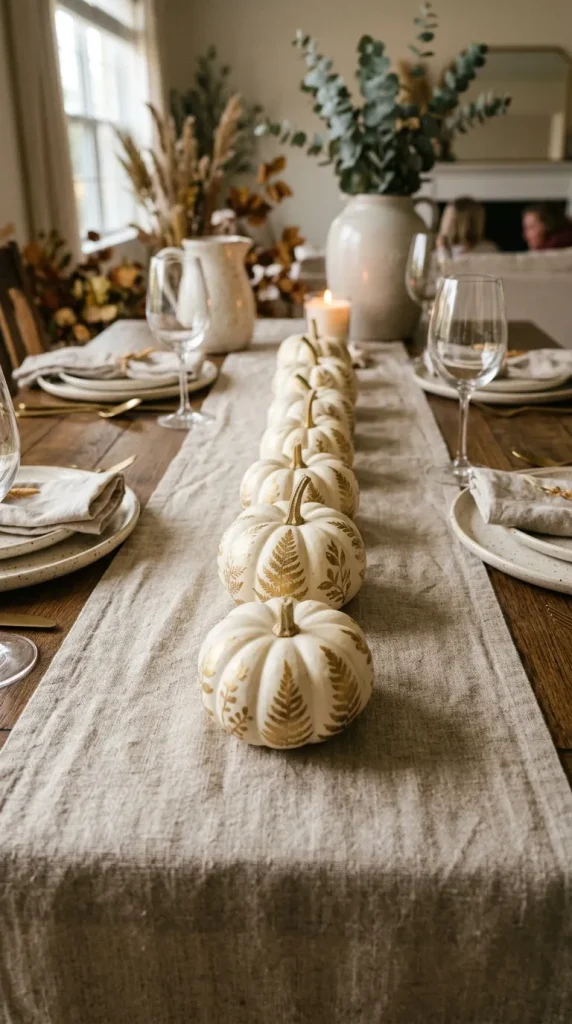
Instead of carving traditional jack-o’-lanterns, create elegant, long-lasting tabletop decor using mini white pumpkins (frequently called “Baby Boo” pumpkins). Clean the pumpkins and paint them with a chalky matte white or soft sage green paint. Once dry, press real fern fronds or delicate leaves flat against the pumpkin skin and gently dab a metallic gold or dark charcoal paint over the top with a sea sponge, creating a beautiful silhouette stencil effect. These look incredibly elegant lined up along a dining table runner for a Thanksgiving feast.

10. Chunky Knit Pumpkin Pillows

If you love the look of cozy knitwear, you can create adorable, plush pumpkin pillows without needing to know how to knit or crochet. Take an old chunky knit sweater and cut a large circle out of the body fabric. Sew a simple running stitch along the outer edge of the circle using a needle and strong thread. Pull the thread slightly to create a pouch, fill it heavily with polyester fiberfill stuffing, and pull the thread tight to close the top, securing it with a knot. Take a long piece of twine and wrap it tightly around the plush ball, pulling sections down to create the distinct ridges of a pumpkin. Top it off with a felt leaf and a real cinnamon stick stem.

10 Bridal Shower Dress Ideas for Summer Brides

Planning a wedding is a whirlwind of decisions, timelines, and floor plans. Amidst the busy logistics, your bridal shower stands out as a joyful oasis—a dedicated moment to slow down, pop some champagne, and celebrate your upcoming marriage with your closest friends and family. Because it is a daytime event, the bridal shower is the perfect opportunity to showcase a look that is distinct from your formal wedding gown.

For a summer bridal shower, the goal is simple: you want to look effortlessly radiant while staying comfortable in the heat. Whether you are hosting a garden party, an elegant brunch on a rooftop, or a casual backyard soirée, your dress should reflect the warm, sunny atmosphere of the season.

1. The Classic White Eyelet Midi

Nothing captures the essence of summer quite like cotton eyelet. It is a fabrication that manages to feel incredibly fresh, classic, and rustic all at once. An eyelet midi dress with a structured bodice and a gently flared A-line skirt offers an effortlessly polished look. The small, geometric cutouts in the fabric provide subtle texture and ventilation, keeping you cool if the shower is held outdoors. Pair it with woven raffia block heels and delicate gold jewelry for a timeless garden-party aesthetic.

2. The Romantic Pastel Floral Slip

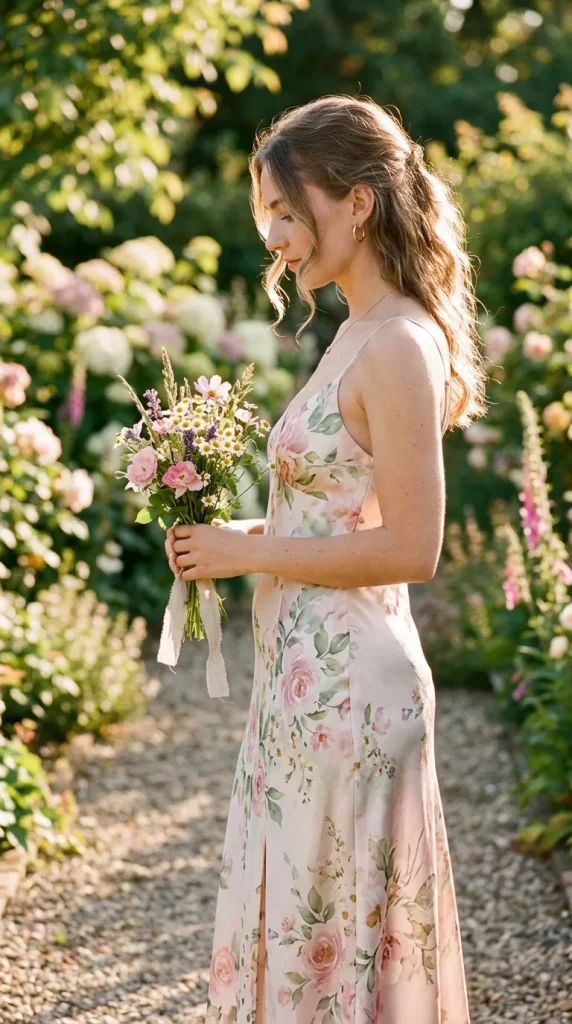
While white is the traditional choice for brides-to-be, many modern summer brides are embracing soft color palettes for their pre-wedding events. A satin or silk slip dress featuring a delicate, watercolor floral print in shades of blush, sage green, or dusty blue is incredibly romantic. Look for a cowl neckline and adjustable spaghetti straps to keep the silhouette modern and fluid. This style glides over the body, catching the summer breeze beautifully, and transitions effortlessly from a daytime brunch to afternoon cocktails.

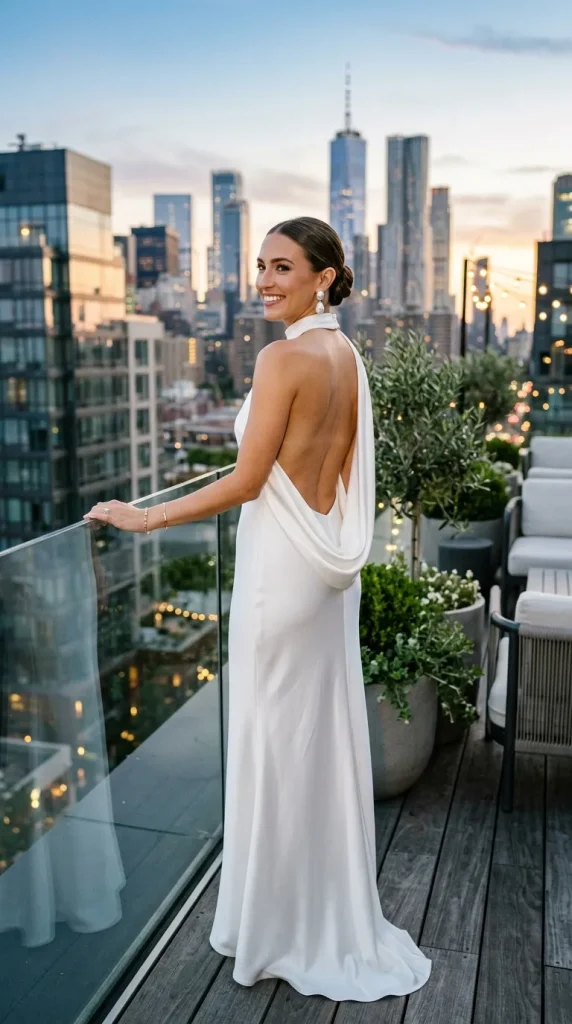
3. The Modern Halter-Neck Satin Dress

For the bride who loves clean lines and minimalist sophistication, a high-neck or halter-neck satin dress is a striking option. A halter neckline elongates the frame and highlights the shoulders, making it a highly photogenic silhouette. Opt for a lightweight, breathable satin-blend in a soft ivory or champagne hue. Keeping the accessories minimal—perhaps just a pair of statement pearl drop earrings—allows the architectural drape of the halter neck to remain the focal point of the look.

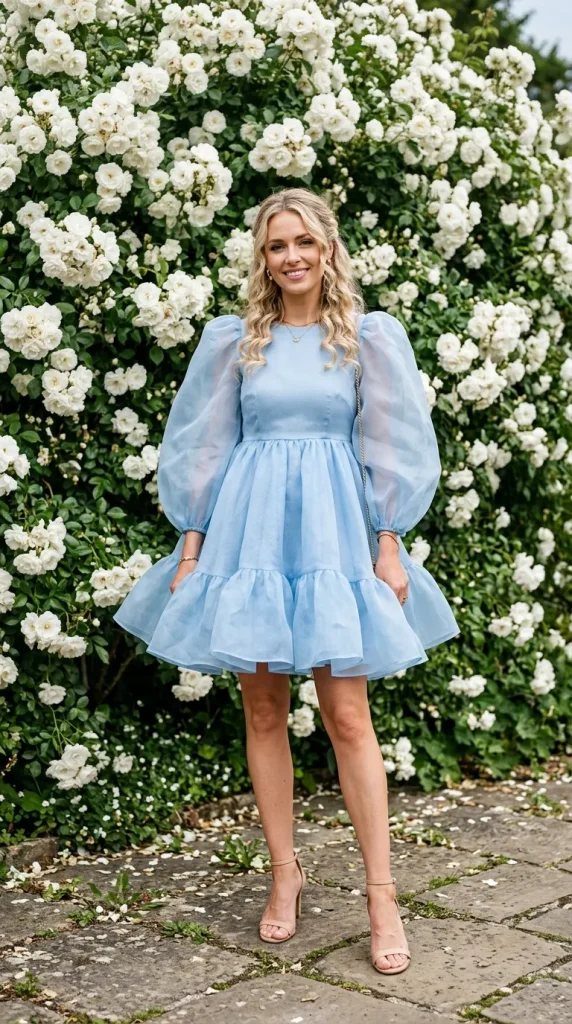
4. The Dreamy Pastel Organza Mini

If your bridal shower theme leans whimsical, fairytale, or high-fashion, look no further than a sheer organza mini dress. Organza naturally holds its shape, allowing for dramatic design details like puffed balloon sleeves, ruffled tiers, and voluminous skirts. Selecting a soft lavender, buttercup yellow, or powder blue organza dress adds a playful, dreamy dimension to your shower. Because the fabric itself is so striking, keep your footwear simple with transparent or nude strappy sandals.

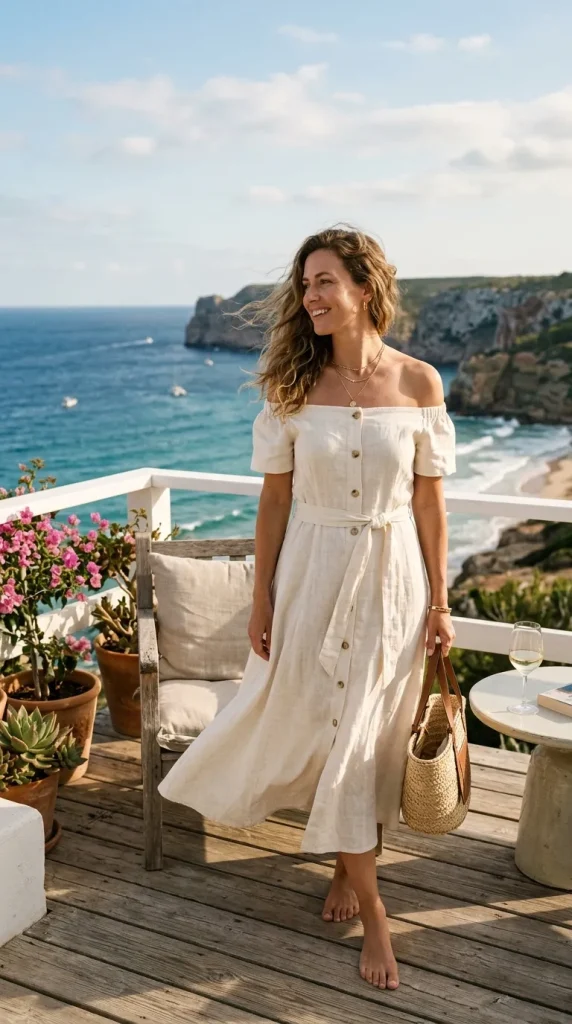
5. The Off-the-Shoulder Linen Dress

If your celebration is taking place at a beach club, a coastal venue, or a casual backyard setting, structured linen is your best friend. An off-the-shoulder midi dress made from a high-quality linen blend strikes the ultimate balance between relaxed and refined. Look for details like a button-down front, a belt to cinch the waist, or subtle puff sleeves. Linen’s natural, slightly textured weave gives it a lived-in luxury vibe that looks incredibly chic under the summer sun.

6. The Tailored White Jumpsuit

Who says you have to wear a dress? A sharply tailored jumpsuit is a powerful, ultra-chic alternative for the contemporary bride. For a summer shower, look for a sleeveless wide-leg silhouette in a lightweight crepe or linen-tencel blend. A halter-style bodice or an asymmetrical one-shoulder cut adds instant visual interest. The beauty of a jumpsuit is its sheer comfort and ease of movement; you can mingle, open gifts, and hug your guests without adjusting a skirt.

7. The Pleated Asymmetrical Midi

Movement is a key element of summer fashion, and nothing moves quite like pleats. An asymmetrical midi dress featuring delicate accordion pleats catches the light and the wind with every step you take. A diagonal neckline or a high-low hemline adds a modern, artistic edge to the bridal look. Choose a soft cream or pastel peach hue in a lightweight chiffon fabric. This style feels dynamic, highly fashion-forward, and incredibly comfortable for a seated lunch.

8. The Retro Crochet Midi

For the bohemian, free-spirited bride hosting an intimate, outdoor gathering, a knit crochet midi dress is a stunning nod to vintage style. Look for a dress with an open crochet overlay and a smooth, solid lining underneath to keep it elegant and bridal. Intricate geometric patterns or floral crochet motifs add a beautiful, artisan feel to the ensemble. Finish the look with tan leather slides, loose beachy waves, and a wide-brimmed straw hat for a relaxed, high-summer vibe.

9. The Playful Tiered Tulle Mini

Celebrate your status as the bride with a dress that is pure fun. A tiered tulle mini dress in classic white or pale pink features layers of light, fluffy tulle that bounce as you move. It is a celebratory, high-energy option that feels distinctly festive. Look for a simple, fitted bustier bodice to balance the volume of the skirt. Because this dress is a statement piece, keep your hair in a sleek low bun and let the dress do all the talking.

10. The Ruffled Wrap Dress

The wrap dress is universally adored for its highly flattering, adjustable fit. For a summer bridal shower, look for a version adorned with delicate ruffles along the neckline and hemline. Made from a lightweight georgette or chiffon fabric, a ruffled wrap dress drapes beautifully across the body and offers a soft, feminine silhouette. A subtle jacquard floral pattern woven into the white fabric can add a hidden layer of texture and luxury to this classic cut.

10 Bridal Shower Floral Arrangements Romantic Roses in Glass Ideas

A bridal shower is a beautiful prelude to the wedding day—a celebration defined by love, anticipation, and shared joy. When it comes to designing the perfect atmosphere for this special event, nothing quite matches the timeless romance of roses. Symbolizing love, beauty, and new beginnings, roses are the quintessential bridal flower. To elevate these classic blooms for a modern, elegant bridal shower, pairing them with glass vessels is a design choice that never fails.

Glass containers—ranging from delicate vintage bud vases and sleek geometric terrariums to dramatic tall trumpets—allow the natural beauty of the roses to take center stage. The transparency of glass reflects natural light, creates an illusion of space, and highlights the intricate details of stems and water, adding a clean, luminous quality to the tablescapes. Here are ten romantic rose and glass arrangement ideas designed to inspire a breathtaking bridal shower, followed by descriptive visual prompts to help you bring these concepts to life.

1. The Monochromatic Velvet Low Bowl

For a look that exudes rich, modern romance, a low, wide glass bowl filled to the brim with monochromatic roses is unmatched. Select a single, deeply romantic hue—such as deep crimson, dusty mauve, or a velvety plum—and pack the roses tightly together inside a heavy-bottomed clear glass bowl. By cutting the stems short and removing the foliage, the focus remains entirely on the lush, velvety texture of the petals. Sitting low to the table, this arrangement encourages intimate conversation across the table while making a bold, luxurious color statement.

2. The Vintage Apothecary Bud Vase Cluster

If the bride-to-be loves vintage charm or a whimsical, cottagecore aesthetic, a curated collection of antique glass apothecary bottles is the perfect choice. Gather mismatched clear, amber, or soft pink glass bottles of varying heights. Place just one or two perfect, long-stemmed roses in each bottle—such as delicate spray roses or ruffled garden roses. Scatter these bottles down the center of a rustic wooden table, interspersed with delicate sprigs of green eucalyptus and flickering tea lights. The staggered heights and varied glass textures create an effortlessly romantic, gathered-from-the-garden feel.

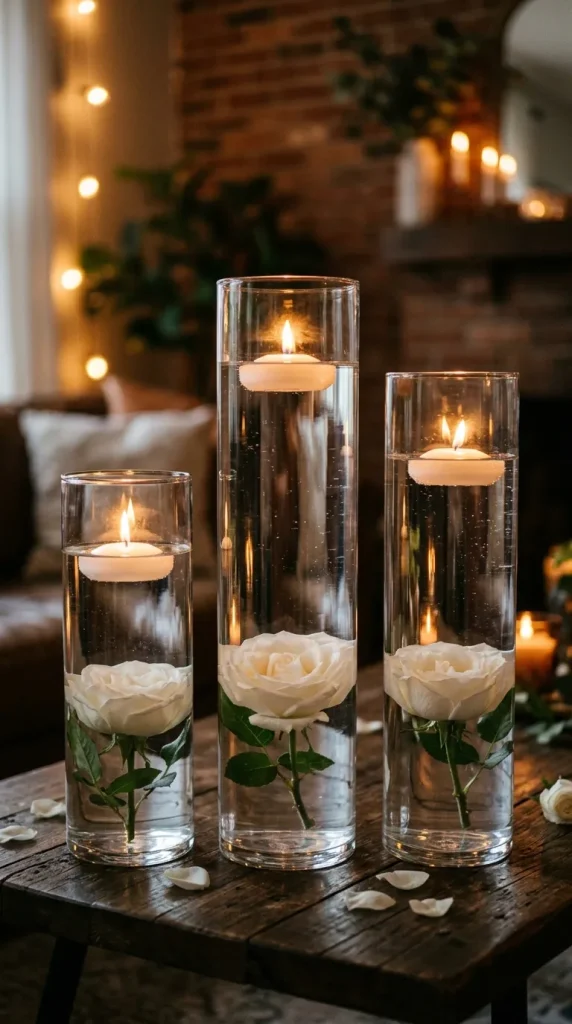
3. The Floating Rose and Floating Candle Cylinder

Water and glass work together to create magic, and this minimalist yet high-impact design proves it. Fill tall, slender glass cylinder vases of graduating heights with clean water. Submerge fully bloomed, large-headed roses (like white or blush pink Mondial roses) at the bottom, using small glass weights to keep them submerged if necessary. At the surface of the water, float a clean, white disc candle. When lit, the candlelight reflects down through the water and illuminates the petals from above, casting a warm, ethereal glow across the dining room.

4. The Modern Geometric Rose Terrarium

For the contemporary bride who appreciates clean lines with a soft touch, geometric glass terrariums offer a stunning alternative to traditional vases. Choose gold- or copper-rimmed glass pyramids, spheres, or prisms. Instead of planting succulents, nestle a bed of soft green moss or silver-dollar eucalyptus leaves at the base, and place a cluster of open, dusty-rose garden roses inside. The contrast between the sharp, metallic-edged glass and the soft, organic curves of the roses creates a striking, modern focal point that doubles as a beautiful keepsake for the bride.

5. The Elegant Tall Trumpet Cascade

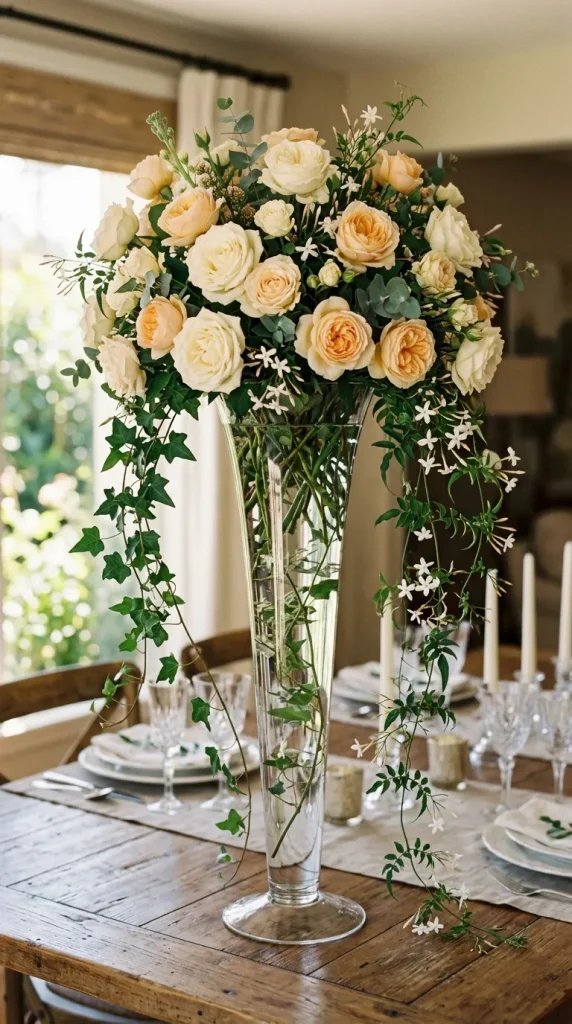
If the bridal shower is being held in a grand venue with high ceilings, you need arrangements that draw the eye upward. A tall, slender glass trumpet vase provides the necessary height without blocking the sightlines of guests sitting across from one another. At the top of the vase, create a voluminous, overflowing dome of mixed roses—such as cream, peach, and blush—intertwined with cascading vines of ivy, jasmine, or silver dollar eucalyptus. The greenery should drape elegantly down the sides of the clear glass stem, mimicking a waterfall of foliage and blooms.

6. The Submerged Rose Column

For a sleek, architectural look that feels incredibly sophisticated, consider completely submerging long-stemmed roses in tall glass columns. Select thick, flawless glass cylinder vases and place a single, perfect, long-stemmed rose inside each. Pour water over the bloom until it is fully covered. The water acts as a natural magnifying glass, highlighting every delicate vein and curve of the petals. Arrange these columns in clusters of three at the entryway or food station to welcome guests with a touch of modern luxury.

7. The Cozy Rose-Filled Hurricane Lantern

Combine the warmth of candlelight with the beauty of floral design by utilizing classic glass hurricane lanterns. Place a pillar candle in the center of a wide glass hurricane, and surround the base of the candle (inside the glass) with a dense ring of small spray roses and delicate waxflowers. The glass protects the flame while beautifully framing the blooms. This setup is particularly enchanting for late afternoon or evening showers, as the flickering candlelight casts dancing shadows through the rose petals.

8. The French Bistro Footed Compote

Bring a touch of Parisian elegance to the shower with footed glass compote bowls. These elevated glass dishes raise the flowers slightly off the table, giving them an air of classic formality. Fill the compote with an organic, loose arrangement of heirloom garden roses in pastel shades of peach, cream, and pale pink. Allow a few sprigs of olive branches, rosemary, or sweet peas to spill casually over the edges of the glass. This style feels wonderfully romantic, artistic, and relaxed.

9. The Delicate Rose Cloche Display

Channel a classic fairytale romance with a cloche (glass dome) display. Place a single, perfect, fully opened garden rose—such as a vibrant pink or classic red—atop a wooden or glass pedestal, and cover it with a clear glass cloche. To add to the whimsical “Beauty and the Beast” charm, scatter a few loose petals around the base of the pedestal. This highly styled arrangement works beautifully on guest book tables, dessert stations, or as a focal point on the gift table.

10. The Mirrored Cube Reflection

To maximize the impact of your florals, play with reflections. Place tight, dense mounds of mixed roses in simple, square glass cube vases. Position these cubes on top of a long, narrow runner of mirrored glass tiles running down the center of the table. The mirrors reflect the undersides of the clear glass vases, the water, and the colorful rose heads, doubling the visual impact of the flowers and bouncing light around the room for a bright, glamorous, and cohesive look.

 10 Bridal Shower Decorations Fall Rustic Warm Color Palette Ideas 

There is something undeniably magical about autumn. As the crisp air rolls in, nature wraps itself in a stunning tapestry of amber, burnt orange, deep terracotta, dusty rose, and rich gold. For an autumn-loving bride-to-be, hosting a bridal shower during this season offers a beautiful opportunity to lean into cozy hospitality.

A rustic theme paired with a warm color palette strikes a perfect balance between organic textures and refined romance. It trades clinical party backdrops for tactile materials like reclaimed wood, woven linens, dried botanicals, and glowing candlelight.
If you are planning an unforgettable autumn celebration, here are 10 rustic bridal shower decoration ideas designed to bring a warm, inviting glow to the special day.

1. The Welcome Arch: Dried Florals and Terracotta Drapes

First impressions set the tone for the entire event. Greet guests with a weathered wooden or copper arch decorated with dried palm spears, pampas grass, and cascading floral arrangements. Focus the color palette on deep terracotta roses, rust-toned carnations, and dried eucalyptus. Drape a soft, amber-colored cheesecloth fabric asymmetrical across the frame, allowing it to pool gently on the floor. It creates a picture-perfect photo spot right at the entrance.

2. Wood Slice and Mason Jar Centerpieces

Bring the forest floor to the tabletop by styling centerpiece displays on thick, natural wood slices. The rough-hewn bark edges provide instant rustic appeal. On top of each wood slice, group clear glass mason jars or amber apothecary bottles filled with delicate white baby’s breath, dried wheat stalks, and a few peach-colored spray roses. Pair these with floating tea lights in small glass votives to reflect a dancing, warm glow across the wood grain.

3. White and Painted Pumpkin Table Runners

Pumpkins are the ultimate symbol of autumn, but they do not have to look like Halloween decorations. For an elegant bridal shower look, source mini white “Baby Boo” pumpkins alongside others painted in metallic copper and matte dusty rose. Arrange them in a winding, organic line down the center of long wooden farm tables. Nestle them into a bed of fresh olive branches or eucalyptus leaves for a lush, dimensional runner.

4. Heirloom Cider Bar with Amber Glassware

A self-serve drink station is both functional and decorative. Set up a vintage wooden bar cart or trestle table dedicated to hot spiced apple cider and seasonal mocktails. Use elevated amber-glass drink dispensers and surround the station with cinnamon stick bundles, sliced apples, and fresh star anise in wooden bowls. Guests can sip their drinks from vintage-style amber glasses that catch the light beautifully, adding a rich, saturated color to the room.

5. Cozy Lounge Area with Plaid and Chunky Knits

Encourage guests to relax and mingle by setting up a dedicated lounge area. Arrange a rustic leather or velvet sofa with low-lying wooden crates used as coffee tables. Layer the seating with chunky knit blankets in cream, woven fringe pillows in burnt orange, and subtle plaid throws in mustard yellow. This tactile, layered space offers a cozy spot for the bride to open gifts or chat with loved ones.

6. Kraft Paper and Twine Place Settings

Rustic design is all about embracing simple, unpretentious materials. Instead of stark white cardstock, use textured brown kraft paper for place cards and menu cards. Tie each menu card with a piece of natural jute twine, tucking a single sprig of dried lavender or a sprig of rosemary inside the knot. Lay these settings on top of woven rattan chargers or directly on a bare wooden tabletop to keep the aesthetic earthy and grounded.

7. Hanging Fall Foliage Chandeliers

Look up to elevate your space. If the venue has exposed ceiling beams, hang large, organic installations directly above the dining tables. Create floating clouds of dried pampas grass, preserved oak leaves in shades of gold and copper, and hanging glass globes containing flickering LED tea lights. This overhead canopy lowers the visual ceiling, instantly making large banquet rooms or outdoor pavilions feel intimate and magical.

8. A “Love is Sweet” Caramel Apple Bar

Transform a dessert station into an interactive design feature. Decorate a rustic wooden table with crates of varying heights to display shiny red and green apples on wooden skewers. Surround the apples with warm copper pots filled with hot caramel and chocolate sauce, alongside small wooden bowls of toppings like chopped pecans, crushed graham crackers, and sea salt flakes. Frame the station with a hand-painted wooden sign and a garland of dried orange slices.

9. Intimate Lantern and Edison Bulb Lighting

As the afternoon sun begins to dip, lighting becomes the most important decor element. Avoid harsh overhead lighting by clustering black metal and copper lanterns of different sizes along pathways, stairs, and around the gift table. Inside each lantern, place warm-white pillar candles. Overhead, string low-wattage Edison bulbs on black wire to cast a nostalgic, amber-hued luminescence over the entire celebration.

10. Bare Wood Farm Tables with Cheesecloth Runners

Instead of covering beautiful wood grain with heavy linens, let the natural timber shine. Use long, bare wooden farm tables as your canvas. Run a continuous strip of hand-dyed, wrinkled cheesecloth in a rich mustard or terracotta shade down the middle of each table. Let the fabric bunch naturally and spill over the ends of the table for a relaxed, breezy, and effortlessly romantic look.

10 Bridal Shower Venues for Small Rooms Cozy Ideas

Choosing a bridal shower venue often comes down to a delicate balance. While grand ballrooms have their place, there is an undeniable magic to an intimate, small-scale celebration. Opting for a smaller room doesn’t mean compromising on style; in fact, it often unlocks a level of warmth, connection, and detail that larger spaces simply cannot match.

When the guest list is short and sweet, the environment should feel like a warm hug. Choosing a cozy space allows the host to focus on highly personalized details, rich textures, and meaningful conversations.

Here are 10 exceptional venue ideas designed to maximize the charm of small rooms, paired with styling tips to keep them feeling comfortable, elegant, and perfectly curated.

1. The Historic Greenhouse or Conservatory Room

Glass walls, iron frameworks, and lush greenery create a natural wonderland that requires almost no extra decoration. Many botanical gardens or historic estates lease out their smaller solariums or conservatory rooms.

  • Why it works: The abundant natural light immediately makes a small room feel airy and spacious.
  • Cozy Styling Tip: Lean into the botanical surroundings with rustic wooden tables, mismatching vintage chairs, and delicate, bud-vase floral arrangements that don’t block across-the-table conversations.

2. A Private Restaurant Dining Alcove

Rather than booking an entire dining room, many boutique restaurants offer semi-private alcoves or small, dedicated dining rooms tucked away from the main bustle.

  • Why it works: You get the benefit of professional, hands-off catering and beautifully curated, pre-existing decor.
  • Cozy Styling Tip: Enhance the existing mood lighting with plenty of unscented taper candles and coordinate the menus to match the bride’s favorite culinary theme.

3. An Elegant, Secret Garden Tea Room

Tea rooms are naturally designed for smaller gatherings, making them a timeless choice for a highly sophisticated, intimate shower.

  • Why it works: The scale of afternoon tea—with its tiered stands of finger sandwiches, scones, and pastries—takes up very little physical space, leaving plenty of room on the table.
  • Cozy Styling Tip: Keep the color palette soft with pastel linens, vintage teacups, and low-lying floral centerpieces.

4. A Boutique Library or Book Bookstore Corner

For the literary-loving bride, renting a small section of a historic independent bookstore or a private library room offers a cozy, nostalgic atmosphere.

  • Why it works: Floor-to-ceiling bookshelves provide a stunning, ready-made backdrop that naturally muffles sound, making conversations feel incredibly intimate.
  • Cozy Styling Tip: Set up a plush, vintage armchair for the bride to sit in, and organize a “book swap” where guests bring a favorite read with a handwritten note inside.

5. An Intimate Wine Cellar or Barrel Room

Many local wineries, wine bars, or high-end restaurants have stone-walled wine cellars or barrel rooms available for private bookings.

  • Why it works: The subterranean, stone-and-wood aesthetic is naturally warm and feels like an exclusive, hidden retreat.
  • Cozy Styling Tip: Drape long, cheesecloth runners across a rustic wooden table and accent the space with rich, deep-toned florals and warm, glowing fairy lights.

6. A Bohemian Living Room Lounge

Transforming a living room (either at home or in a rented loft) into a floor-seated bohemian lounge is a fantastic way to maximize a small floor plan.

  • Why it works: Removing bulky dining tables and chairs frees up incredible physical space, allowing guests to relax and mingle casually.
  • Cozy Styling Tip: Layer thick vintage rugs, low-profile wooden coffee tables, and a mountain of plush, textured throw pillows in neutral, warm tones.

7. An Art Gallery or Private Creative Studio

Small local art galleries, ceramic studios, or floral workshops are highly creative, blank-canvas venues that welcome small groups.

  • Why it works: The focus shifts from sitting around a table to engaging in a shared, hands-on activity, making the smaller footprint feel intentional and dynamic.
  • Cozy Styling Tip: Keep the decor minimal to let the studio’s natural aesthetic shine, and set up a beautiful “DIY station” like flower-crown building or candle-making.

8. A Boutique Hotel Suite or Rooftop Lounge

Booking a luxury hotel suite or a small, glass-enclosed rooftop lounge offers a chic, modern, and highly private experience.

  • Why it works: It feels like a luxurious getaway without leaving the city, offering high-end amenities, great views, and built-in lounge furniture.
  • Cozy Styling Tip: Bring in a custom, compact bar cart styled as a “Mimosa & Bubbly Bar” with fresh fruits, edible flowers, and personalized glassware.

9. An Attic Loft with Exposed Brick

Loft spaces with sloped ceilings, exposed wooden beams, and brick walls are inherently cozy, rustic, and photogenic.

  • Why it works: The architectural details do all the heavy lifting, meaning you don’t need to overcrowd the room with decorations.
  • Cozy Styling Tip: Hang delicate string lights or Edison bulbs from the beams to emphasize the height of the room, and use warm, amber glassware on the tables.

10. A Glass-Enclosed Lakeside or Garden Pavilion

A small, freestanding pavilion in a park, garden, or lakeside property offers a protected, intimate indoor space while keeping a direct visual connection to the outdoors.

  • Why it works: The glass walls trick the eye into feeling like the venue is endless, while the actual physical space remains small and easy to heat or cool.
  • Cozy Styling Tip: Incorporate organic textures like wicker, linen, and pampas grass, and frame the entrance with a simple, grounded crescent balloon and floral arch.